


I have been painting rocks for a few years now as something to do when I want to keep my hands busy without needing a big setup.
It started with a few stones for the garden and turned into a habit of trying out different patterns when I have time.
I put these ideas together because coming up with designs each time can slow things down so the printable templates make tracing simple.
Some work for any season while others fit a certain theme or age group.
You can print them out and get started with whatever rocks you already have around.
Chick Painted Rock
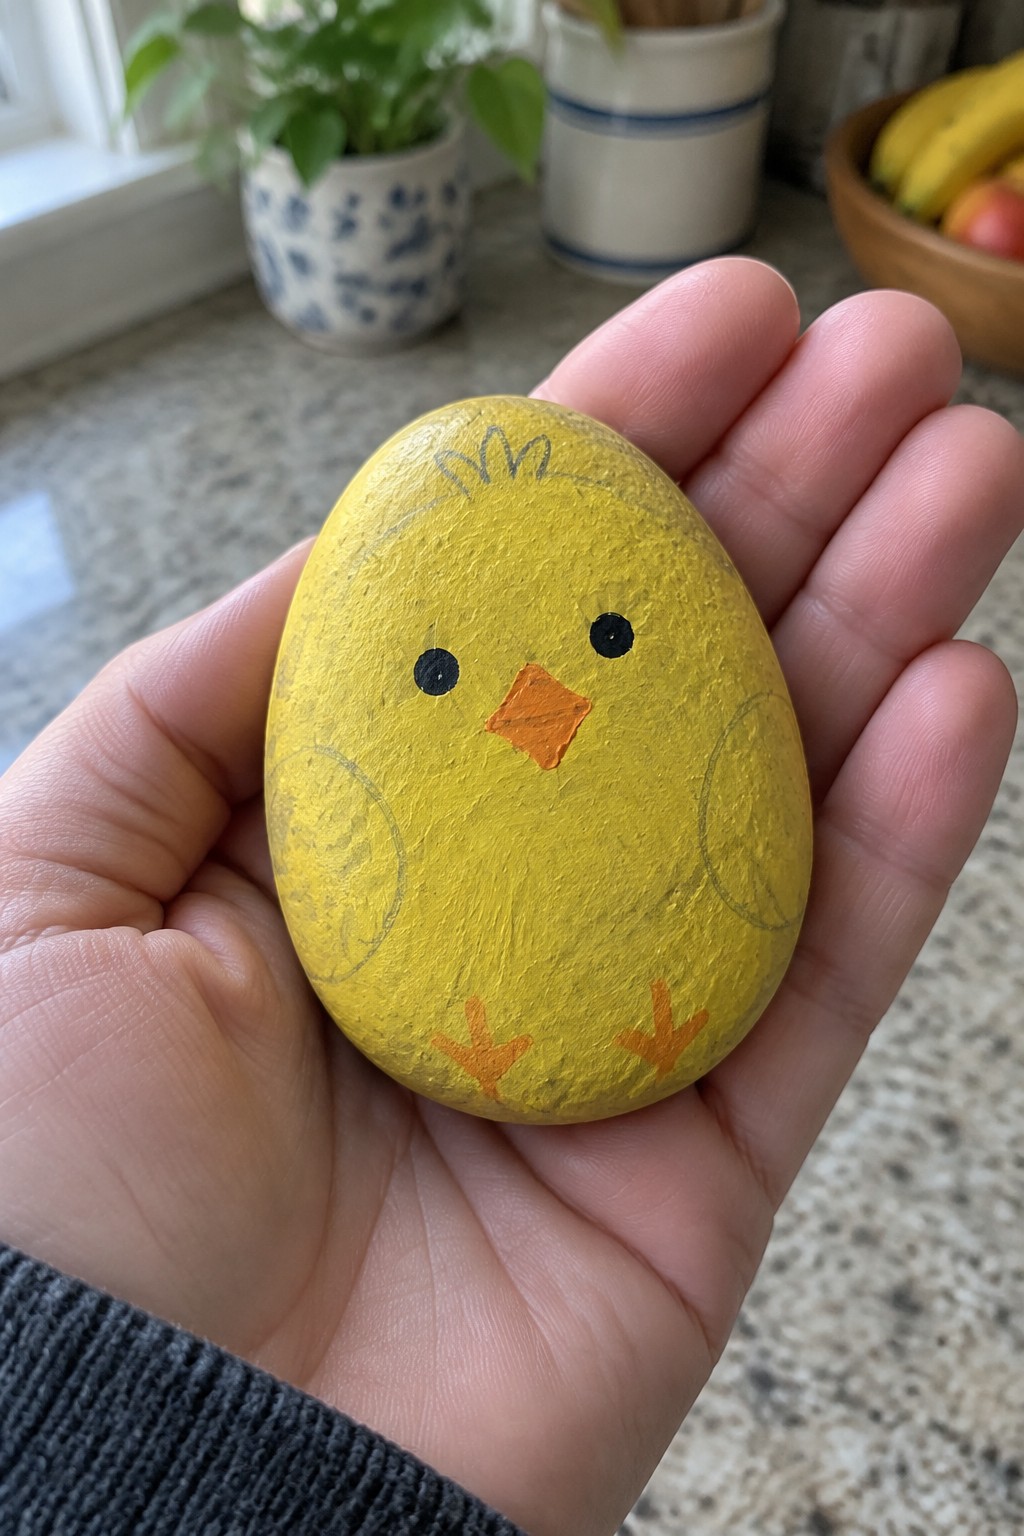
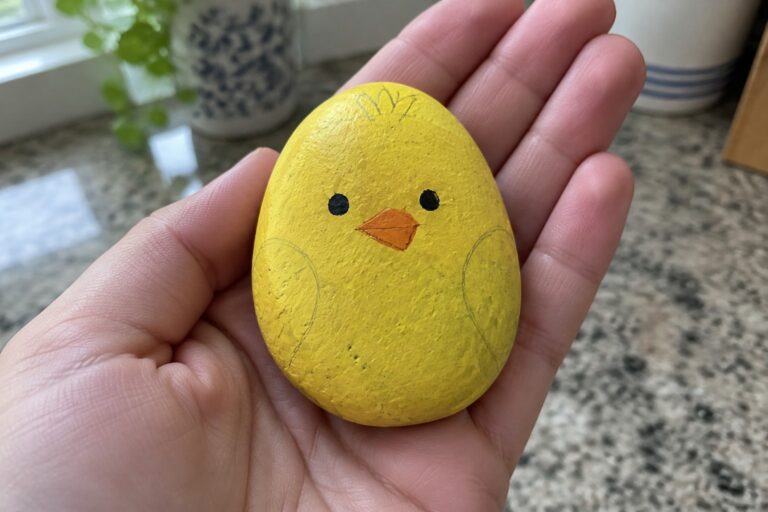
A smooth oval rock painted bright yellow forms the base for this simple chick design. Black dot eyes, an orange triangle beak, and matching orange feet with three-toed marks keep the details basic and easy to trace. Faint wing outlines and a small feather tuft on top add just enough character without crowding the surface. This approach fits the animal rock category and works especially well when the natural stone shape already suggests an egg or chick form.
The rounded stone shape does a lot of the work here by giving the chick its natural body without extra painting. You can reuse the same color blocks and basic shapes on other oval rocks to build a small set for spring displays or planters. The clean outlines make it simple to create a printable template for tracing multiple versions. This painted rock idea stands out for quick seasonal accents because the limited color palette and minimal lines translate easily to different stone sizes.
Strawberry Painted Rock
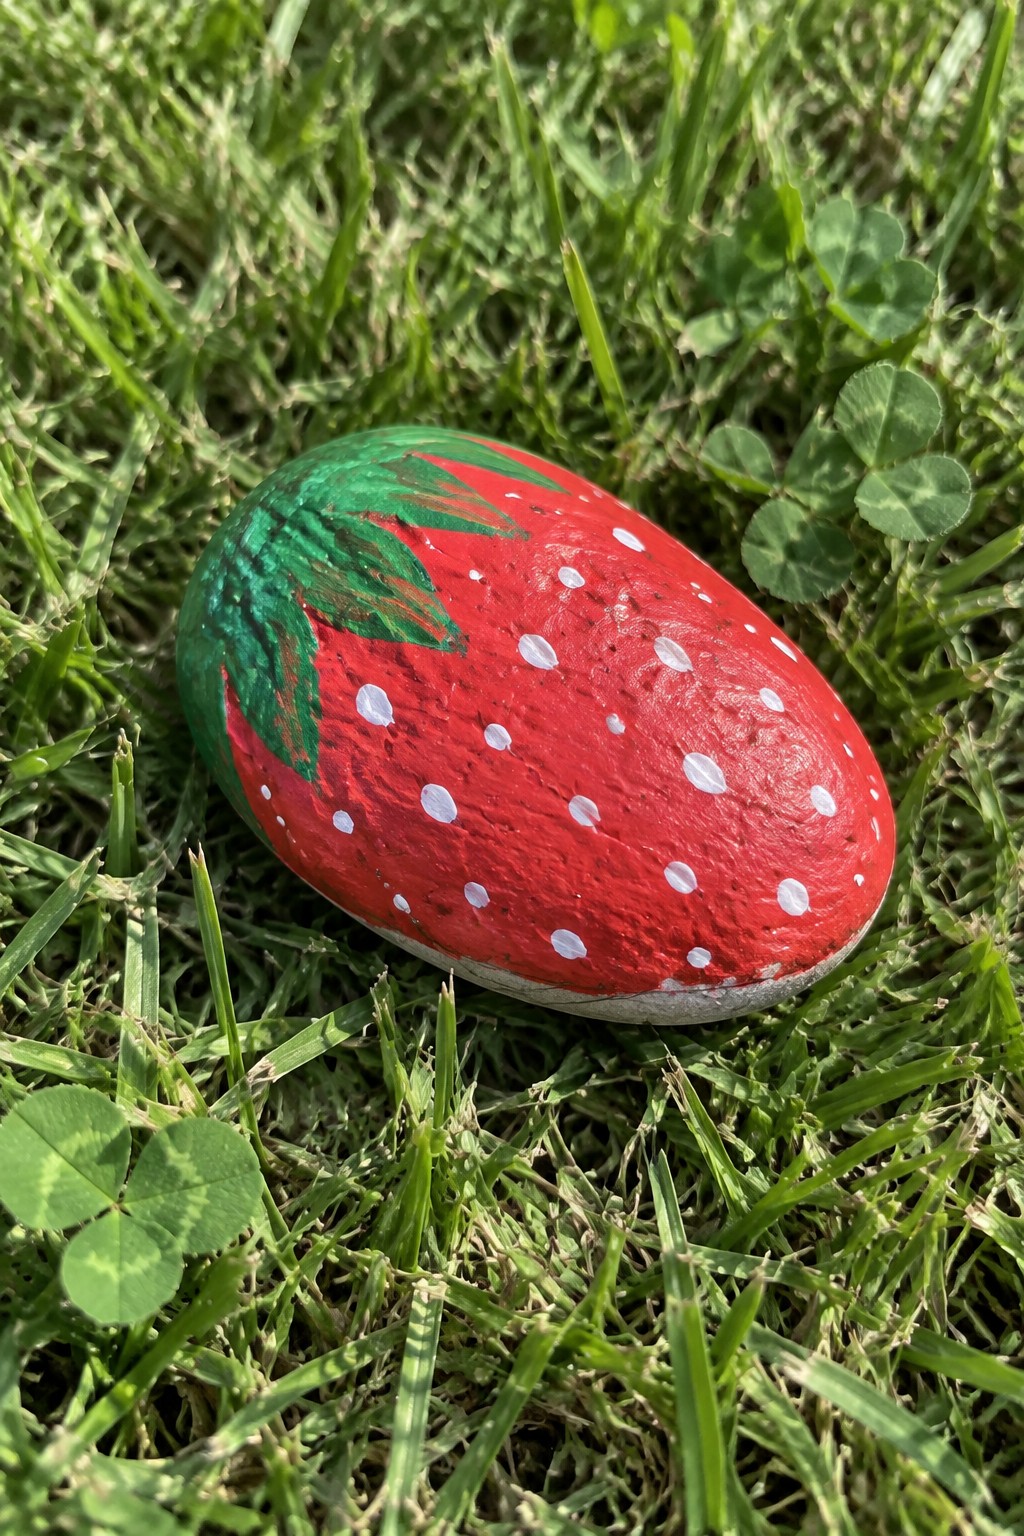
A strawberry design uses an oval rock as the base for a simple fruit motif. The rounded stone shape supports the curved form of the strawberry while the red paint covers the main surface and white dots represent the seeds. A green section at one end forms the leafy top using basic color blocking. This food-inspired rock painting idea works as a small decorative accent for gardens or indoor plant displays.
What makes this idea useful is how the clear color areas and repeated dots make it simple to trace from a template onto different rock sizes. A painted rock like this works especially well tucked into flower beds or planters where the bright red shows up against soil and leaves. The same layout could be changed to other fruits by swapping the base color and adjusting the seed or stem details. The rounded stone shape makes this smart for quick projects that still read clearly from a short distance.
Ladybug Painted Rocks
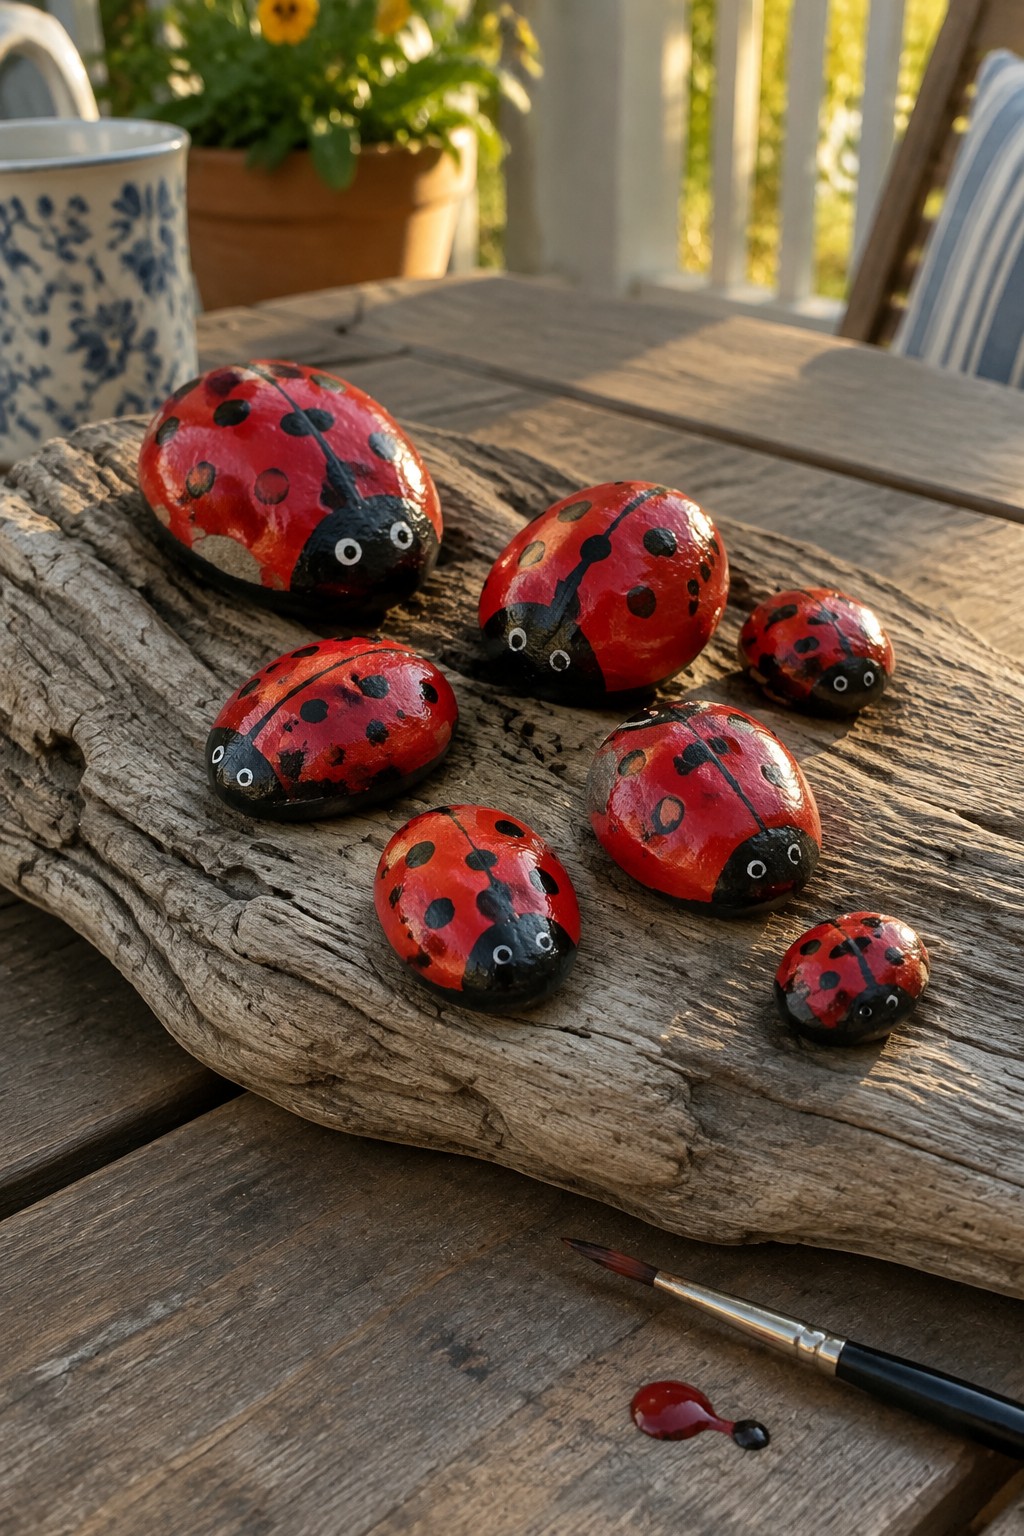
Ladybug rocks turn smooth, rounded stones into bug shapes by painting the main body red and adding black spots along with a black head area at one end. The natural oval or slightly domed form of the stones already suggests the insect body, so the design only needs simple color blocking and a few white dots for eyes. This bug rock style stays effective even on smaller pebbles or larger river stones because the high contrast between the red base and black markings keeps the pattern clear. It fits the animal or bug rock category and works as a painted physical rock rather than a figurine or decal.
What makes this idea useful is how the rounded stone shape does most of the work for the body outline. You can trace a basic ladybug template onto any similar rock, fill the sections with red and black, and finish with quick white eye dots. These painted rocks sit well in planters, along garden paths, or on a windowsill without needing extra display pieces. The same motif scales easily to different sizes, so you can make a set of matching ladybugs or mix in other bug designs using the same tracing approach.
Sunset Cross Painted Rock
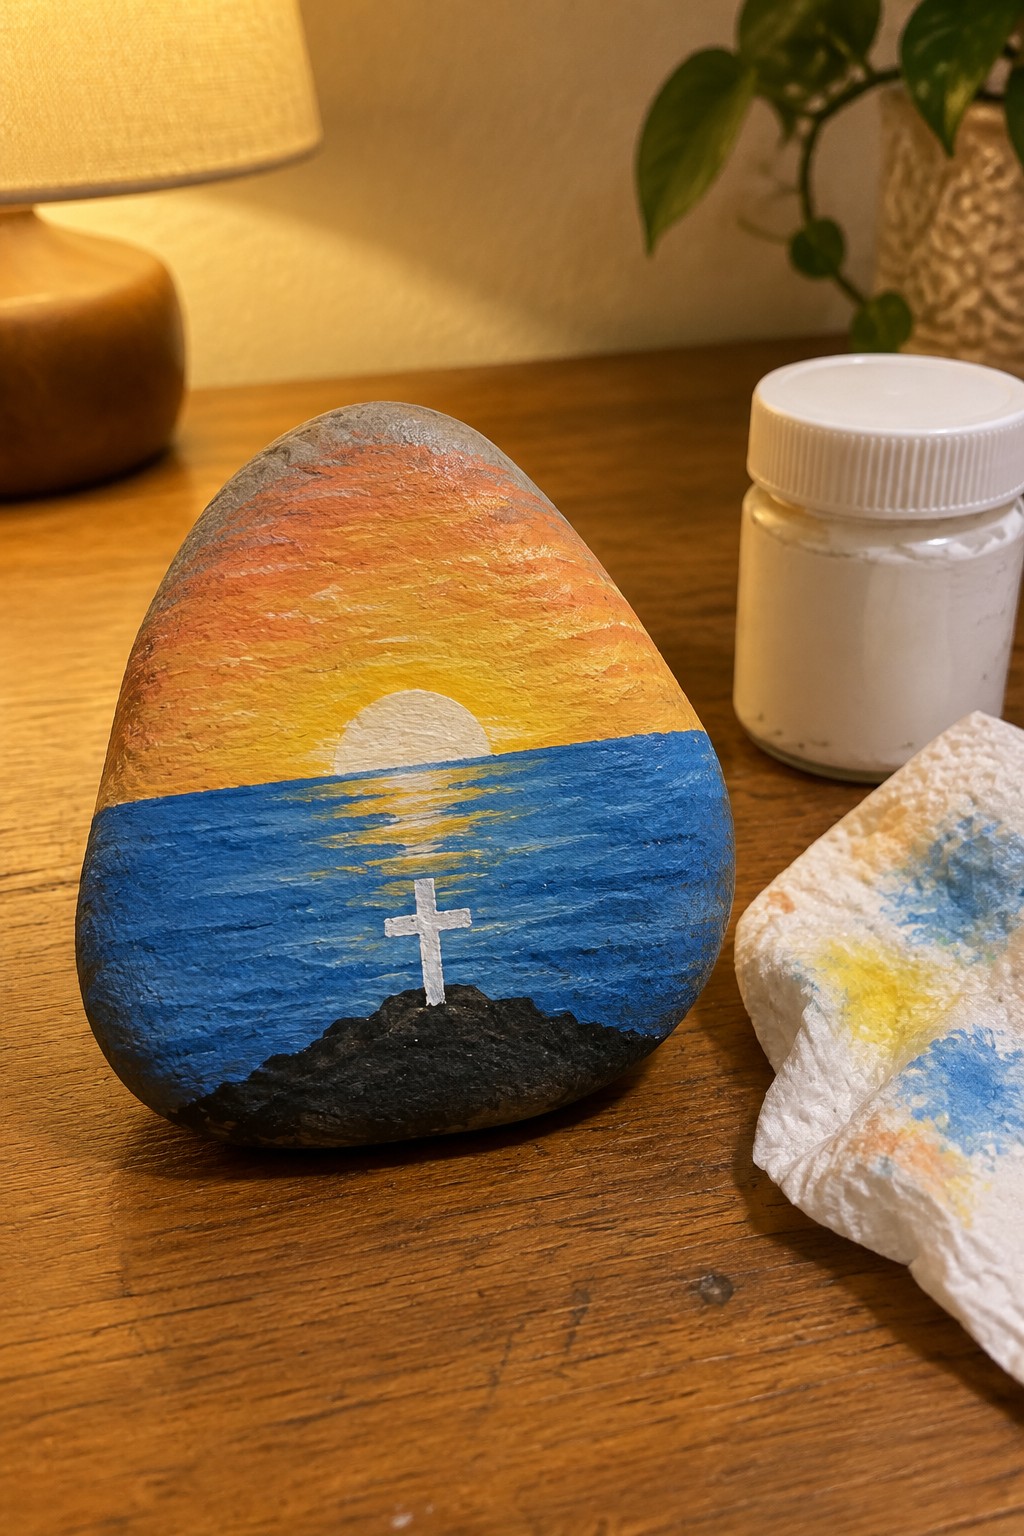
A smooth rounded stone makes a strong base for this sunset scene over water. The design uses simple color blocks in orange and yellow for the sky, a band of blue for the water, and a black lower section to form the horizon. A single white cross sits centered on the blue area, turning the rock into a clear Christian symbol piece that works for both indoor shelves and outdoor spots.
What makes this idea useful is how the curved rock shape already suggests the horizon line, so only basic color blocking and one traced cross are needed. The same layout could be scaled down to smaller pebbles for table displays or enlarged on a flatter stone for a garden border. The bold sky colors stand out against soil or mulch, and the cross motif can be swapped for other simple symbols if you want to adapt it for different seasons or themes.
Hamburger Rock with Printable Template
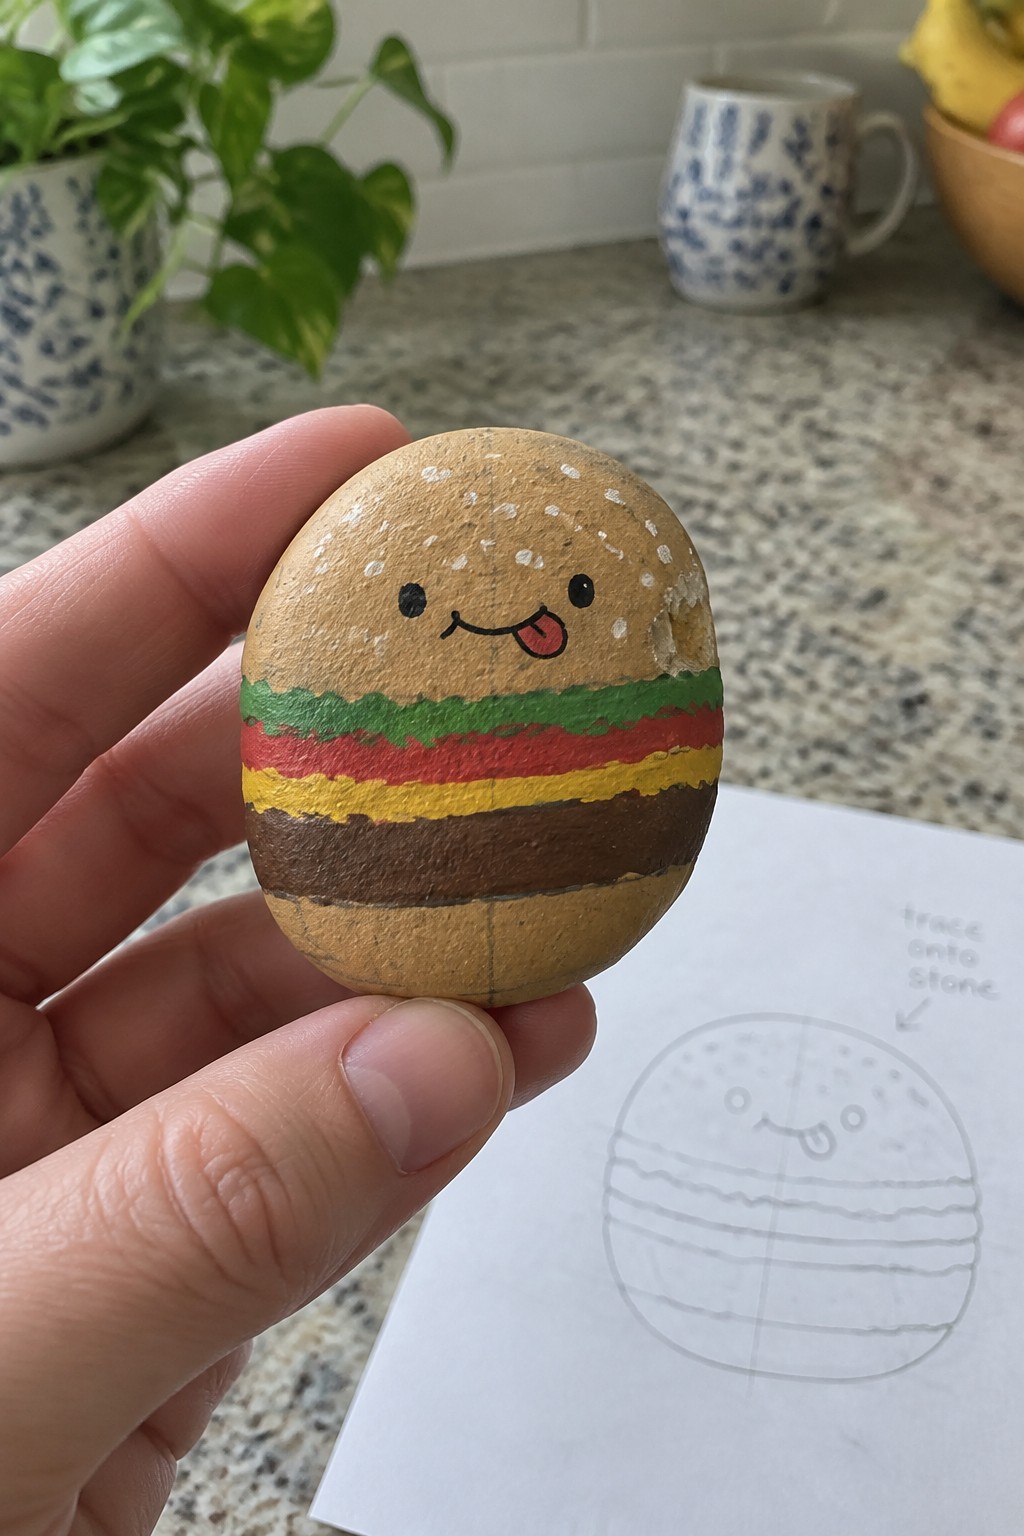
A smooth oval stone painted as a hamburger creates a simple food-inspired rock project that uses the natural rounded shape to mimic a bun. Horizontal bands of green, red, yellow, and brown paint form the lettuce, tomato, cheese, and patty layers, while small white dots on the top suggest sesame seeds. A basic face with dot eyes and a curved mouth fits the curved surface without needing fine detail work.
The rock shape does a lot of the work here by letting the layered colors read clearly as a burger even from a distance. You could reuse the same color blocking on a flatter stone or swap the face for a different expression to create a small set. This design works well as a kitchen shelf accent or a quick giftable piece because the template makes the layout easy to transfer.
Mushroom Painted Rocks for Garden Accents
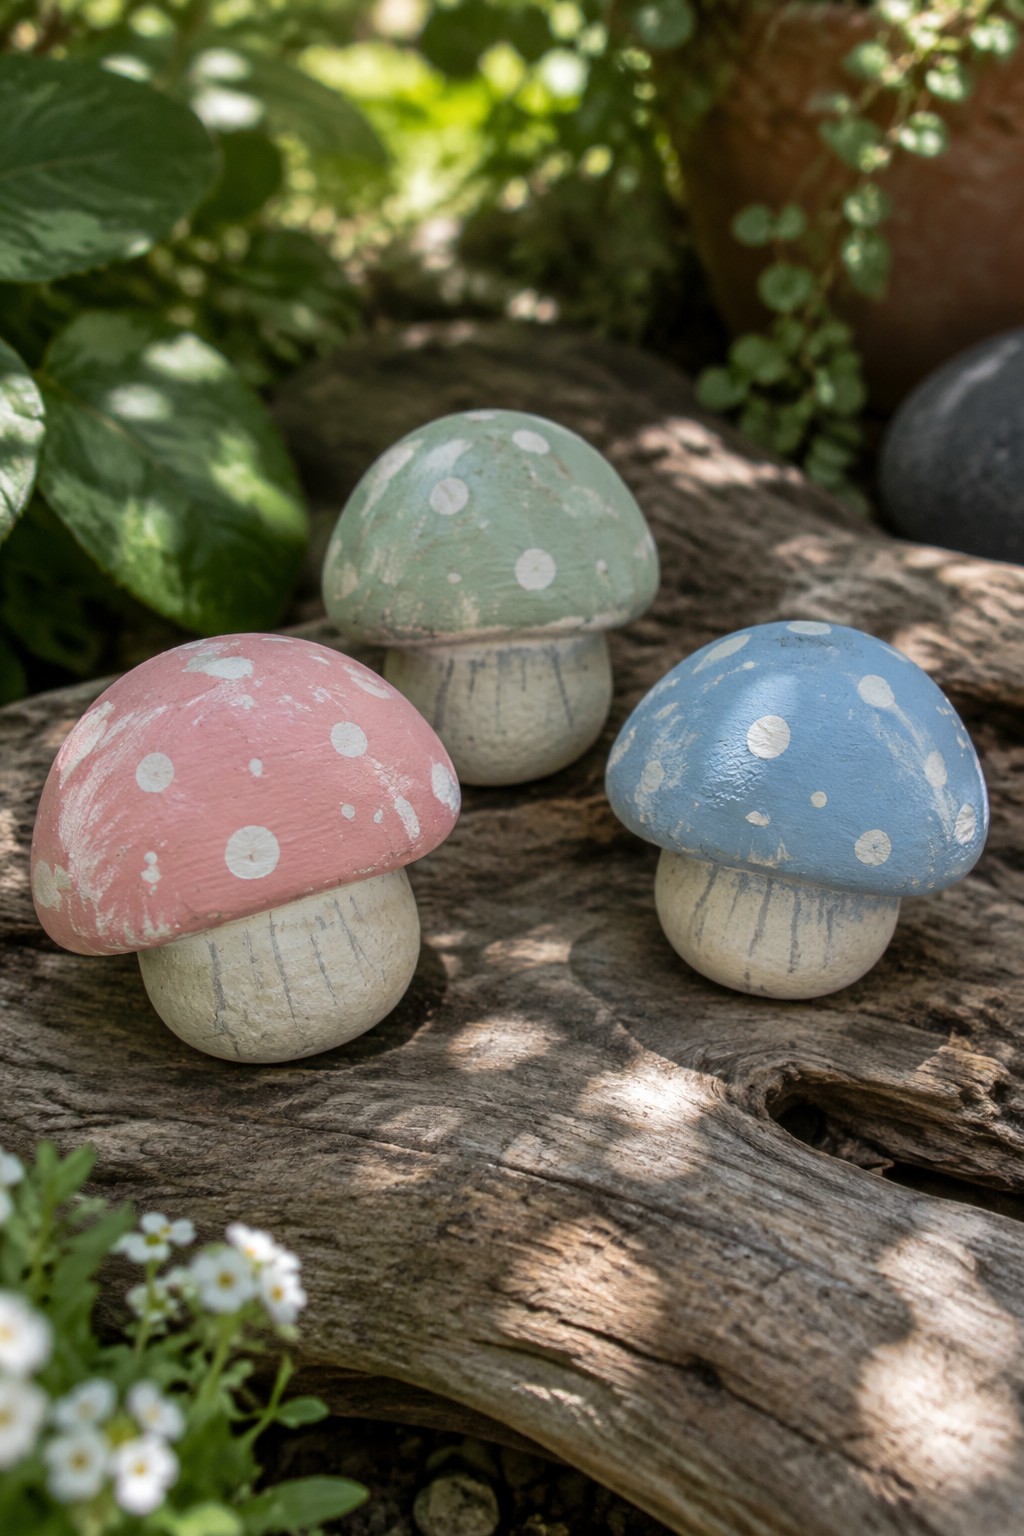
Paint rounded rocks to create mushroom shapes by covering the top portion in a solid color for the cap and leaving the bottom section lighter for the stem. Add white dots across the cap in varying sizes to mimic the classic mushroom pattern, using colors like pink, blue, or green for variety. This garden decor rock idea works well because the rounded stone shape naturally supports the curved cap form and the dots add visual interest without needing fine detail work.
What makes this idea useful is how the basic mushroom outline can be traced from a printable template onto any similar rounded rock you find. The simple color blocking and dot pattern make it easy to produce a set in different shades for lining flower beds or placing in planters. For garden decor, these painted rocks hold up well when sealed and can be adapted to smaller pebbles or larger stones depending on where you want to display them.
Smiling Sun Face Rock
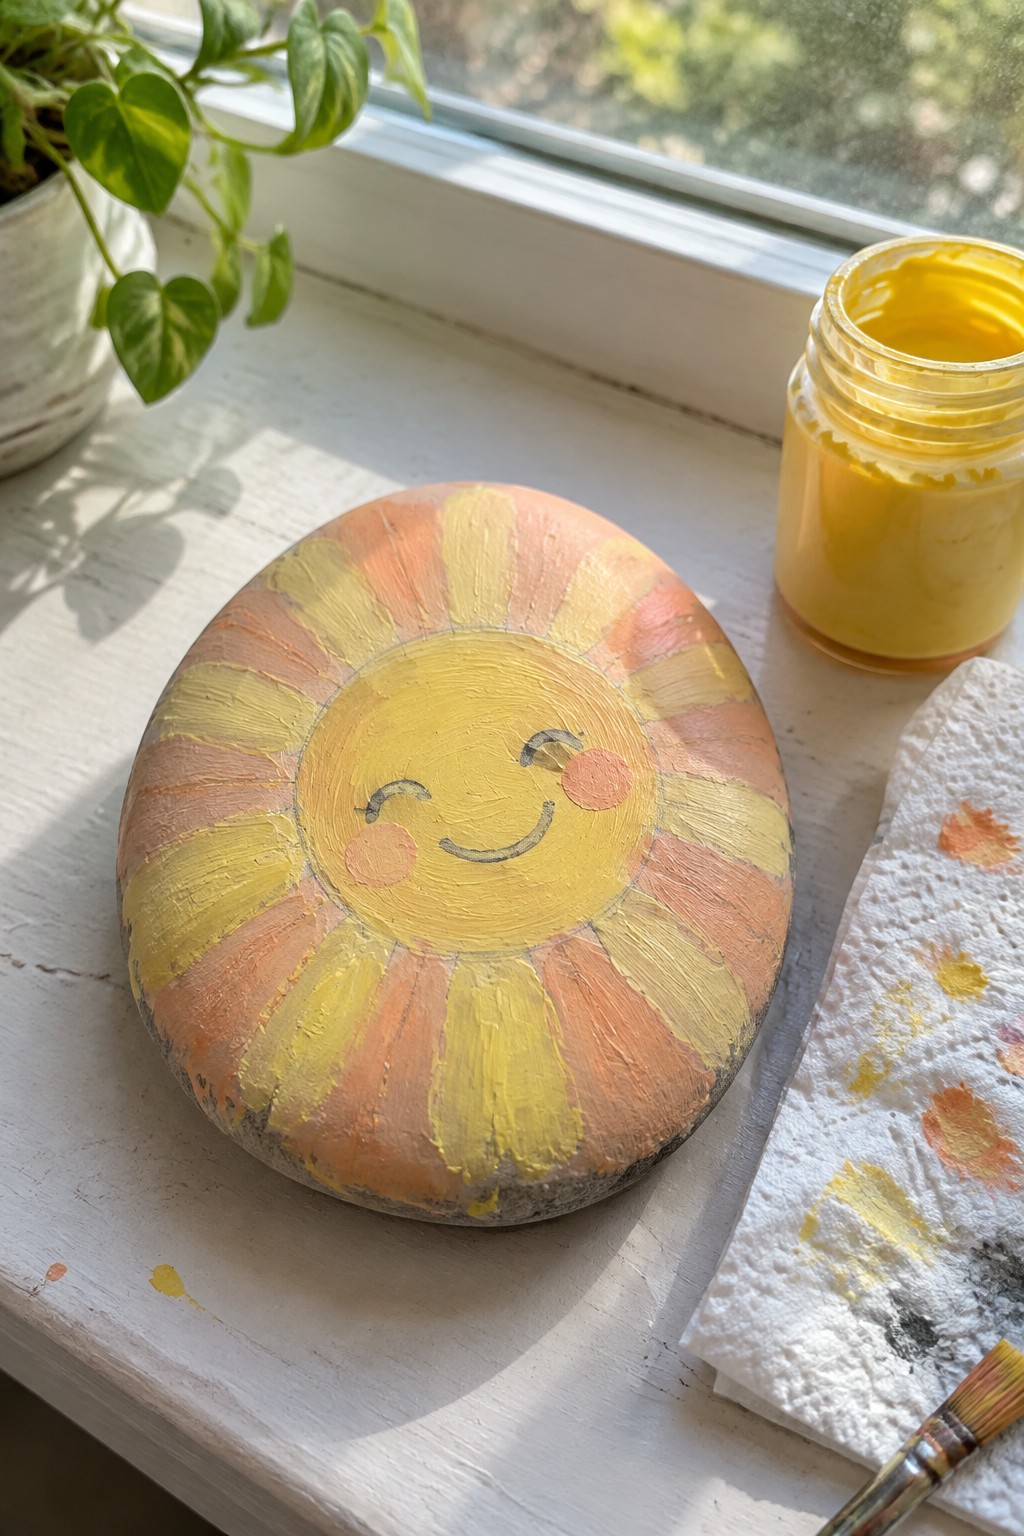
A smooth, rounded stone serves as the base for this sun design. The painter filled the center with a solid yellow circle, added a simple curved smile and closed eyes, then painted short rays in alternating yellow, orange, and pink tones around the outer edge. Two small pink dots act as cheeks. The flat surface and natural round shape make the motif easy to trace and keep the rays evenly spaced.
What makes this idea useful is how the basic circle-and-ray layout translates directly from a printable template onto any similar flat stone. The warm color blocks stay readable even from a distance, so the finished rock works in a flower bed, on a patio step, or inside a large planter. You can shorten the rays for smaller pebbles or change the cheek dots to a different expression without redrawing the whole pattern. The design also photographs cleanly for Pinterest because the contrast between the yellow center and outer rays stays strong.
Turtle Shell Painted Rock
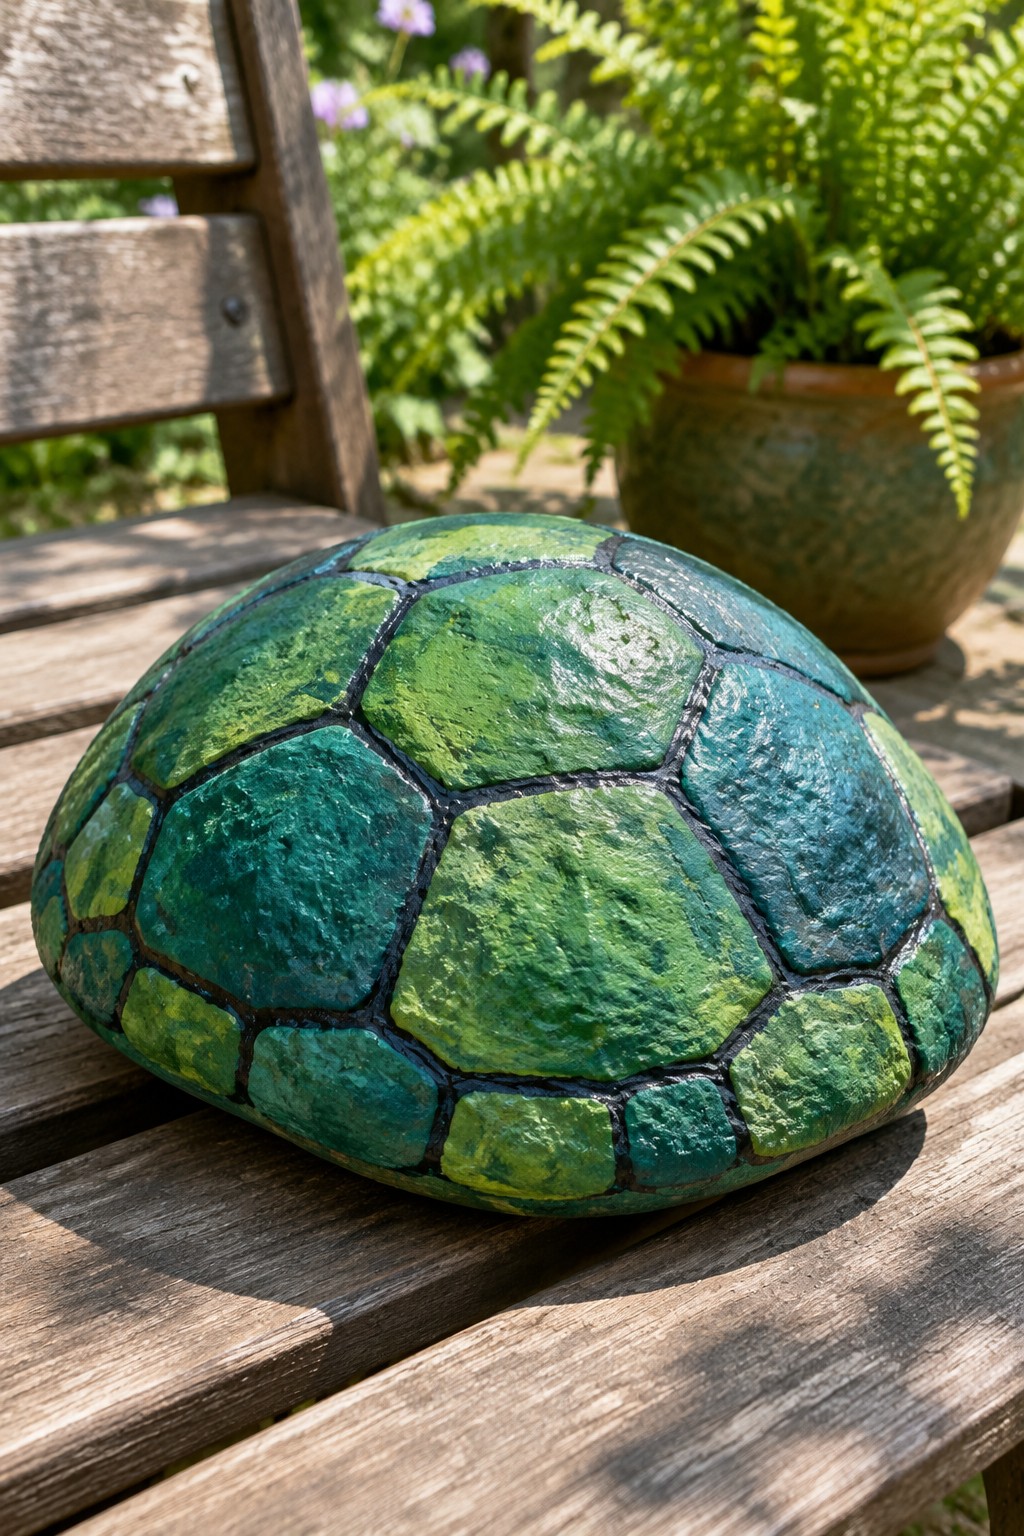
A domed stone painted with a turtle shell pattern creates a straightforward animal rock project. Black lines divide the surface into irregular segments that are filled with blended greens and blues, letting the rock’s natural curve do most of the work of suggesting a shell. The design stays simple enough to trace from a printable template while still showing enough color variation to read clearly from a short distance.
What makes this idea useful is how the rounded shape already supplies the turtle’s back, so the painted sections only need to follow the existing contours. The same segmented layout can be scaled up or down for different stone sizes and used in planters, along garden paths, or as a small accent on a porch step. The basic color blocking also makes it easy to swap in other shades or simplify the outlines if you want a faster version for a set of rocks.
Daisy Cluster Painted Rock
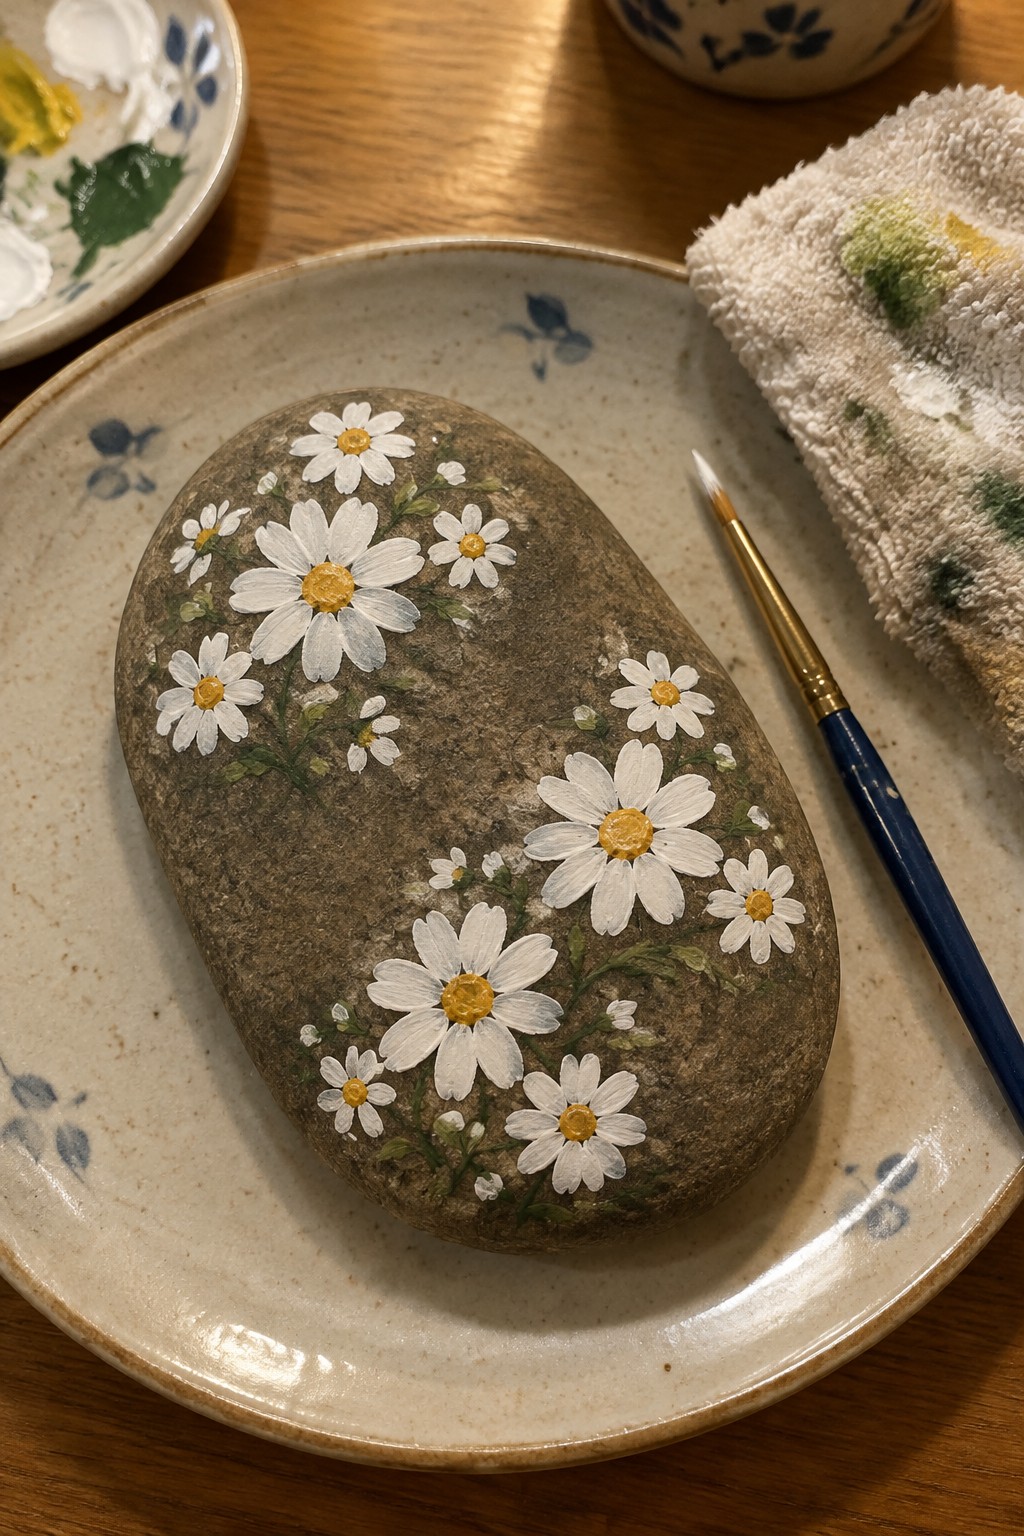
A rounded river rock with a naturally textured surface works well for a cluster of daisies painted in white with yellow centers and scattered green stems. The simple circle-and-petal shapes follow the curve of the stone without needing precise symmetry. This flower rock idea uses basic color blocking that traces easily from a template onto the uneven surface. It belongs in the garden decor category and stays clearly recognizable as a painted physical stone rather than a ceramic piece.
What makes this idea useful is how the compact motif fits small to medium rocks for placement in planters or along garden paths. The same daisy layout can be simplified by reducing the number of blooms or adapted to a flatter stone for a different arrangement. For shelf styling or porch accents this painted rock adds a light seasonal touch that pairs with real plants. You could change the center color or leaf spacing to match existing garden colors without redrawing the full design.
Rainbow Dotted Pebbles
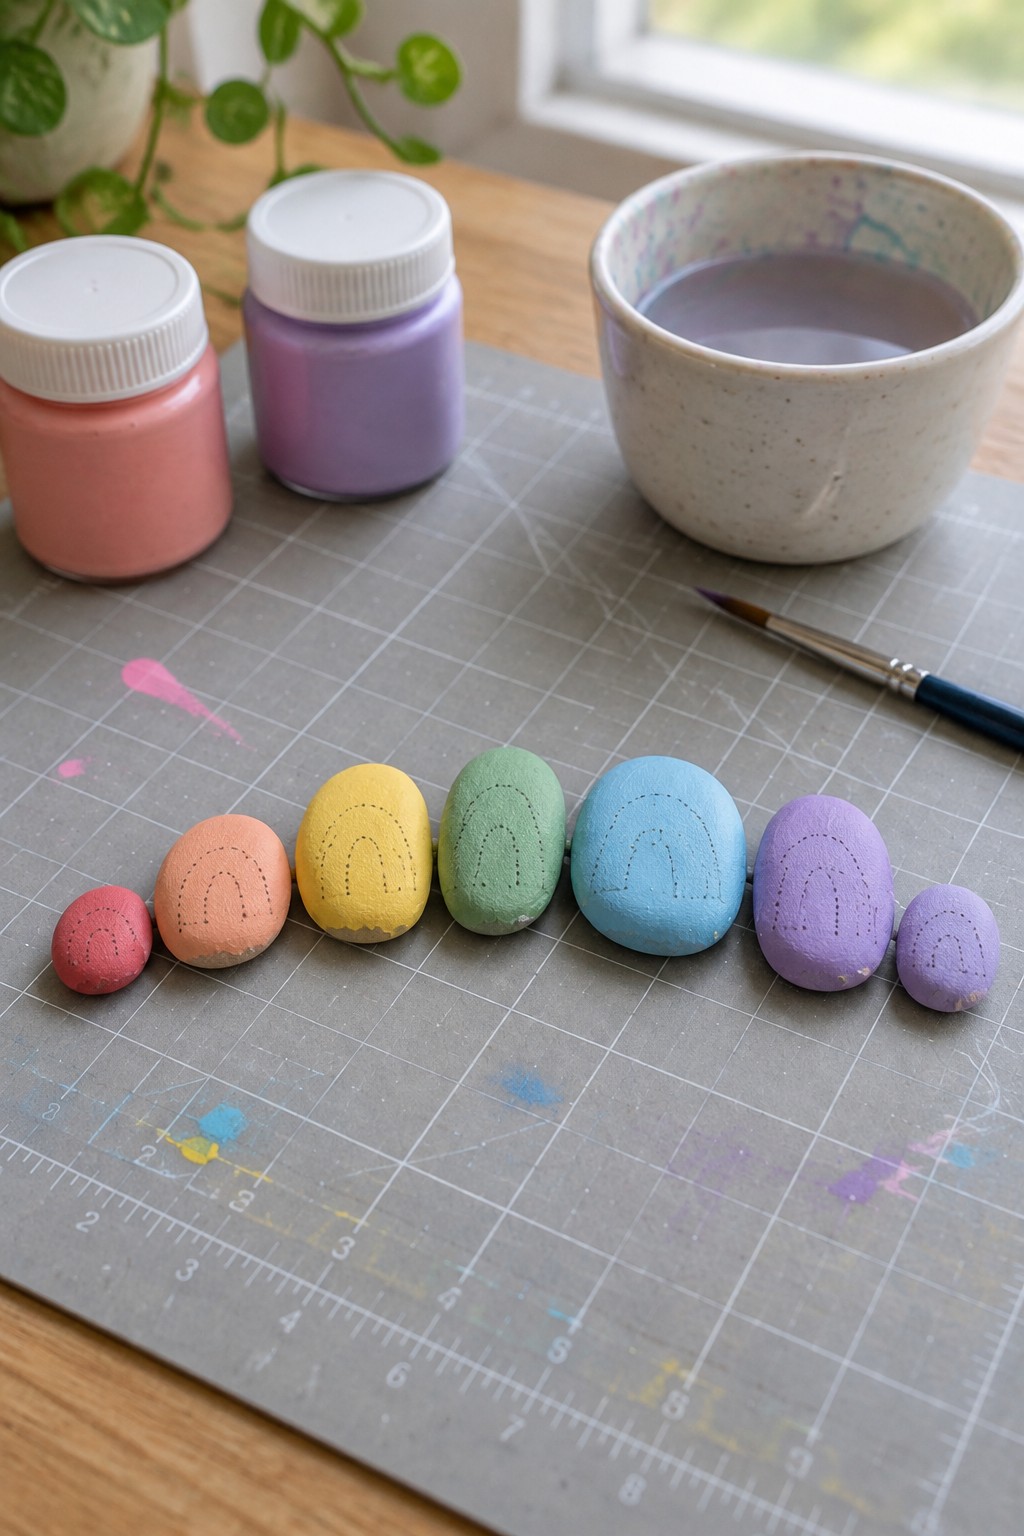
Small smooth pebbles painted in rainbow order create a simple matching set. Each stone receives a solid pastel base coat, then a series of black dotted arcs form a rainbow shape across the curved surface. The dotted linework makes the motif easy to trace from a template and keeps the design light even on tiny stones. This painted pebble set works as a collection meant to be displayed together.
The rock shape does a lot of the work here because the rounded form lets the dotted arcs follow the natural curve without extra shading. You can reuse the same template on any similar pebbles by changing only the base color, which keeps the set consistent while still allowing quick variations. These would suit a windowsill row, a planter accent, or a small shelf display where the color sequence shows best. The small scale also makes it simple to produce the full set in one session.
Penguin Painted Rock
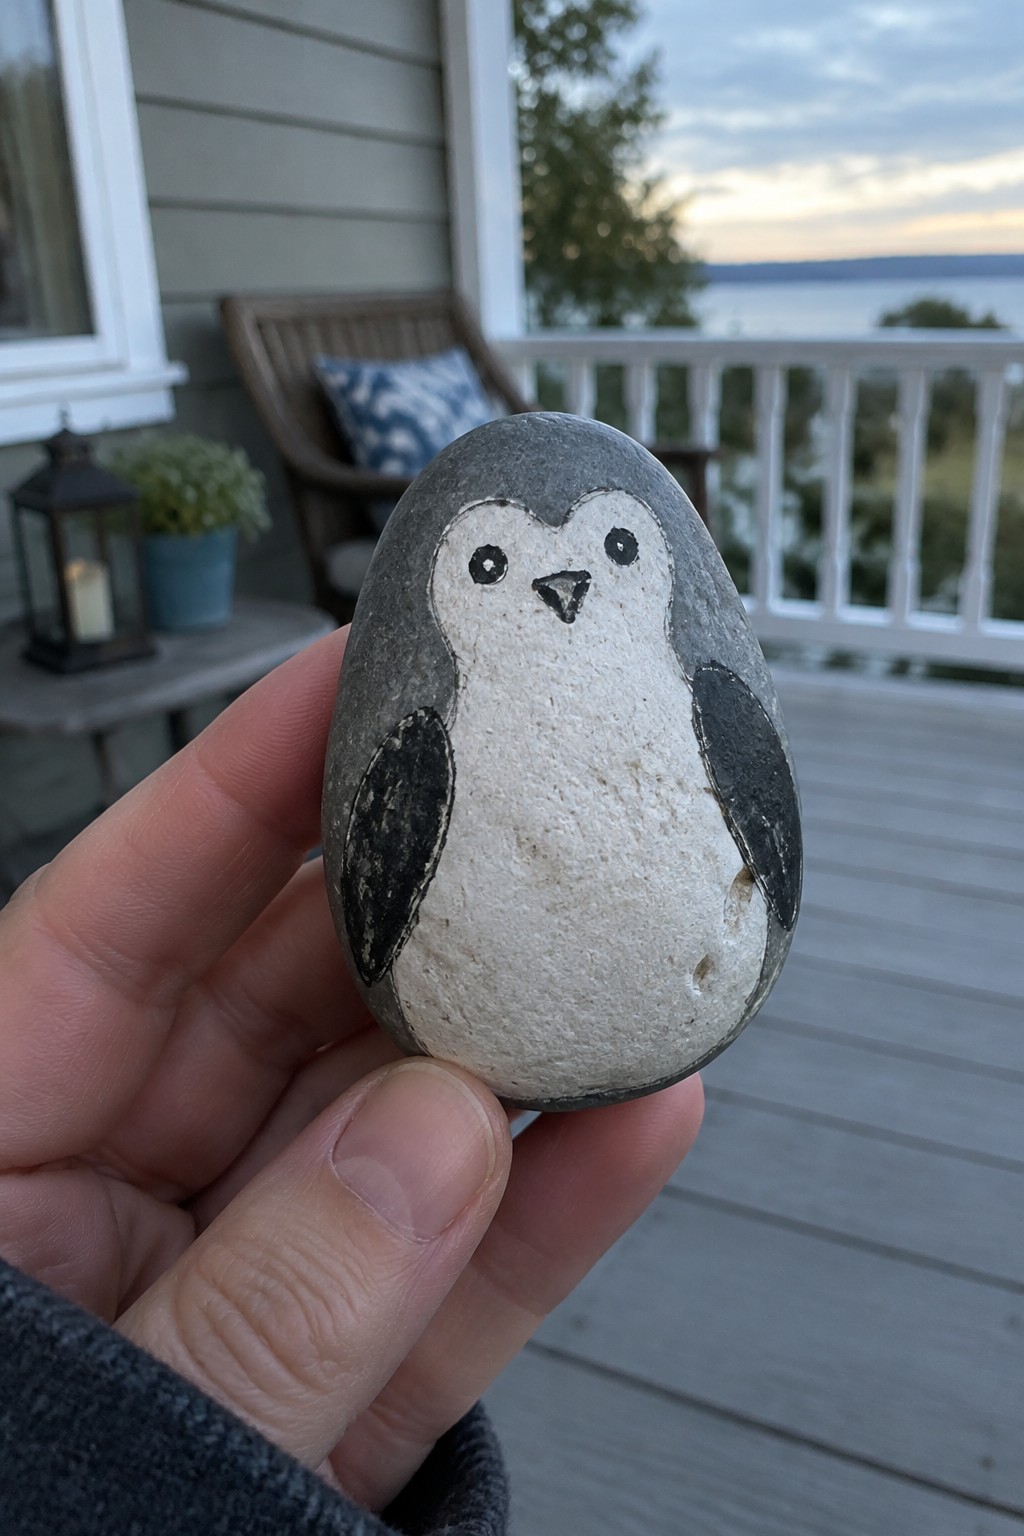
An oval river rock painted as a penguin uses the stone’s natural rounded shape as the body. Black paint blocks in the head, back, and flippers while the central area stays white for the belly. Small black dots and a simple triangle form the face, keeping the design clean and easy to trace from a template. This approach fits the animal rock category and works on any smooth, egg-shaped stone.
The rock shape does most of the work here so the focus stays on basic color blocking and minimal linework. It sits well in a planter, on a porch step, or grouped with other animal designs for a windowsill display. The same layout can be scaled up or swapped for different seabirds on larger stones without changing the core pattern. A printable template makes the eyes, beak, and wing edges quick to transfer.
Watermelon Rock Painting

A watermelon rock painting turns an oval stone into a fruit slice by blocking in a green rind along the outer curve, a narrow white band, and a pink center scattered with black seed dots. The rounded edges of the stone help the painted sections follow a natural watermelon shape without extra shaping. This approach fits the food-inspired rock category and relies on simple color zones rather than fine detail work. The visible stone texture under the paint adds a handmade quality that keeps the result clearly a painted rock rather than a manufactured piece.
What makes this idea useful is how the large color blocks and scattered dots make it straightforward to create a printable template for tracing onto different sizes of rock. A painted rock like this works especially well as a summer table accent or placed among real fruit in a bowl for a playful mix. The same layout can be adapted by swapping the pink for other fruit colors or repeating the design across several stones to build a small collection. The bold contrast also helps the finished piece stand out in photos for sharing.
Bumblebee Rock with Striped Body
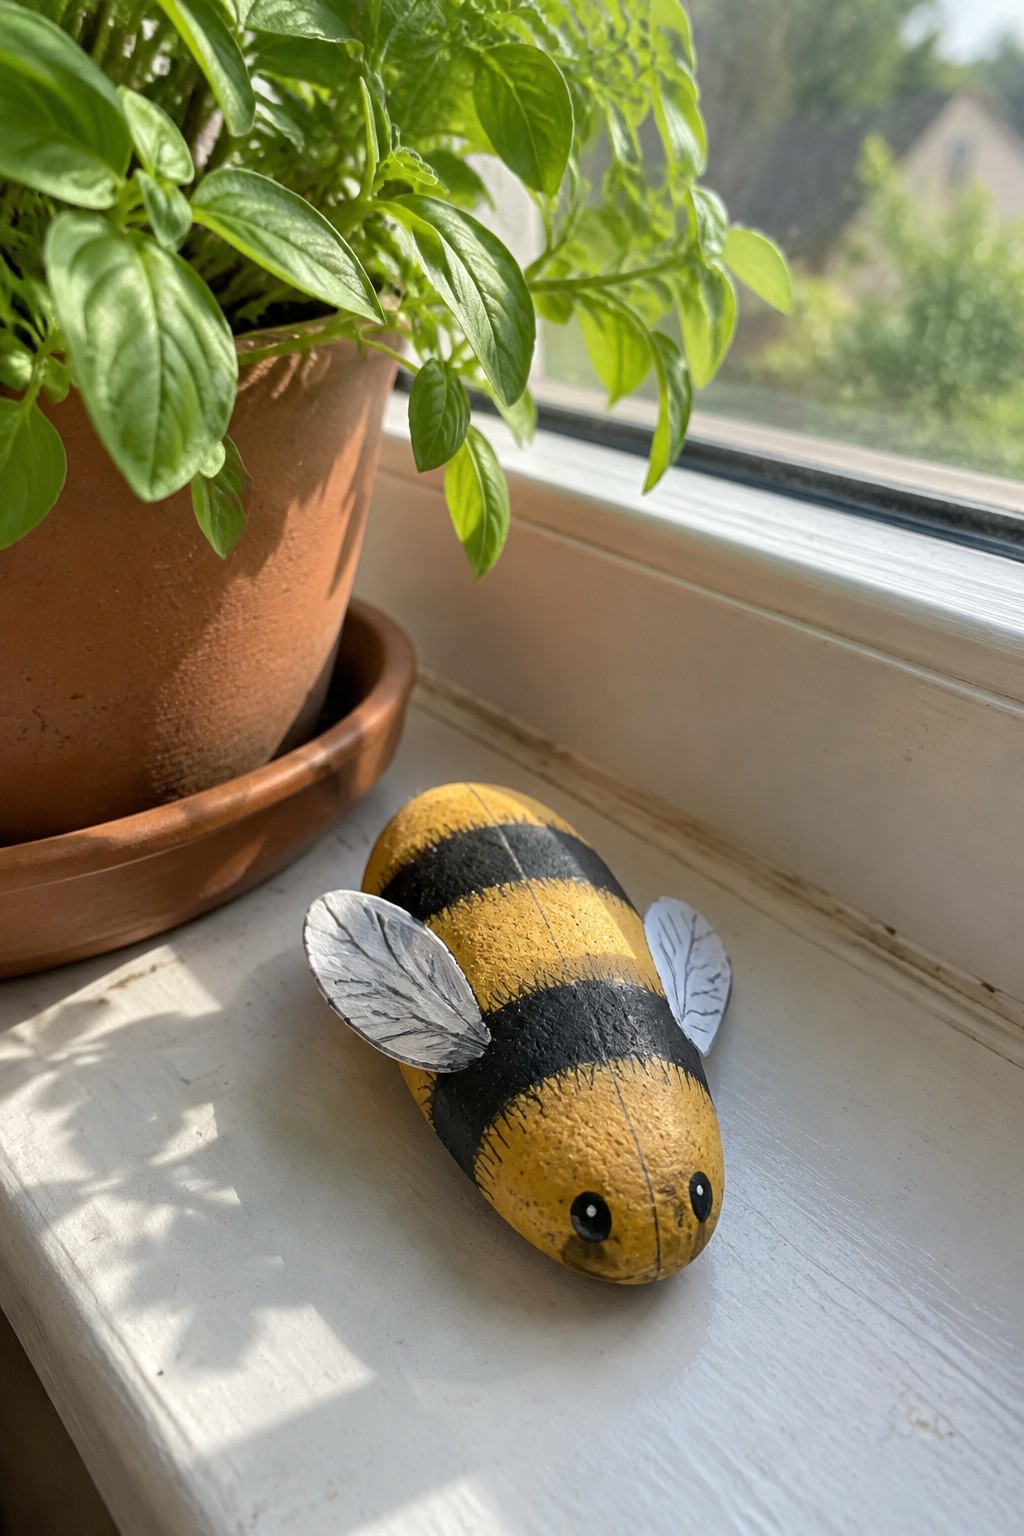
A smooth oval stone painted in alternating yellow and black bands forms a simple bumblebee shape. The natural curve of the rock already suggests the bee’s rounded body, so the design relies on clean color blocking and a few thin black lines to separate the stripes. Small silver wings with basic vein lines sit on either side, and two black dots create the eyes at the front. This approach falls into the bug rock category and stays easy to trace because the main elements are just stripes and basic outlines.
The rock shape does a lot of the work here since the oval form matches a bee’s body without extra carving or sculpting. A painted rock like this works especially well in planters, on windowsills, or tucked along garden paths where the bright stripes stand out against soil or foliage. You could adapt the same idea by using fewer stripes on a smaller pebble or adding a second bee on a larger flat stone for a pair. The basic color areas make it simple to scale up or down with a printable template.
Owl Rock on a Rounded Stone
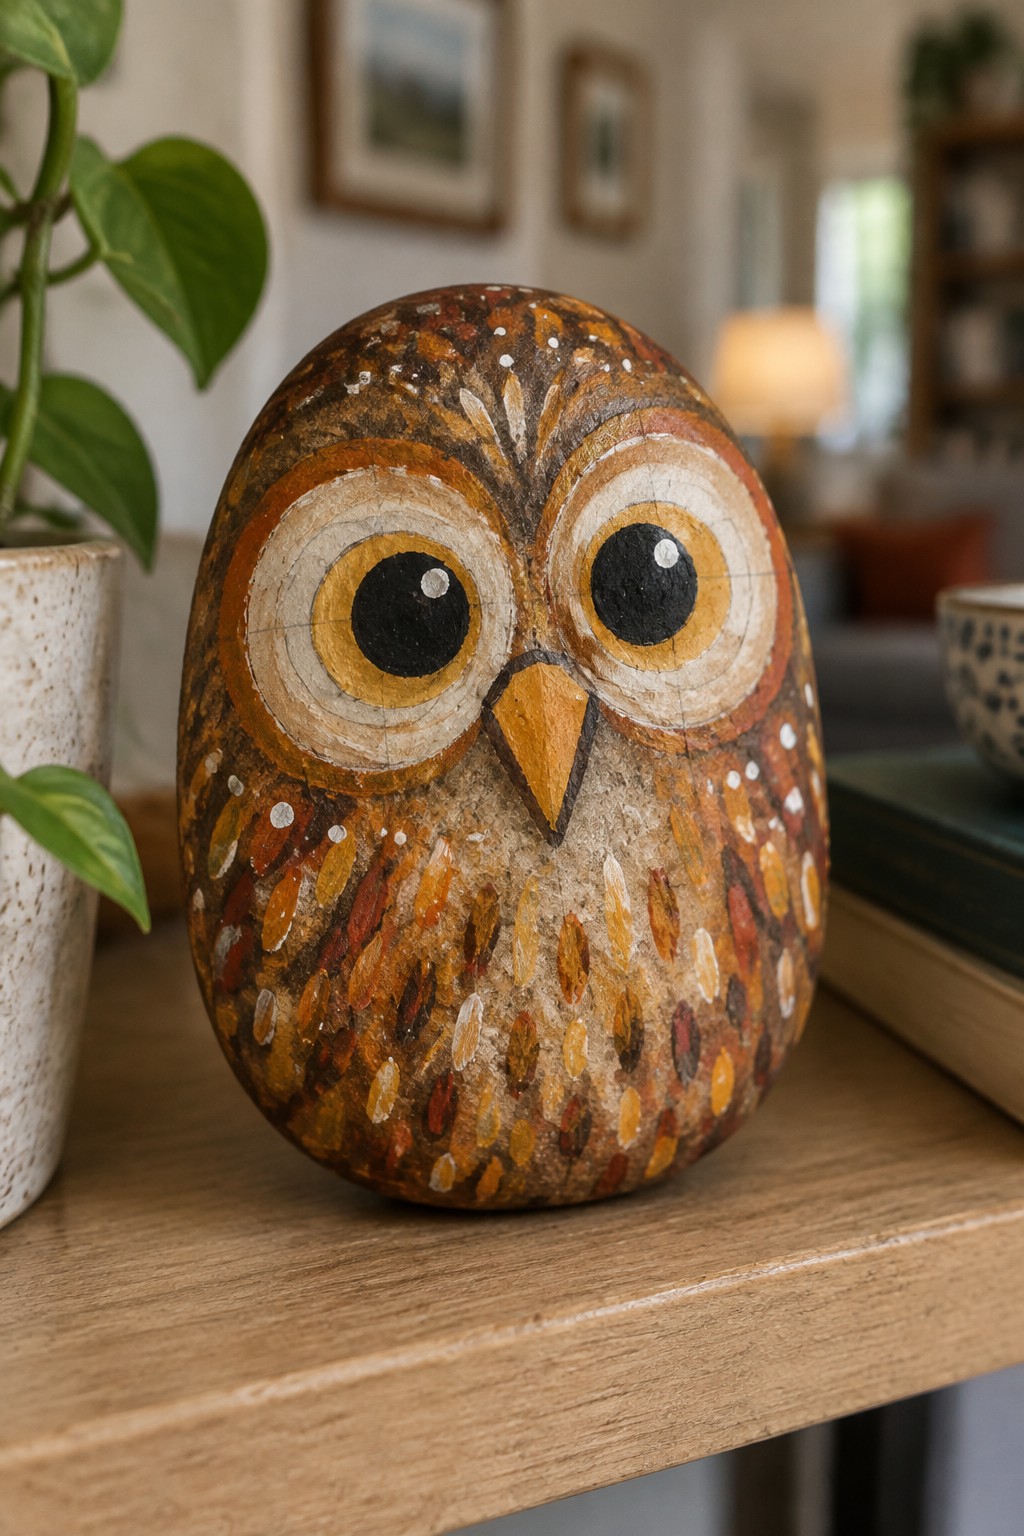
An owl rock painting turns an oval stone into a bird by using its natural shape as the body. Concentric rings of yellow, white, and brown form the large eyes, with solid black centers and a small orange triangle for the beak. The body gets covered in rows of small oval marks in brown, orange, and yellow that follow the curve of the stone. This animal rock idea keeps the design readable because the shape already suggests an owl before any paint is added.
What makes this idea useful is how easily the eye rings and feather ovals can be traced from a printable template onto any similar rounded rock. The color blocking stays simple to follow even when the stone surface is uneven. For garden decor, this type of painted rock sits well in a planter or along a path edge without looking out of place. The same layout works on a smaller pebble if you reduce the number of feather rows.
Citrus Fruit Painted Rocks
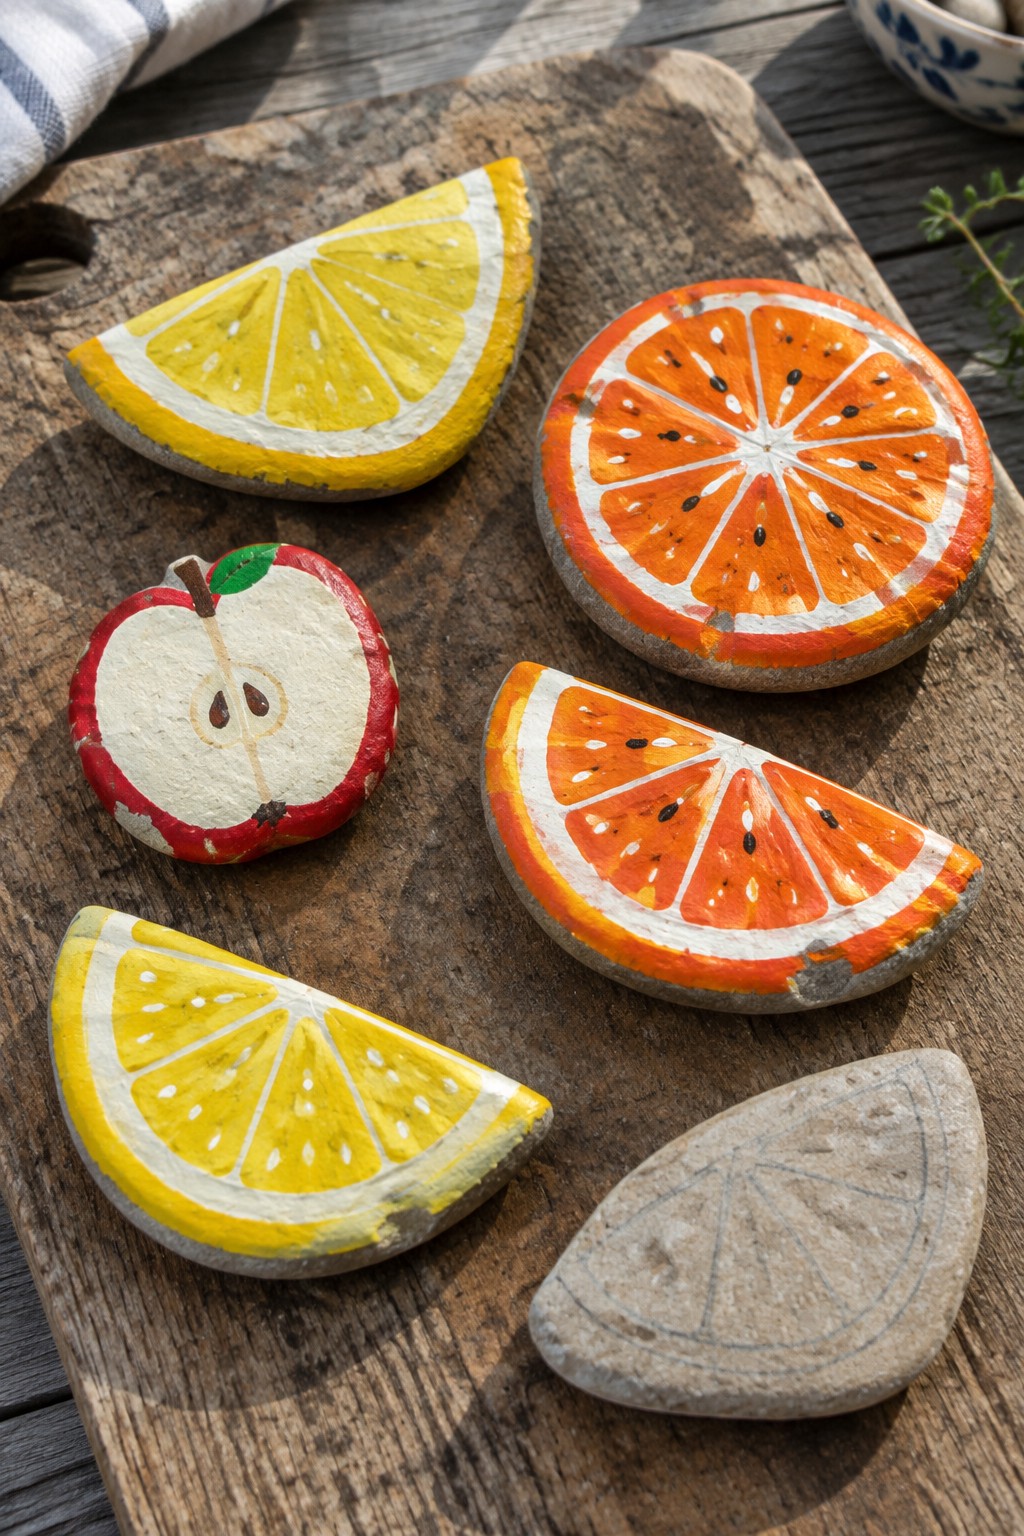
Flat stones painted as lemon wedges, orange slices, and apple halves turn basic river rocks into simple food-inspired accents. The rounded edges and slightly curved surfaces help the painted segments look like real fruit slices once the white dividing lines and small seed dots are added. Bright yellow and orange color blocking with clean outlines makes the designs easy to read even from a short distance. This style works well with printable templates because the basic wedge shapes and center lines transfer directly onto the stone.
What makes this idea useful is how the natural rock shape already suggests a cut fruit, so you mainly add color areas and a few straight lines. A painted rock like this works especially well as a kitchen windowsill accent, inside a planter, or grouped on a patio table. You could change the yellow to green for limes or adjust the segment count to match different fruit sizes. The same template approach scales easily to smaller pebbles or larger stones for a matching set.
Flower Painted Rocks Using Easy Tracing Templates
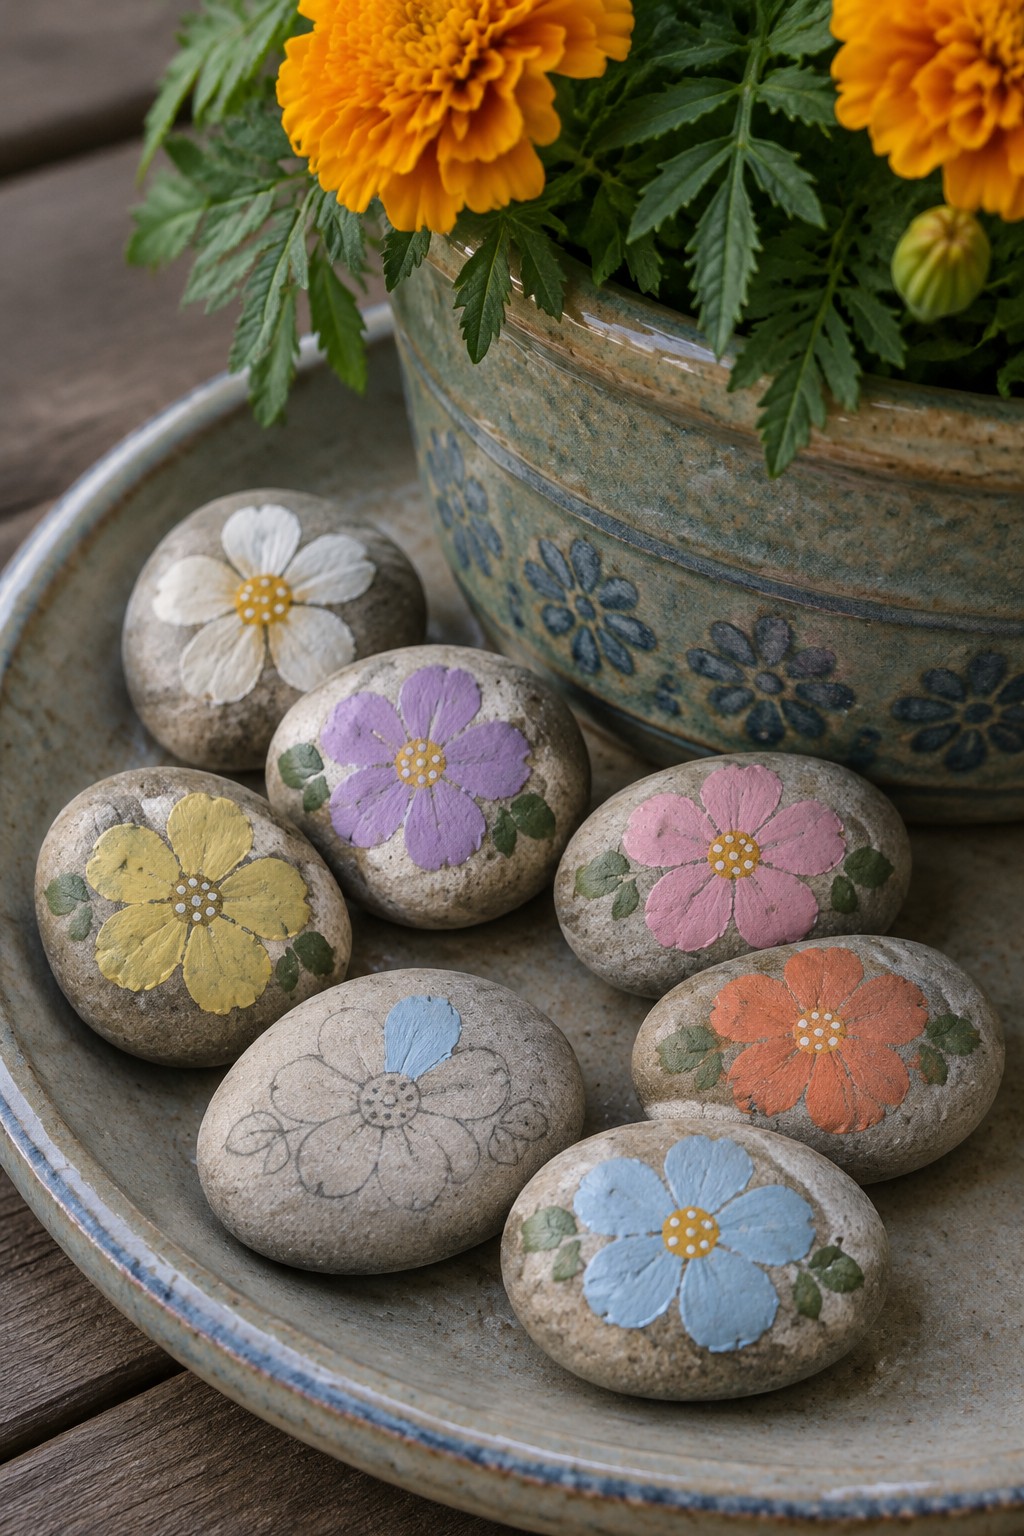
Flower painted rocks turn smooth, rounded stones into simple garden accents by covering the surface with daisy-style blooms in solid color blocks. Each design uses a central circle of dots for the middle, broad petals around it, and a few small green leaves at the base. The rounded stone shape lets the flower sit naturally without needing extra border lines, and the flat areas on top make it straightforward to trace a template and fill in the shapes. This creates a set of decorative pebbles that sit well in planters or along garden paths.
The rock shape does a lot of the work here since the natural curve matches the round flower form and reduces the need for precise edges. You can swap the colors to match your existing pots or use just the outline version on a larger stone for a lighter effect. For garden decor, this type of painted rock fits easily into mulch beds or on porch steps where the bright petals catch the light. The motif could be reworked onto oval stones by stretching the petals slightly or turned into a set of matching markers for different plant varieties.
Frequently Asked Questions
What supplies do I need to complete the rock painting ideas with printable templates? Gather smooth rocks from a craft store or your yard, acrylic paints in various colors, paintbrushes of different sizes, a pencil for tracing, and a clear sealant spray. Print the templates on regular paper, then cut them out to trace onto your rocks. Have paper towels and water nearby for easy cleanup.
How do I print and use the templates for tracing onto rocks? Download the printable templates and print them at actual size on standard printer paper. Cut out the designs, place them on your rock, and trace around the edges with a pencil. For curved surfaces, gently bend the paper or use a light box to help the lines show through before painting over the traced outlines.
Are these rock painting ideas suitable for children to try? Many of the 16 ideas work well for kids with adult supervision, especially simpler designs like ladybugs or hearts. Use nontoxic paints and provide larger brushes for little hands. Start with easier templates to build confidence, and encourage creativity by letting them choose colors.
How can I protect the painted rocks so they last outdoors? Apply two to three coats of outdoor sealant after the paint dries completely. Allow each coat to dry fully between applications. Place the rocks in a sheltered spot if possible, and avoid submerging them in water to keep the designs vibrant longer.
What should I do if I want to adapt the ideas for different rock sizes? Scale the printable templates up or down using a printer setting or by enlarging them on a photocopier. Choose rocks that match the adjusted design proportions, and break complex ideas into simpler sections if the rock is smaller. Experiment with combining elements from multiple templates for unique results.
