


I paint rocks sometimes when I want a quiet activity to do at home.
I put together this list of 19 ideas because I know how helpful it is to have clear steps when you are new to it.
Each design is explained one part at a time so it stays manageable.
You do not need fancy supplies to make them look nice.
I think these will give you a good place to start if you are interested.
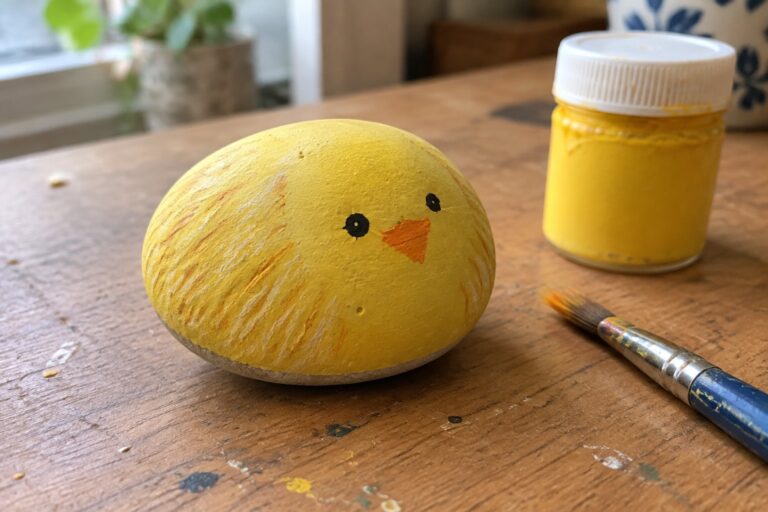
Simple Yellow Chick Rock
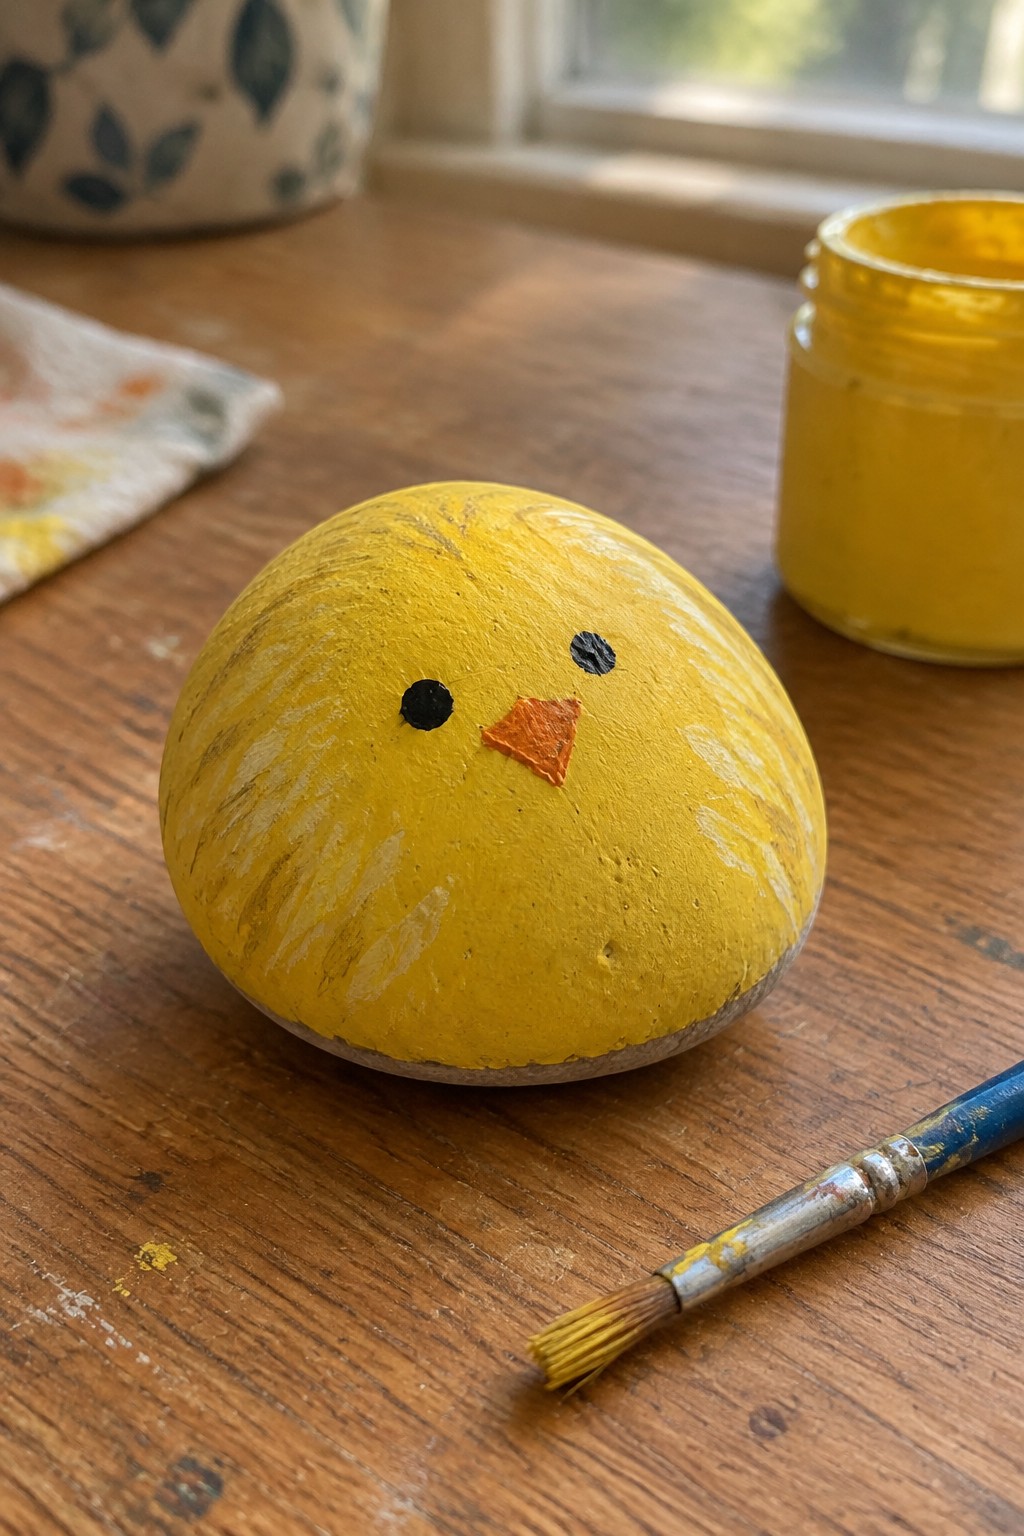
A rounded stone painted bright yellow becomes a chick rock through two black dot eyes and a small orange triangle beak. The natural oval shape of the stone already suggests a plump bird body, so the design relies on basic color blocking rather than complex outlines. This animal rock idea works as a quick garden accent or spring tabletop piece because the compact size keeps the painted face as the main focus.
What makes this idea useful is how few steps it takes after the base color is applied. The rock shape does a lot of the work here since the curve supports the chick form without extra shaping. You could adapt the same motif to a smaller pebble by shrinking the eyes and beak or swap the yellow for other bright colors to make different birds. This painted rock fits well in flower beds, on porch steps, or as part of a small collection for seasonal displays.
Strawberry Painted Rock
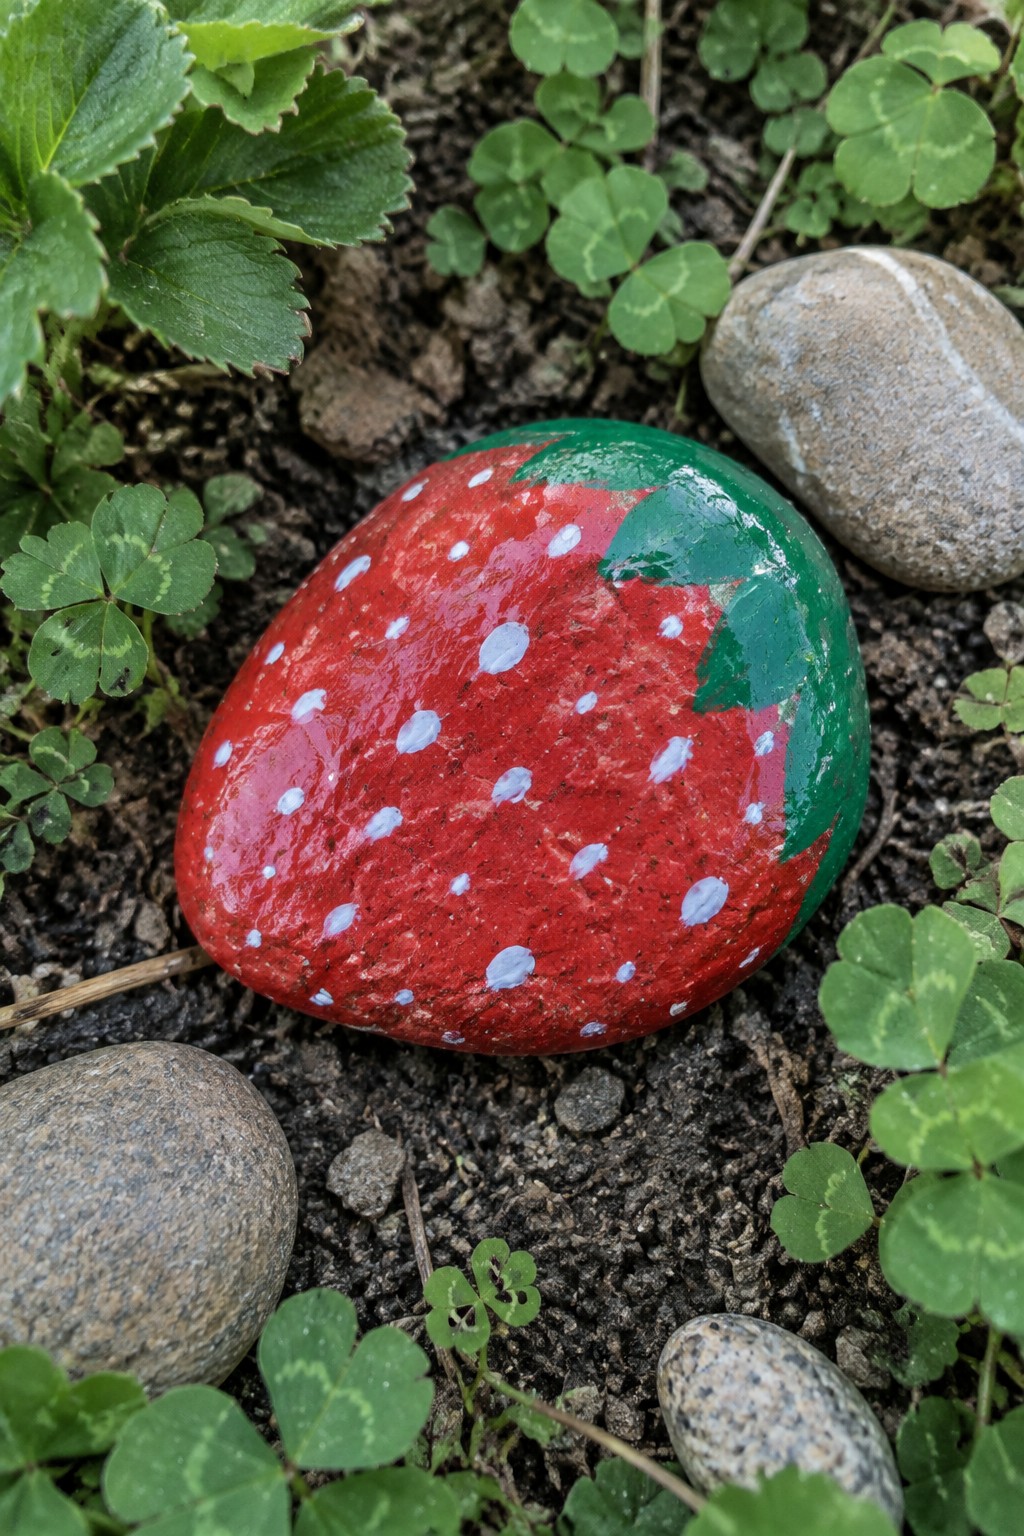
A smooth, rounded stone painted bright red with scattered white dots creates a simple strawberry design that fits naturally among garden plants. The green section at one end forms the leafy top, using the stone’s curved surface to suggest the fruit’s shape without extra outlines. This food-inspired rock painting idea relies on basic color blocking and dot placement, making it straightforward for anyone starting out with rock crafts.
What makes this idea useful is how the rounded form already suggests a berry shape, so you only need to add the red base, white dots, and green top. It works especially well nestled in flower beds, mulch, or potted plants where the red color pops against greenery. You could adapt the same approach on smaller stones to make a set of fruit accents or swap the colors for other berries like blueberries or raspberries.
Ladybug Rocks
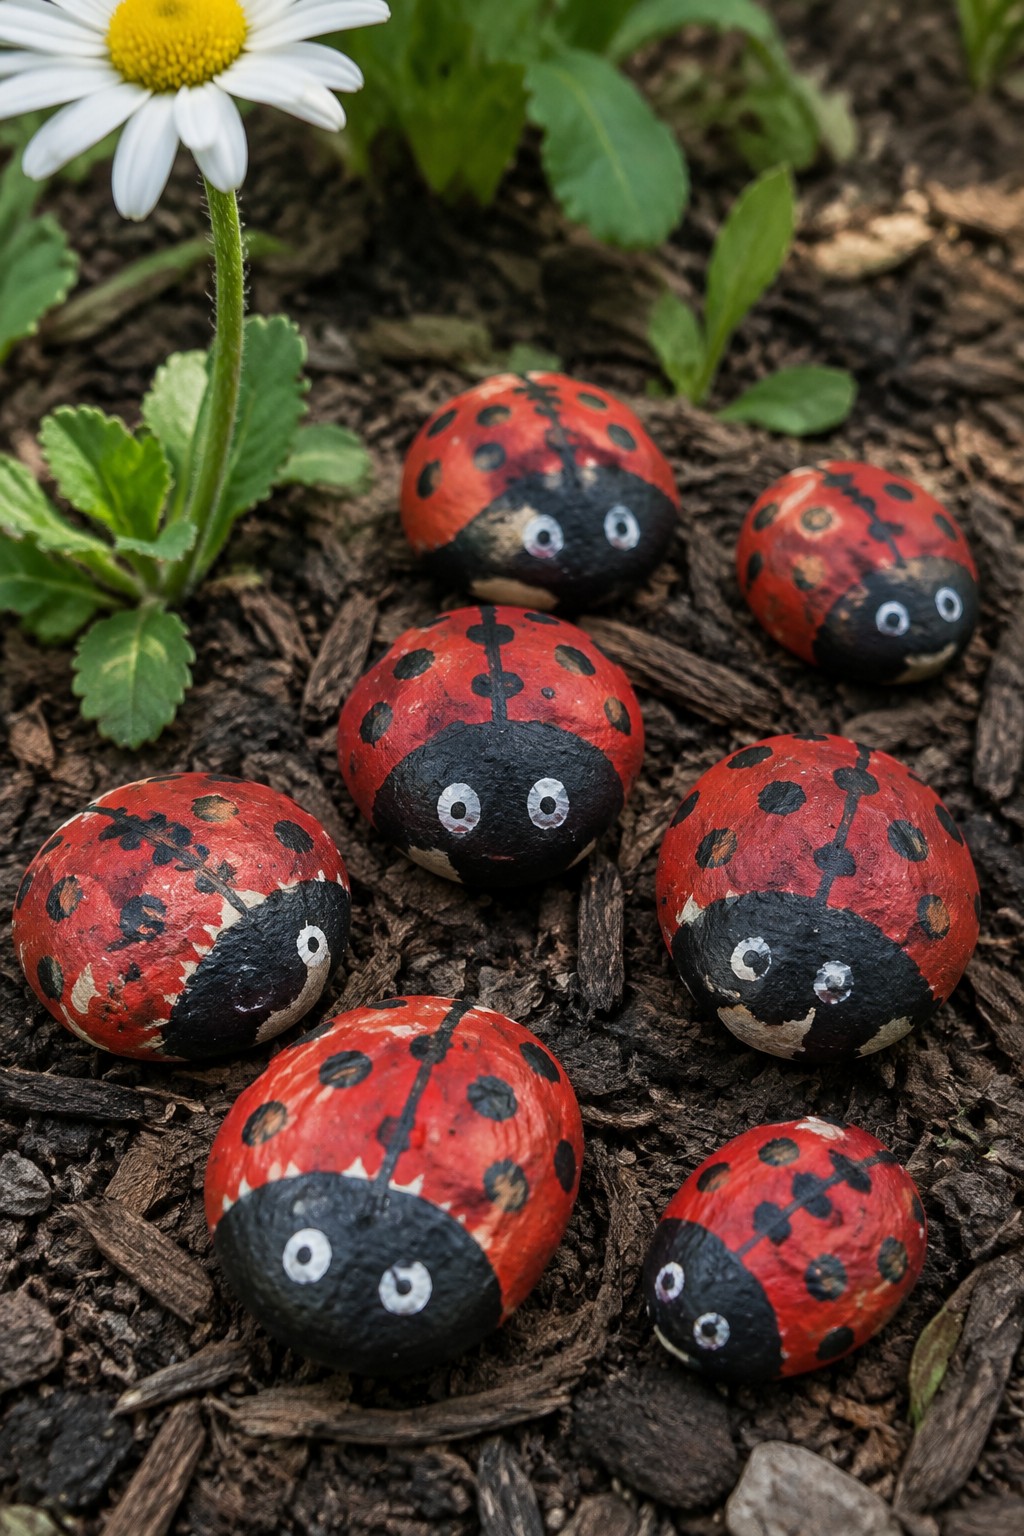
Painting small rounded stones as ladybugs turns ordinary rocks into simple bug accents for outdoor spaces. Use a bright red base coat on smooth pebbles, add black spots and a solid black head area, then finish with basic white dots for eyes. The natural curve of the stone helps the body shape read as rounded without extra sculpting, and the high-contrast colors keep the design clear even on textured surfaces. This fits the bug rock category and works as a painted pebble set that can sit directly in soil or mulch.
What makes this idea useful is how easily the same pattern adapts to different stone sizes or slight shape variations. Place a few in a flower bed, line them along a planter edge, or scatter them on a patio for a quick seasonal touch. You can simplify further by skipping the eyes or swap the red for other bright colors if you want a different insect look. The small scale means you only need basic supplies and a few rocks to test the design before making more.
Sunset Cross Rock
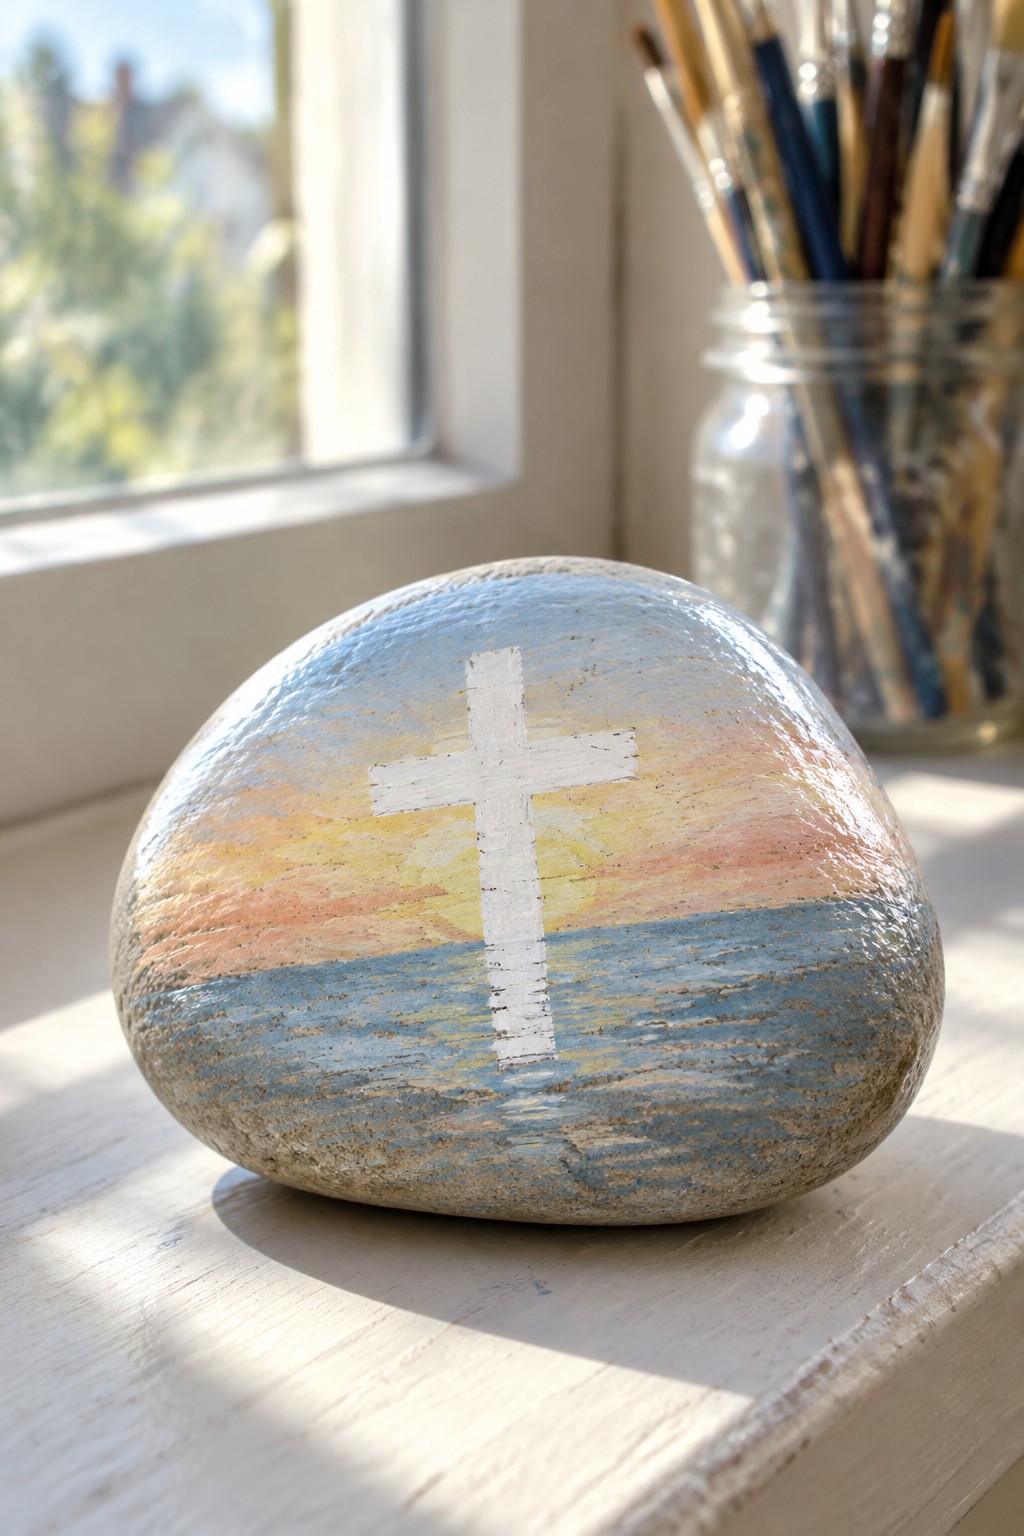
A smooth rounded stone makes a good base for this Christian symbol rock that combines a simple white cross with a sunset scene. The design uses broad color areas for the sky and water, with the cross painted on top in one solid shape so it stands out without needing fine details. The natural curve of the rock helps the horizon line sit evenly across the middle. This approach keeps the project focused on basic color blocking and one clear motif rather than small patterns or lettering.
What makes this idea useful is how the rounded form supports the curved water line and gives the cross a centered spot to rest on. The same layout could be simplified by using just two or three colors or by painting the cross on a plain background stone if you want fewer steps. For garden decor this kind of painted rock works in a flower bed, on a porch step, or as a small shelf accent. The motif could easily be changed into a cross over a solid blue or green background on a flatter pebble for a quicker version.
Paint a Smiling Cheeseburger Rock
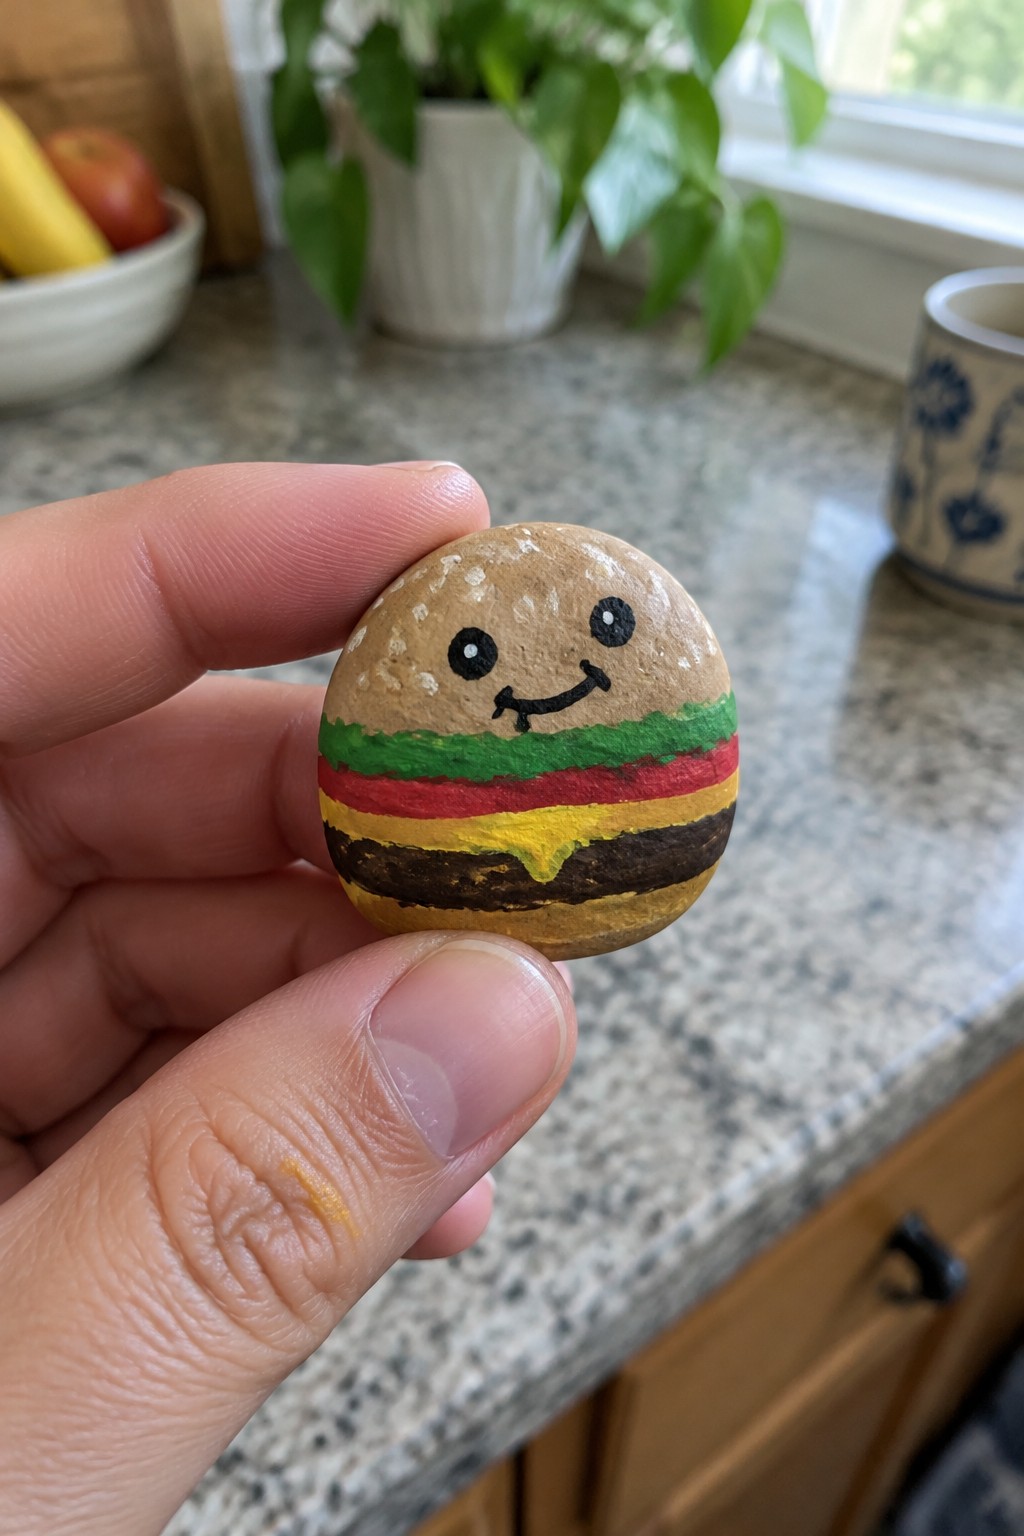
A small rounded stone works well for a cheeseburger rock painting project because its curved surface already suggests a bun shape. You can build the idea with simple horizontal bands of paint to show the top bun, lettuce, tomato, cheese, and patty without needing detailed shading. Black dots and a short curved line create the eyes and mouth directly on the upper section. This falls into the food-inspired rock category and stays approachable for first-time painters since it uses basic color blocking on a naturally fitting form.
What makes this idea useful is how the rock shape does most of the visual work so you only add stripes and a face. A painted rock like this works especially well as a kitchen shelf accent or slipped into a windowsill planter. The small scale makes this easy to adapt by switching the face to a different expression or trying the same layered bands on an oval stone to make a hot dog version. For a gift, something like this pairs nicely with other simple food rocks in a small bag.
Frog Face on a Rounded Garden Stone
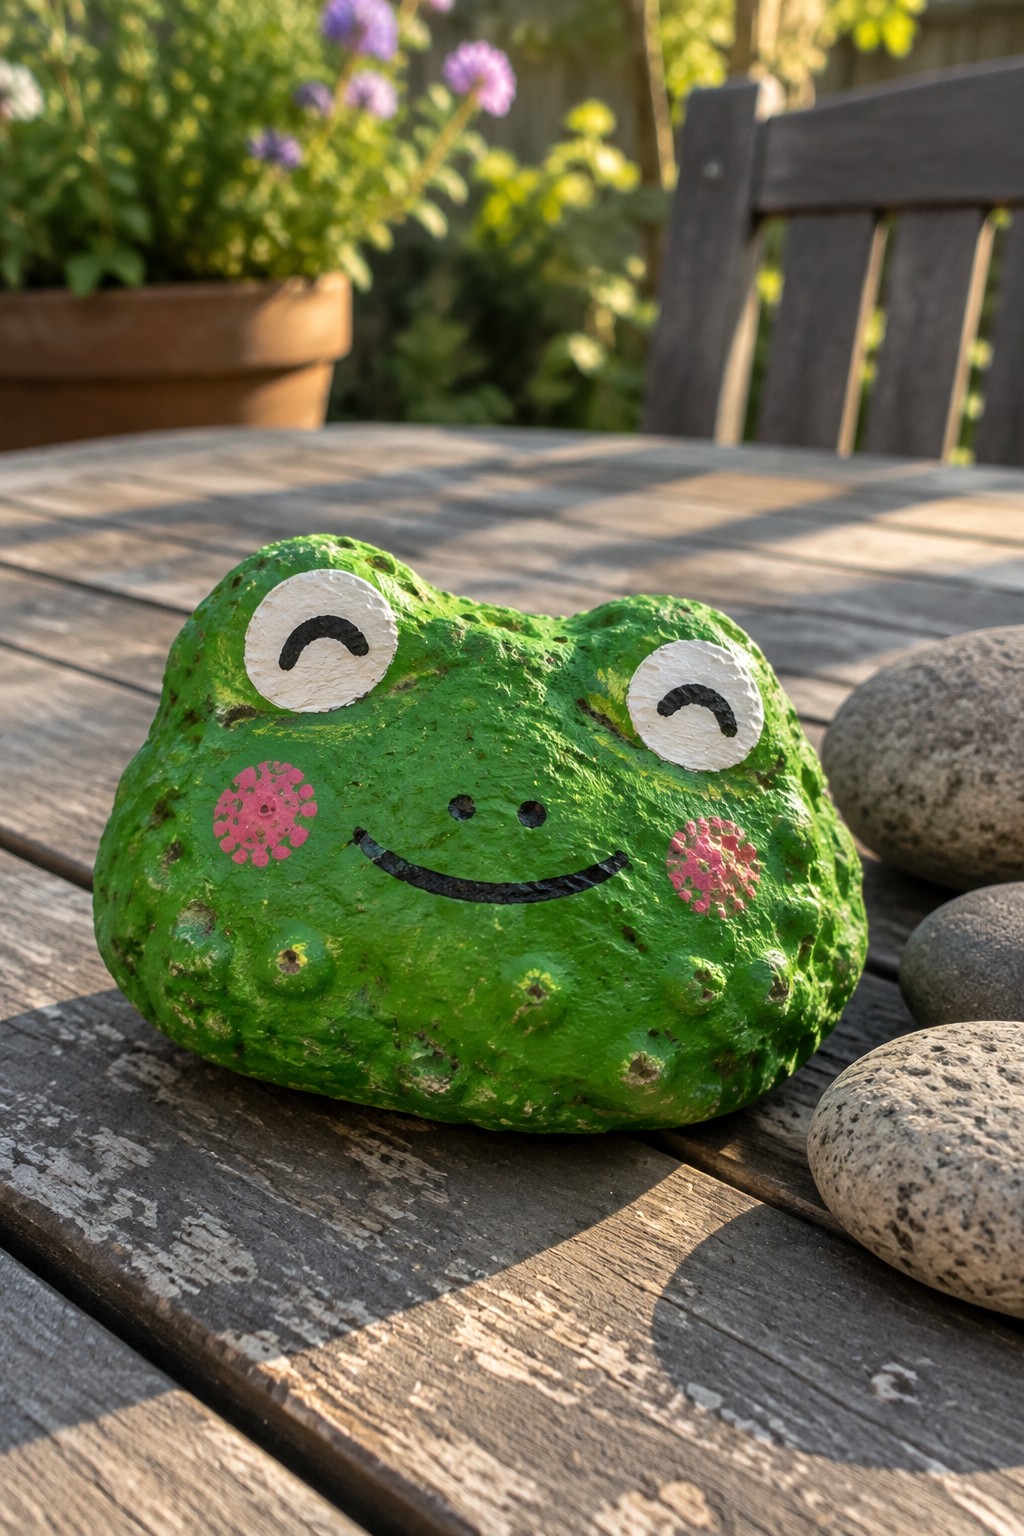
A frog face rock turns a rounded physical stone into simple garden decor by painting the whole surface green to suggest the body. White circles with black arcs inside form the eyes, a curved black line creates the mouth, and pink dotted circles add cheeks that follow the stone’s natural texture and bumps. The design uses the rock’s existing shape and surface rather than trying to reshape it.
The rounded stone shape does a lot of the work here by giving the frog its basic form without extra effort. This idea fits well in planters, along garden paths, or on porch steps where the solid green color stands out against dirt and plants. You can swap the dotted cheeks for solid pink or try different eye shapes on flatter stones to make a small collection of animal faces.
Simple Pastel Bird Rocks
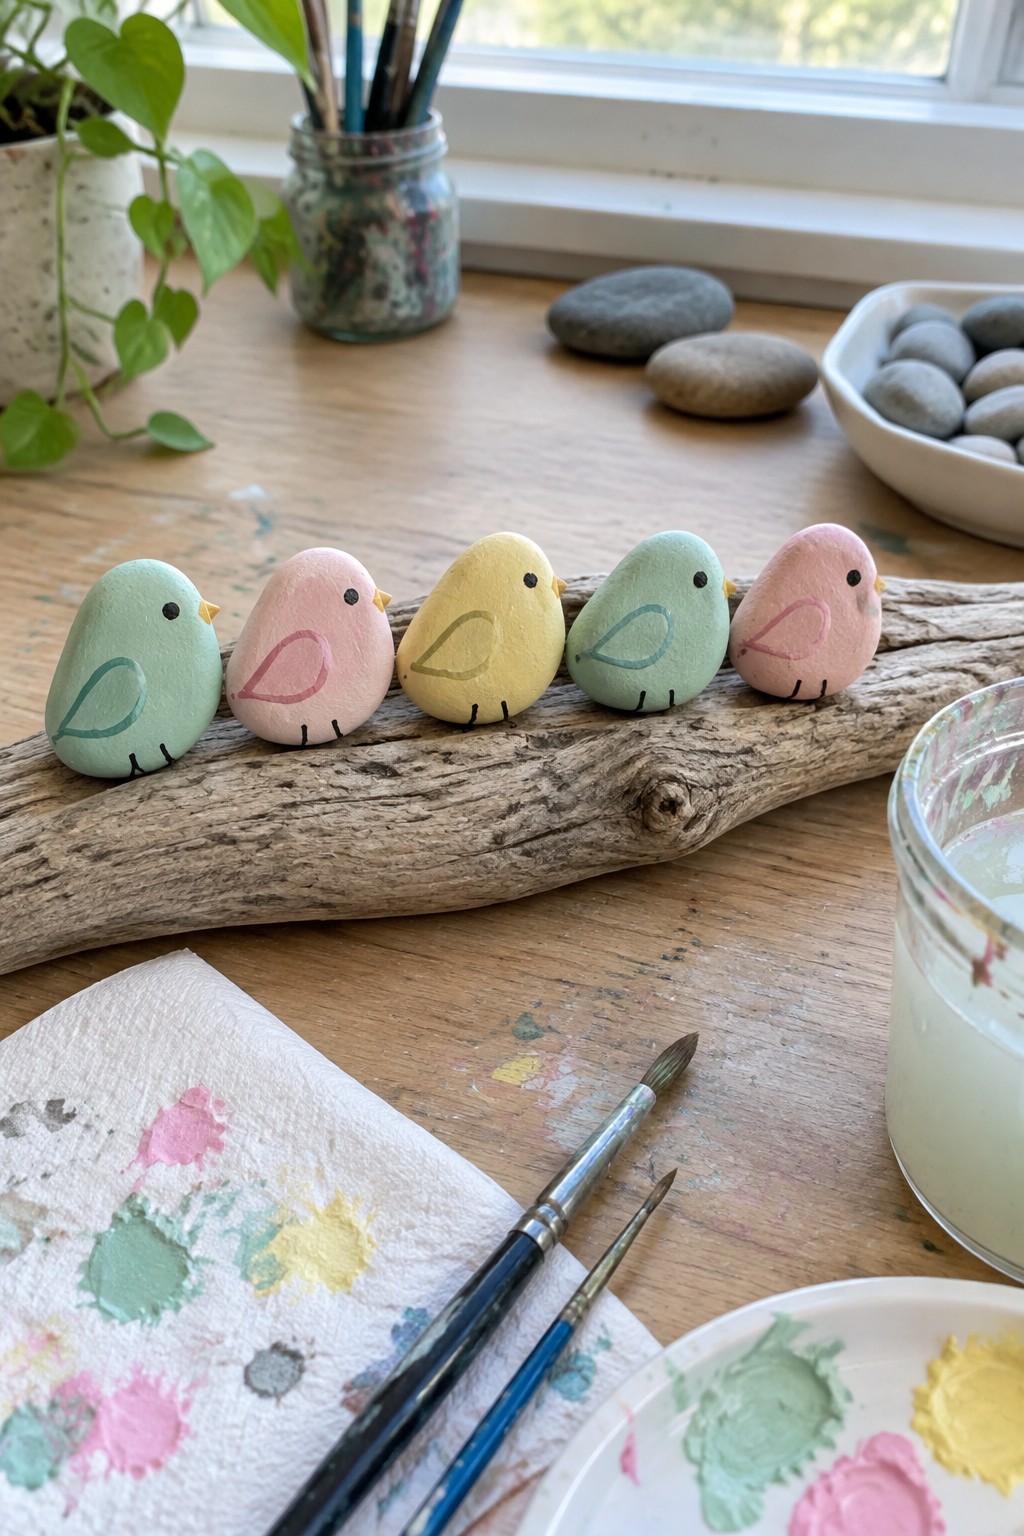
Smooth, rounded stones work well for this animal rock project because their natural oval shape already suggests a bird body. Each rock gets painted in a single pastel color, then finished with a basic wing outline, a small eye dot, a tiny beak, and short leg lines. The design stays minimal with flat color areas and thin black details, which keeps the focus on the stone shape rather than complicated drawing. This approach fits the painted pebble set category and suits first-time painters who want to practice color blocking on a forgiving surface.
What makes this idea useful is how the rounded stone shape handles most of the form, so you only need to add a few quick lines and dots. These bird rocks work especially well in planters, on windowsills, or along a garden path where their small size blends in without taking over. You could easily switch the pastel colors for brighter shades or adjust the wing shape to fit different seasons while using the same stones. The simple outlines also make it straightforward to paint several at once for a small collection or gift.
Daisy Cluster Painted on a Rounded Stone
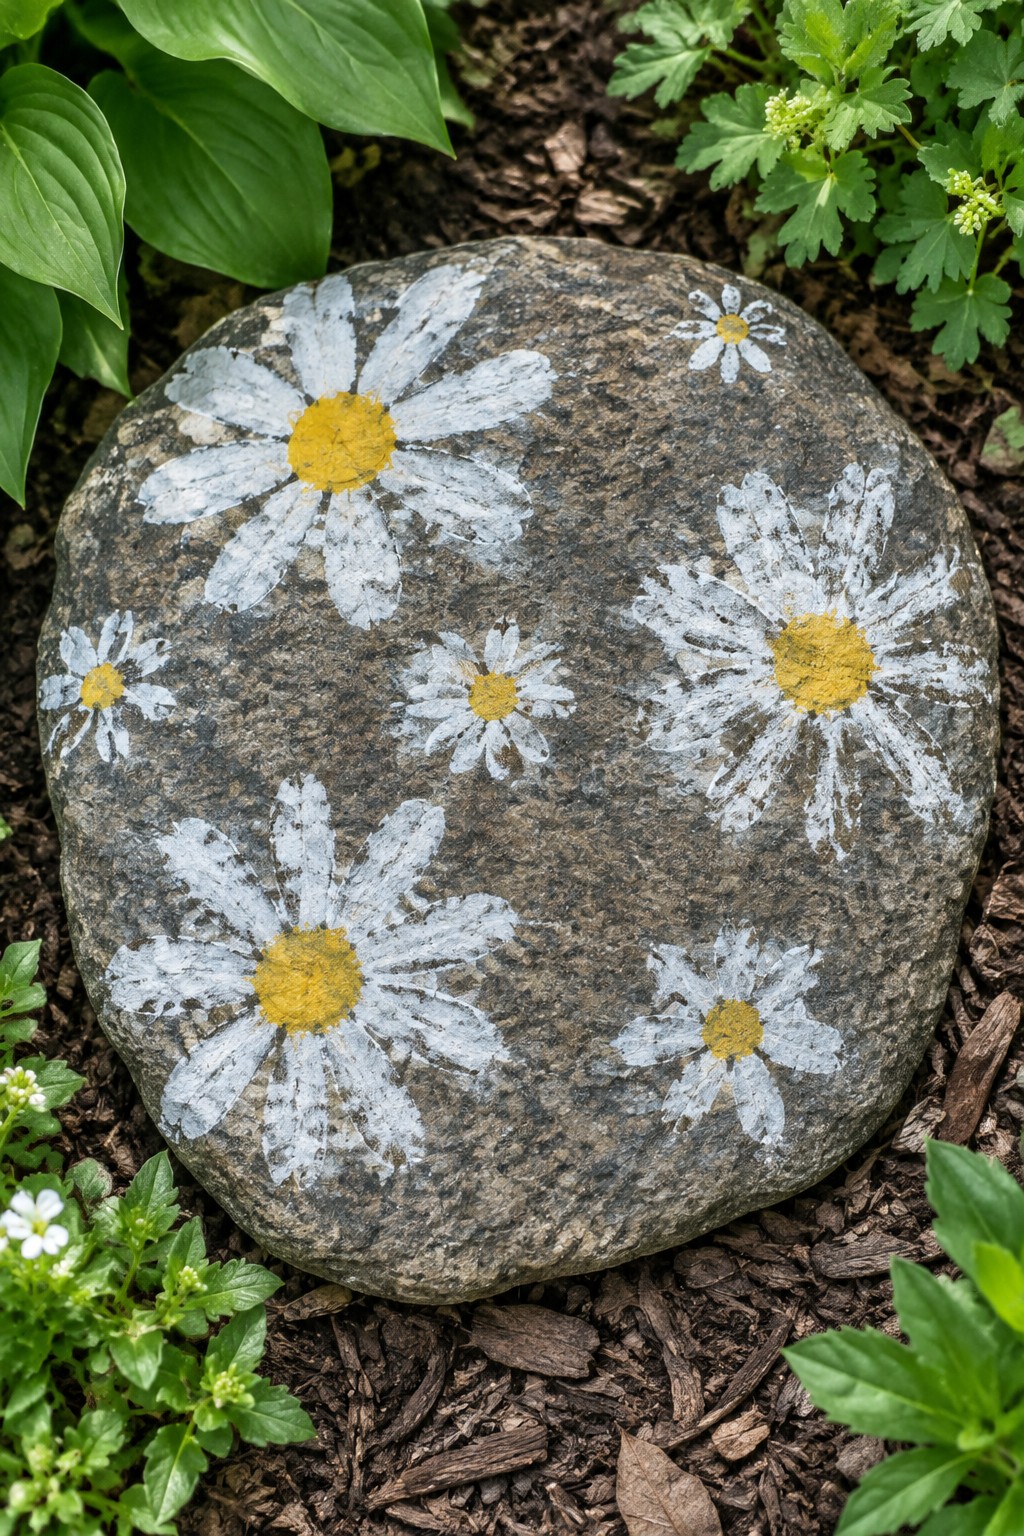
A large rounded garden stone becomes a flower rock when several daisy shapes are painted across its surface in white with yellow centers. The dark natural texture of the stone makes the petals stand out while the curved form lets the flowers sit at different angles without looking crowded. This idea fits the garden decor rock category and uses simple color blocking that first-time painters can follow with basic brushwork.
What makes this idea useful is how the rounded stone shape supports multiple flowers without needing perfect spacing. You could scale the same daisy design down to smaller pebbles for a set or swap the yellow centers for other bright colors to match different plantings. For garden decor this type of painted rock blends into mulch beds or planter edges where the white petals catch the light. The motif could easily be changed into other simple blooms like coneflowers if you want to expand the project.
Sleeping Cat Rock Painting
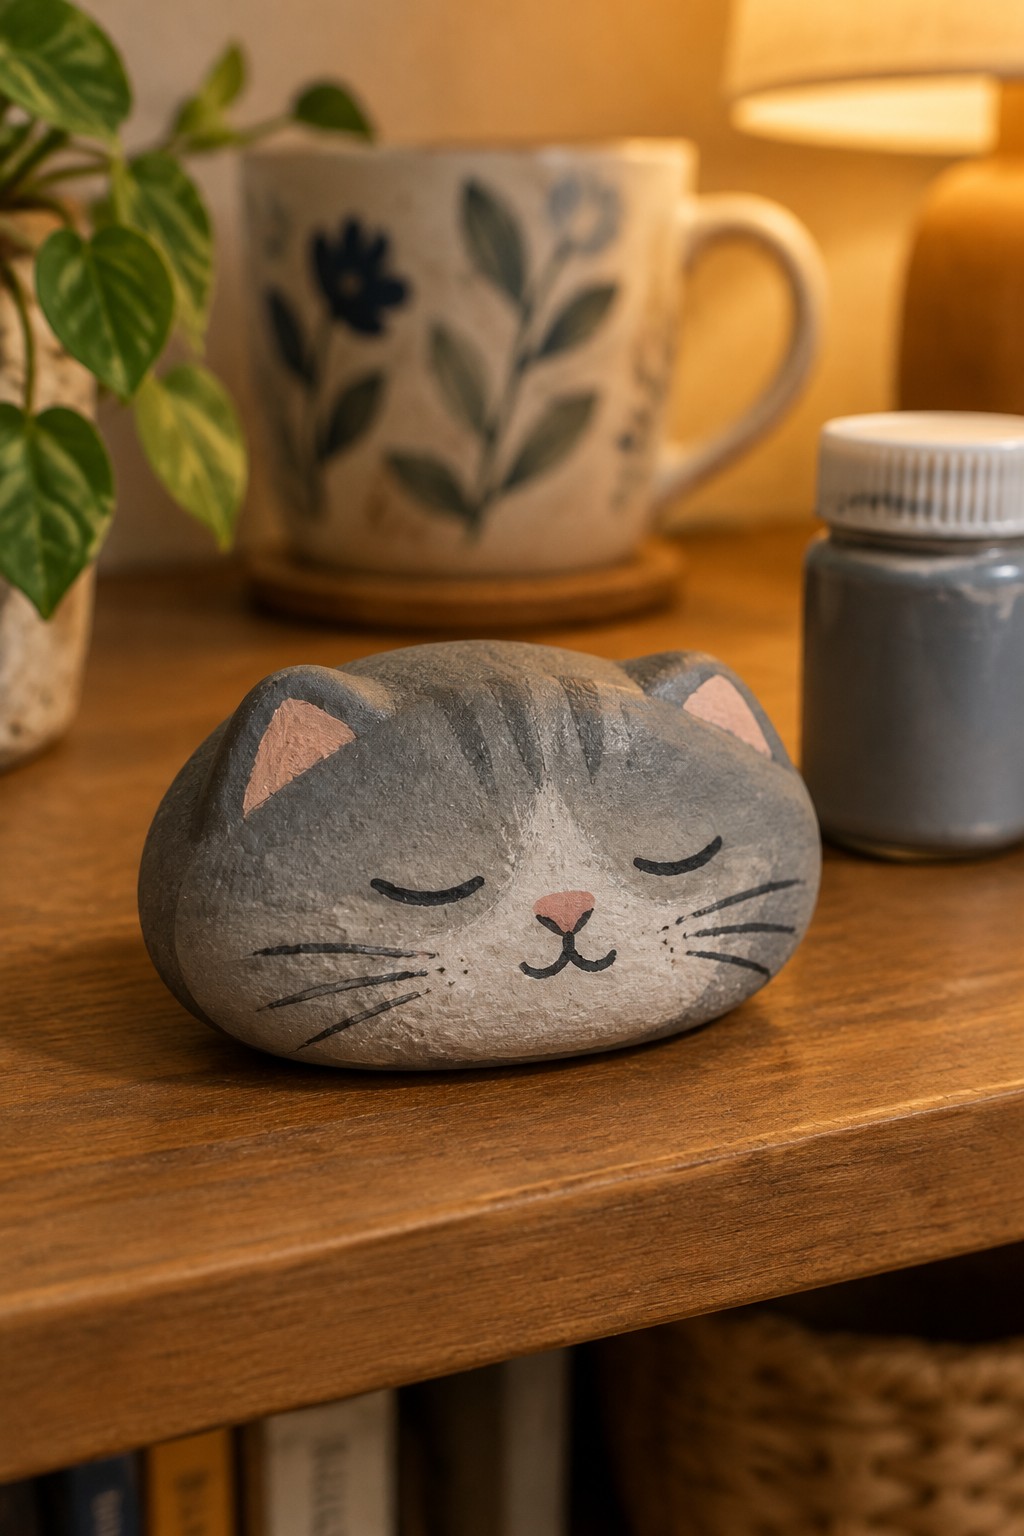
A smooth, oval river rock painted gray with darker stripes creates a sleeping cat face that uses the stone’s rounded form as the head shape. Simple black linework defines closed eyes, whiskers, and a small mouth while pink paint accents the inner ears and nose. The design stays minimal so the natural stone texture remains visible around the painted areas. This approach belongs in the animal rock category and works well because the rock’s curve already suggests a cat’s rounded head.
The rock shape does a lot of the work here since the oval form needs only ears and facial lines to read as a cat. A painted rock like this works especially well as a shelf accent or desk paperweight where its small size fits without taking up space. You could rework the same face onto a flatter stone for a garden border or switch the gray tones to match a real cat’s coloring. The simple color blocking makes this easy to reuse as a template for other animals by changing just the ear placement and whisker angles.
Sunflower Painted Rock for Garden Pots
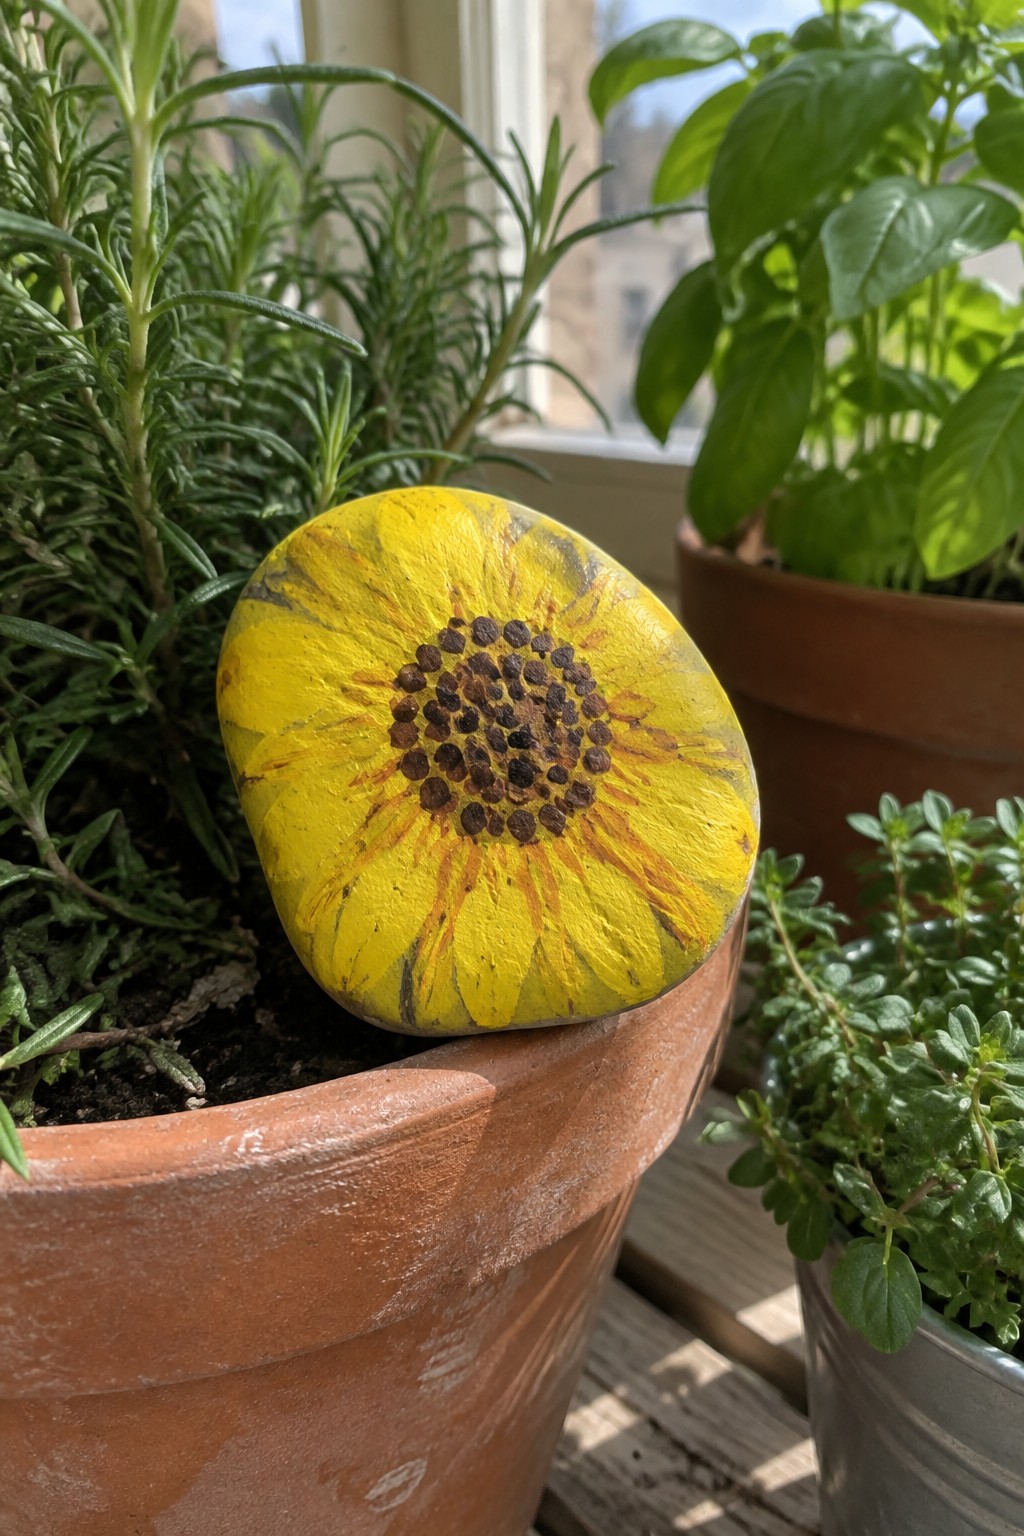
A sunflower design painted on a smooth rounded stone turns the natural curve of the rock into the flower head itself. The center is built from simple brown dots while yellow petals radiate outward with basic brush strokes that follow the stone’s surface. This flower rock sits easily among real plants and needs no extra hardware or stands to look finished.
The rounded stone shape does a lot of the work here since it already suggests a sunflower head. You can scale the same idea down to a smaller pebble by using fewer petals or switch to a flatter rock for a more graphic look. For garden decor this type of painted rock works well on the rim of a pot or tucked into mulch near herbs and stays visible without competing with the plants.
Penguin Family on Oval Pebbles
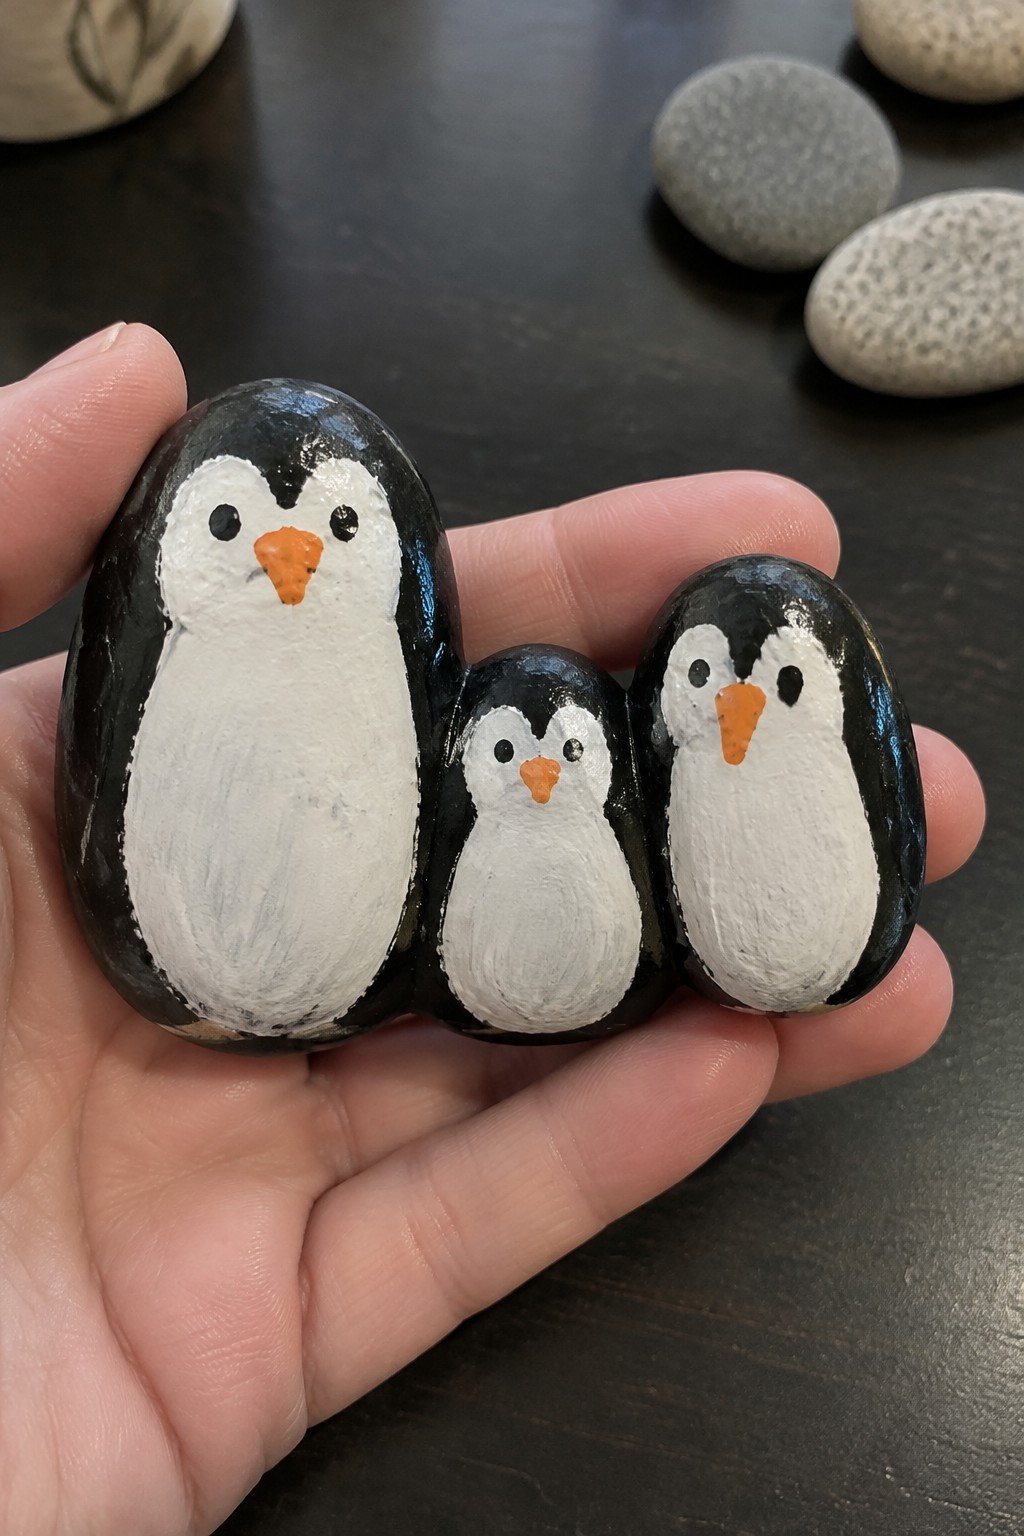
A penguin family works well as a rock painting project when you pick three smooth oval stones in different sizes to match adult and chick proportions. Paint the outer edges and top black while leaving a wide white belly down the center, then add a small orange triangle beak and two black dot eyes on each stone. The rounded stone shape already suggests the body form, so the design relies on simple color blocking rather than detailed drawing. This approach falls into the animal rock category and creates a small matching set instead of separate single pieces.
What makes this idea useful is how the natural rock shape carries the design, letting first-time painters focus on basic areas of color and a few dots. These painted penguins sit nicely on a shelf, windowsill, or inside a planter without taking up much space. You can simplify the idea to one stone or expand it by adding more sizes from the same batch of pebbles. The small scale also makes it easy to finish in one session and keeps the project forgiving if the brushwork stays loose.
Soft Rainbow Gradient on a Half-Painted Stone
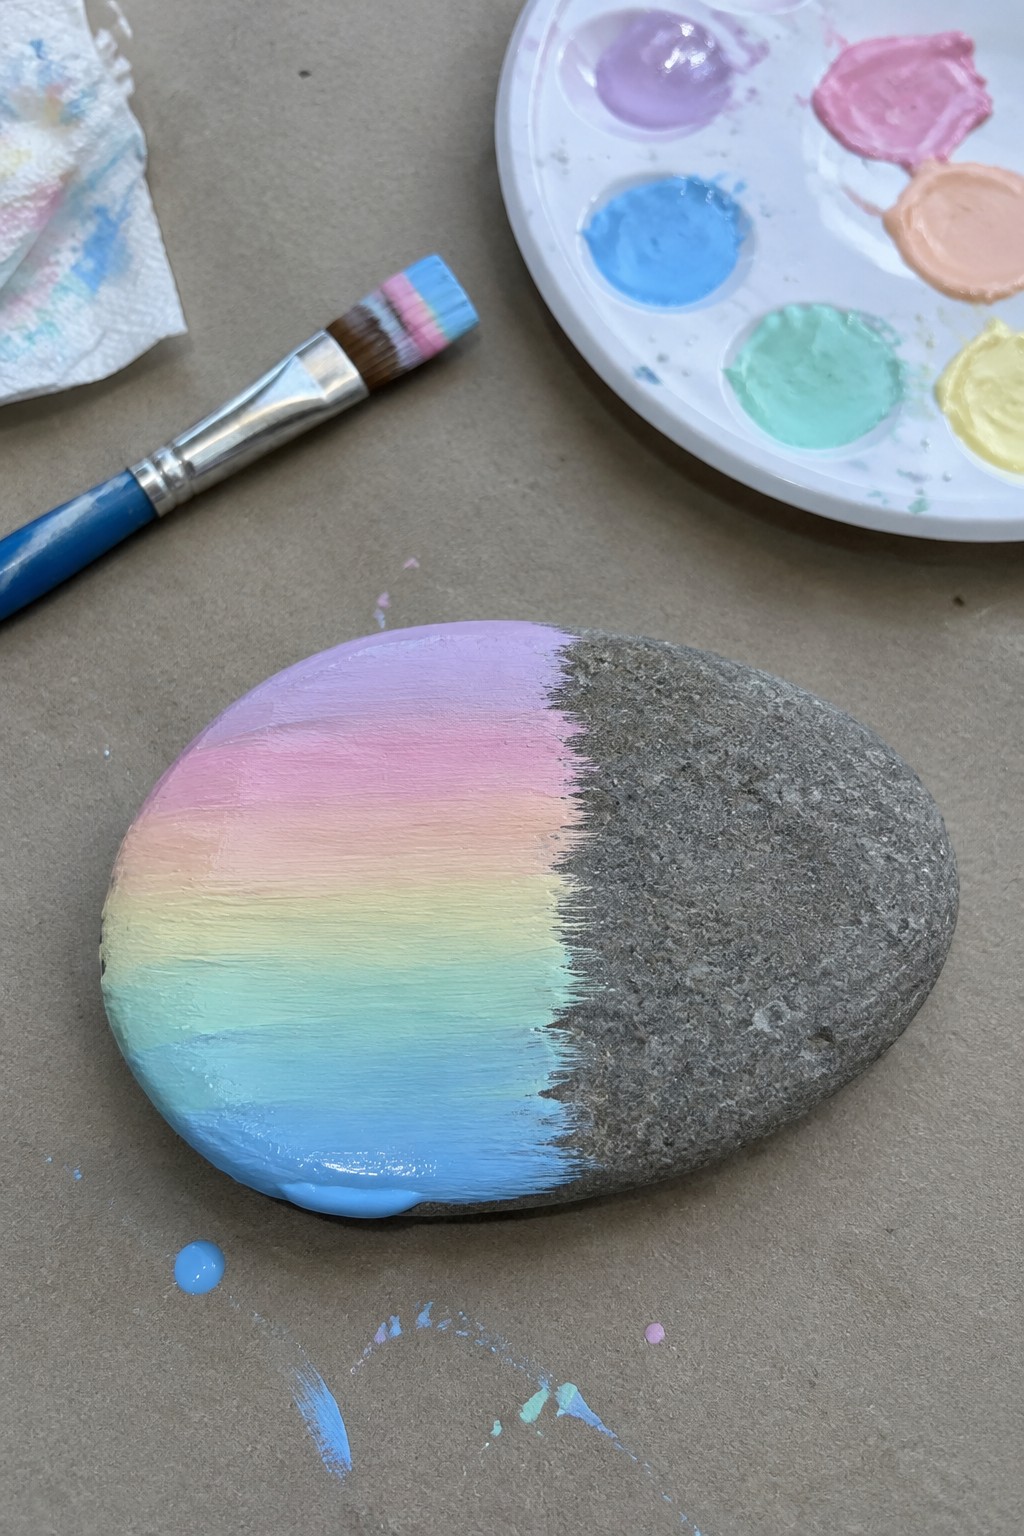
A smooth oval stone makes a good base for this simple color-blocked design. One half receives a soft rainbow gradient in pastel shades that blend from purple at the top through pink, peach, yellow, mint, and blue at the bottom edge. The other half stays bare to show the natural gray texture of the rock. This approach uses basic color placement and loose blending rather than detailed drawing, which keeps the project manageable for someone new to painting on stone.
The rounded shape helps the paint sit evenly without pooling. A painted rock like this works especially well as a windowsill accent, tucked into a planter, or added to a group of plain stones on a shelf. You could repeat the same half-and-half layout with different color sets to match a room or season, or scale the idea down to smaller pebbles for a set. The strong contrast between the painted area and the raw stone makes the finished piece easy to spot in photos.
Smiling Sun on a Rounded Stone
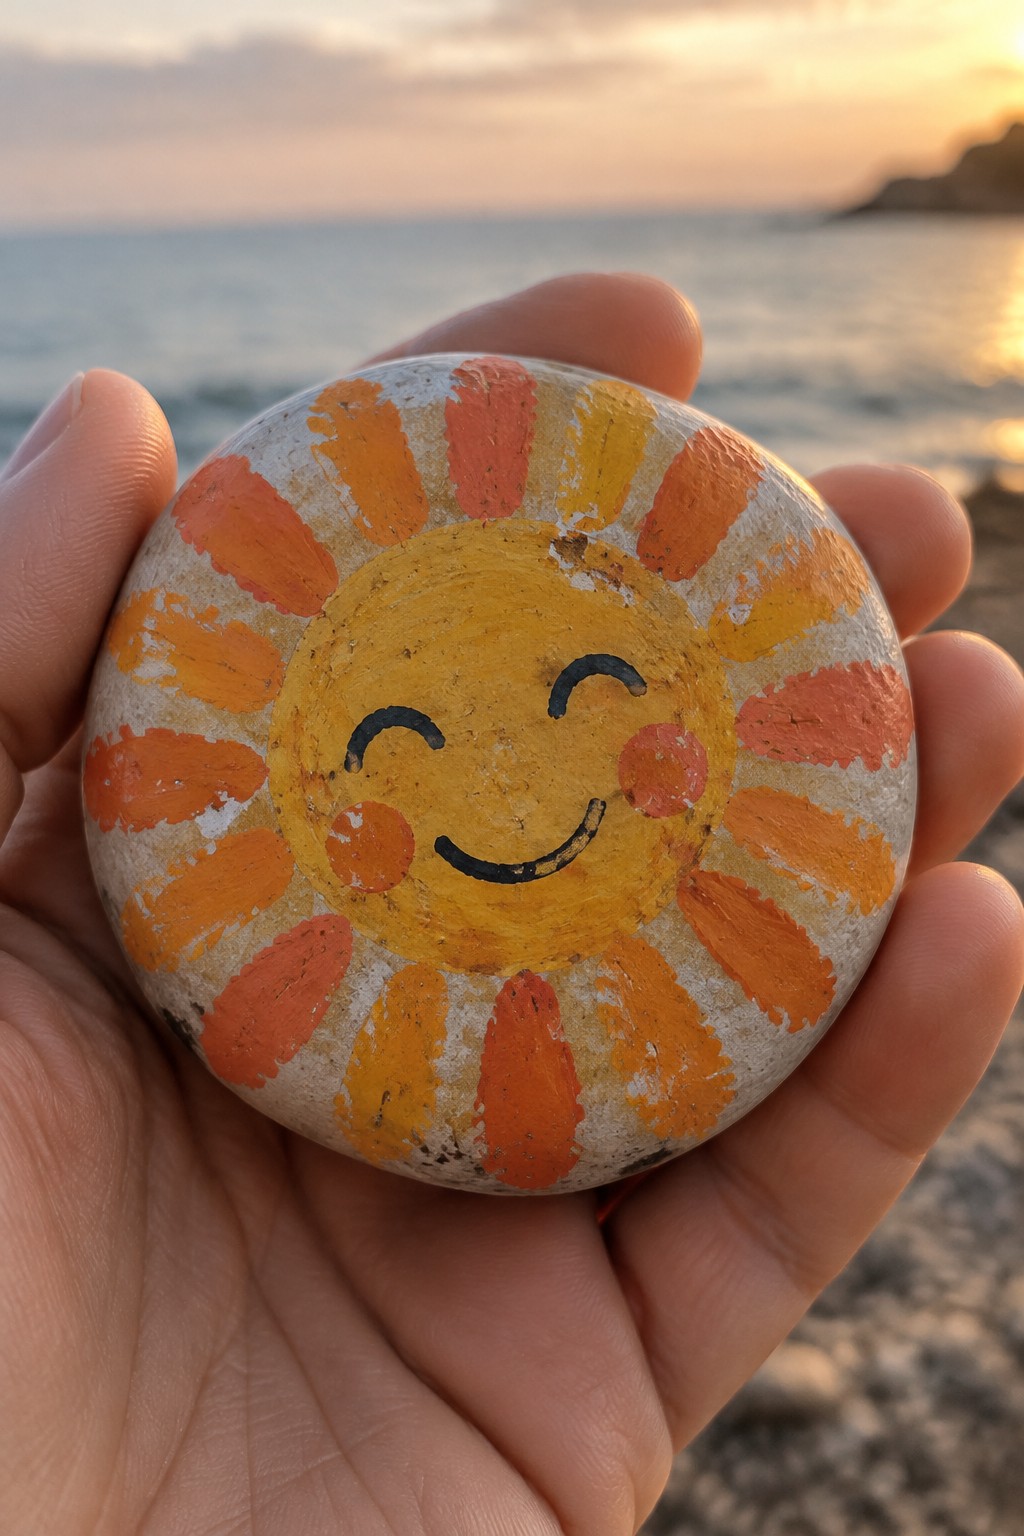
A round beach stone painted with a yellow sun face and short radiating rays in orange and yellow creates a simple decorative rock. The design uses the stone’s natural curved shape to form the sun’s outline, with broad brush strokes for the rays and basic curved lines for the eyes and smile. This approach fits the positive symbol or funny face rock category and works well for first-time painters because it relies on large color areas rather than fine detail.
The rock shape does a lot of the work here since the round form already suggests a sun without needing extra outlining. A painted rock like this works especially well as a small garden accent tucked into a planter or placed along a windowsill. You can easily adapt the idea by changing the ray colors or skipping the face for a more abstract version on a flatter stone. The clear color blocking also makes it a strong candidate for a beginner project that still photographs well for sharing.
Simple Bumblebee Rock Using Stripes and Dots

An oval stone works well for a bumblebee rock because its length matches the insect body shape. Paint wide yellow sections first, then add thick black stripes across the middle and one end. On the rounded yellow section, add two white circles with black centers for eyes, short black lines for antennae, and a curved line for the mouth. This bug rock idea stays beginner-friendly since the design relies on color blocking and basic shapes rather than fine detail work.
What makes this idea useful is how the rock shape already suggests the bee form, so you focus mainly on stripes and the face. A painted rock like this works especially well tucked into flower beds, near lavender, or on a porch step where it blends with garden surroundings. The same approach adapts easily to other oval stones or different bug colors if you want a ladybug or beetle instead. The small scale also makes it simple to paint several at once for a windowsill set.
Watermelon Slice Painted Rock
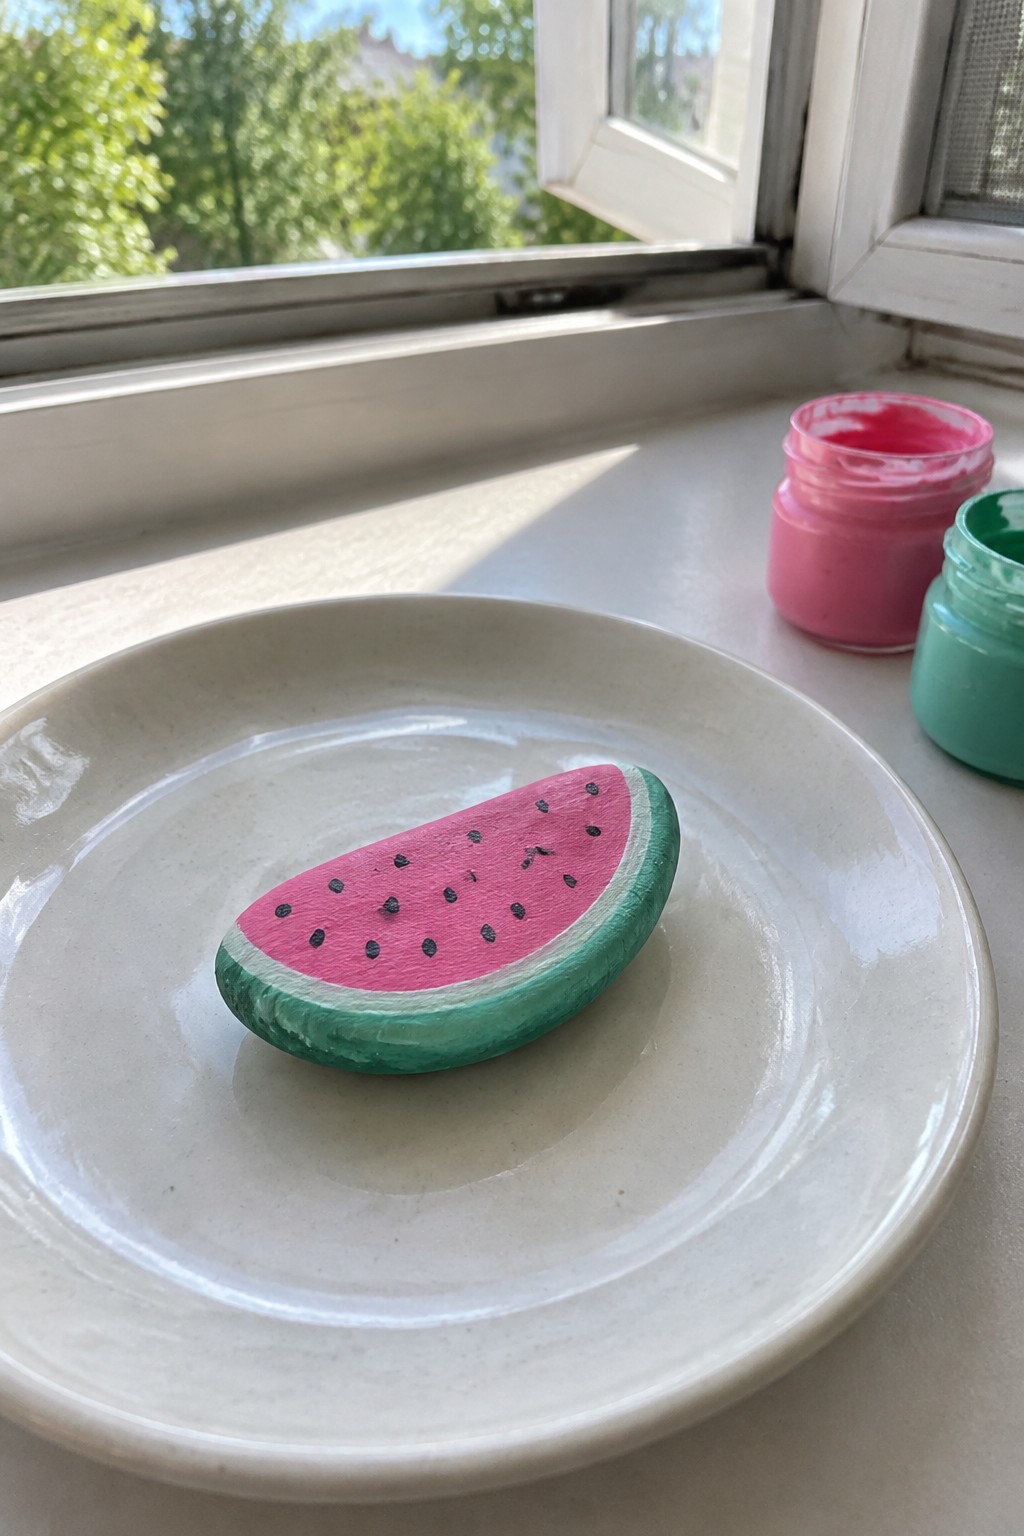
A watermelon slice rock painting uses an oval stone as the base for a fruit design built from three simple color areas: bright pink across the center, a narrow white strip, and green along the curved edge. Black dots scattered over the pink section stand in for seeds and keep the pattern easy to paint. This food-inspired idea works best on smooth, rounded stones that already suggest a cut fruit shape.
What makes this idea useful is how the clear color blocks and basic dot work need only a few paint colors and no advanced brush skills. The small scale lets you tuck the finished rock into a planter, line it along a windowsill, or add it to a set of other fruit designs without taking up much space. You can adapt the same approach to strawberries or oranges by swapping the pink for red or orange and adjusting the seed pattern.
Ladybug Painted Rock for Garden Spots
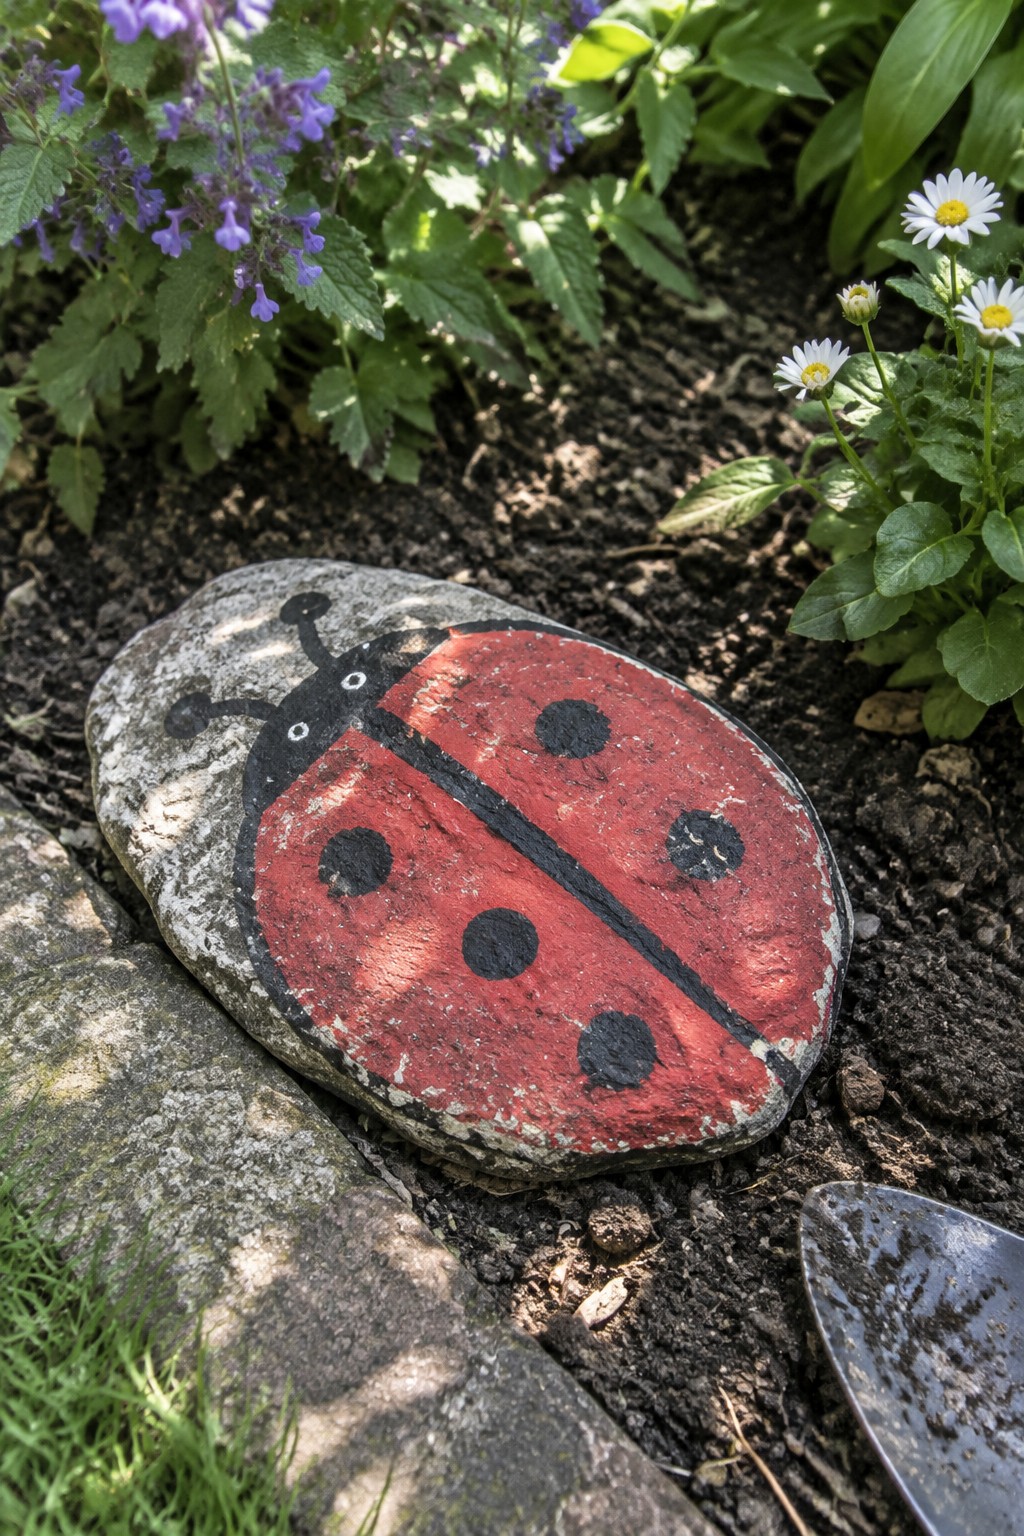
A ladybug design on an oval garden stone uses simple red and black color blocking with round spots and basic antennae shapes. The flat surface lets the body fill most of the rock while the natural curve helps the head and wing line follow the edge. This bug rock works as straightforward garden decor because the bright red stands out against soil and mulch.
The rounded stone shape carries most of the ladybug form so you only need clean outlines and solid spots. You can adapt the same idea by shrinking it onto smaller pebbles for a group or swapping the red for orange on a different rock. For garden decor this type of painted rock sits well in flower beds or along path edges where the motif stays visible without extra framing.
Food-Inspired Painted Rocks
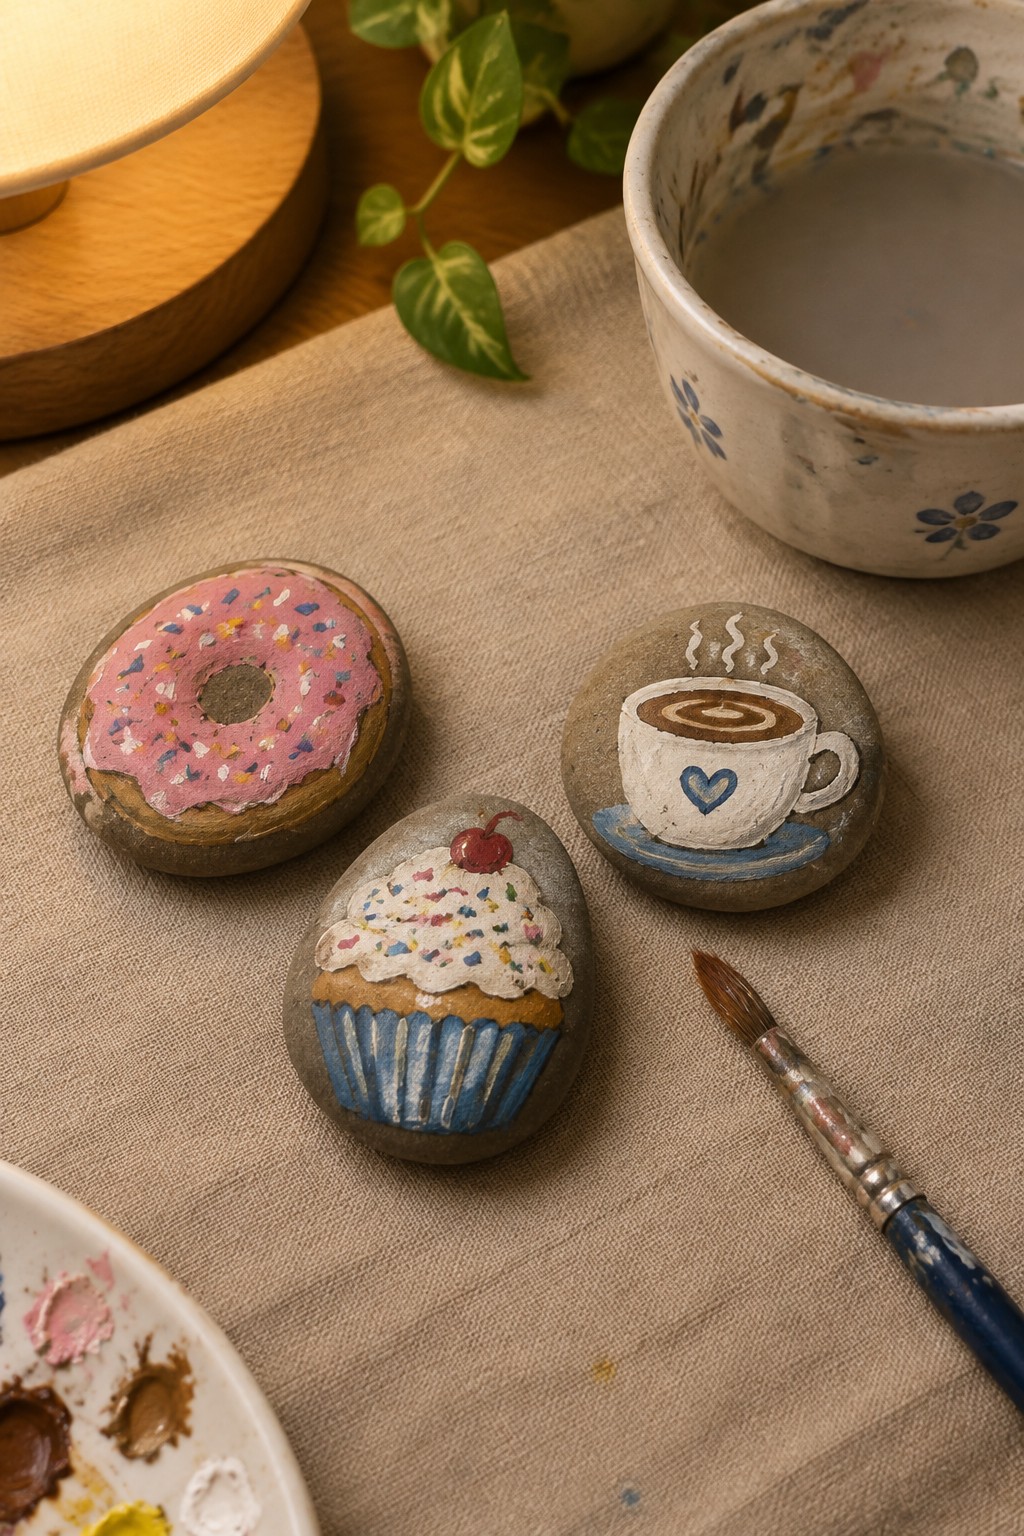
Food-inspired painted rocks use smooth, rounded stones to create simple versions of everyday treats. A flat-topped stone works well for a donut with pink frosting and scattered dots for sprinkles, while an oval stone fits a cupcake by letting the blue wrapper follow the lower curve and an upright stone holds a coffee cup with basic steam lines. The rounded edges and natural texture of the stones help the color areas stay contained without needing perfect circles or straight lines.
What makes this idea useful is how the stone shapes already suggest the forms of pastries and mugs, so the designs rely mainly on color blocking and a few added details. These painted rocks work especially well as small kitchen shelf accents or in a table display, and the same motifs could be simplified to one treat per stone or reworked on longer pebbles for a row of different drinks. The small scale makes this easy to adapt for beginner practice or quick gifts.
Cross and Vine Rock
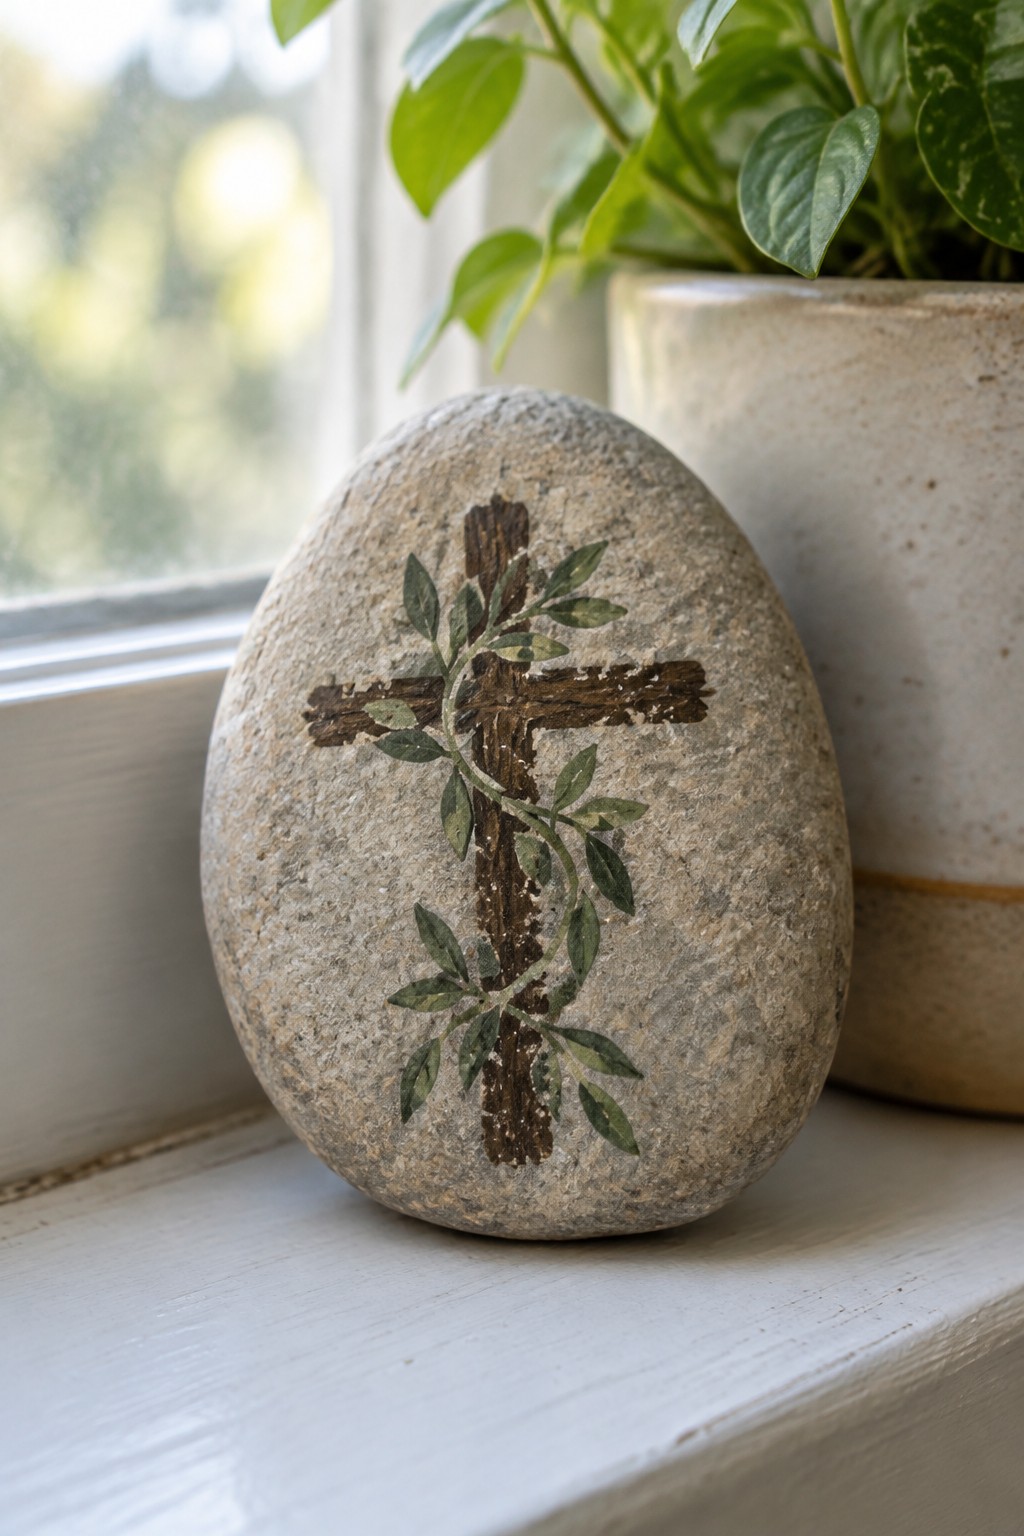
A smooth oval stone gives a steady surface for painting a cross that stays centered and balanced. Use a dark brown or black paint to form the cross shape first, then add thin green vines that curve around the arms with small pointed leaves on either side. The design stays simple because the vines follow the natural curve of the rock instead of needing perfect straight lines.
What makes this idea useful is how well it works as a small garden accent or windowsill piece next to plants. You can swap the green for fall colors or shorten the vines if you want less detail on a smaller stone. The same cross layout can be painted on flatter river rocks for lining a planter or used on a larger stone as a single shelf accent.
Simple Motif Painted Pebbles
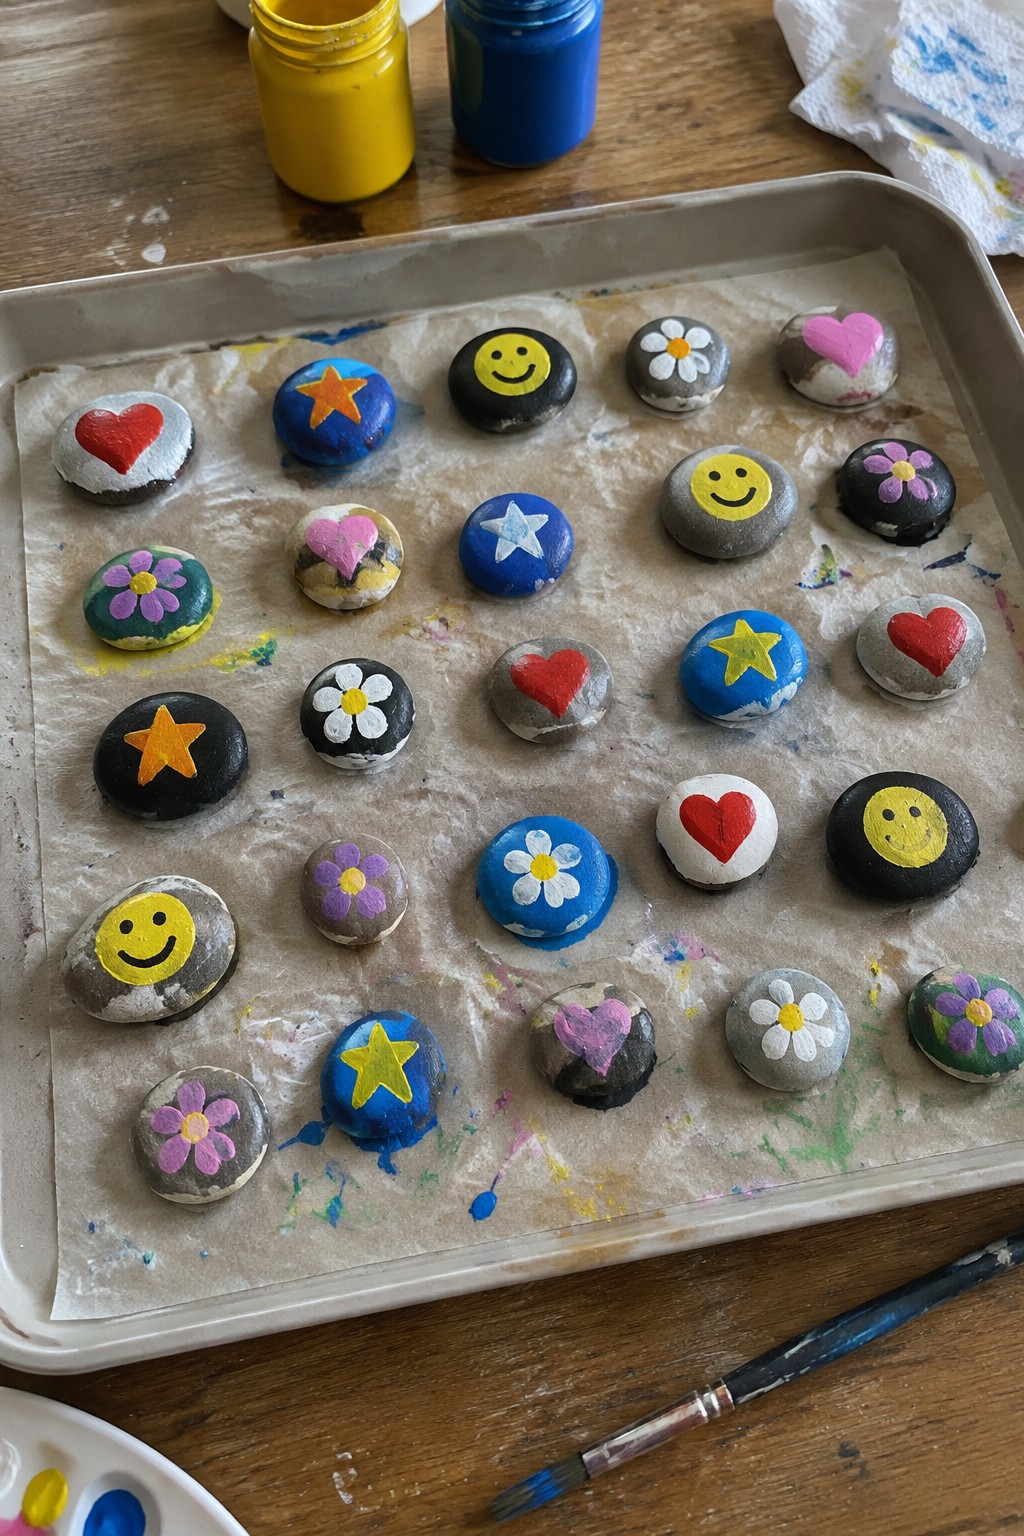
Small rounded stones make a good surface for this project because their compact shape lets basic motifs stand out without extra detail. Painters apply a solid base color first, then add hearts, stars, daisies, or smiley faces in bright contrasting shades so each design reads clearly from a short distance. The approach fits the painted pebble set category and works on any smooth river rock or beach stone that fits comfortably in the hand.
What makes this idea useful is how fast you can finish several rocks once the main colors are mixed. The small scale lets you test different motif placements or swap a star for a heart without wasting paint or time. A painted rock like this works especially well as garden path markers, porch tray accents, or quick gifts since the simple shapes stay readable even when the stones sit among plants or mulch.
Frequently Asked Questions
What supplies do beginners need to get started with rock painting projects?
Start with smooth, flat rocks collected from a beach or bought from a craft store. Use acrylic paints in various colors, fine and medium brushes, a pencil for sketching, and a sealant like Mod Podge or clear acrylic spray. Gather paper towels, a water cup, and a palette. These basics allow you to follow step by step instructions for any of the 19 ideas without extra purchases.
How should rocks be prepared before applying paint?
Wash the rocks thoroughly with soap and water to remove dirt and oils. Let them dry completely for several hours or overnight. If the surface feels rough, lightly sand it with fine grit paper. Apply a base coat of white acrylic paint if your design needs brighter colors. This preparation ensures paint adheres well and lasts longer on your finished pieces.
What paints and techniques work best for detailed designs on rocks?
Acrylic paints are ideal because they dry quickly and offer vibrant colors. Use thin layers for blending and let each dry before adding details. For beginners, practice simple shapes like dots or lines first. Follow the step by step guides in the article by sketching with a pencil, then filling in sections one color at a time. Test colors on paper to match the idea you choose.
How can painted rocks be sealed to protect them outdoors?
Once the paint is fully dry, apply two to three thin coats of outdoor sealant. Spray or brush it on in a well ventilated area and allow drying between coats. This step prevents fading from sun or rain. Place sealed rocks in gardens or paths only after the final coat cures for 24 hours. The article ideas often include this for long lasting results.
What common mistakes should first time painters avoid?
Avoid painting on wet rocks or using too much water in acrylics, which causes colors to run. Do not skip the base coat if needed for light designs. Work in good lighting to prevent uneven lines. If a design goes wrong, let it dry and paint over it rather than trying to fix wet paint. These tips help you complete any of the 19 projects successfully.
