


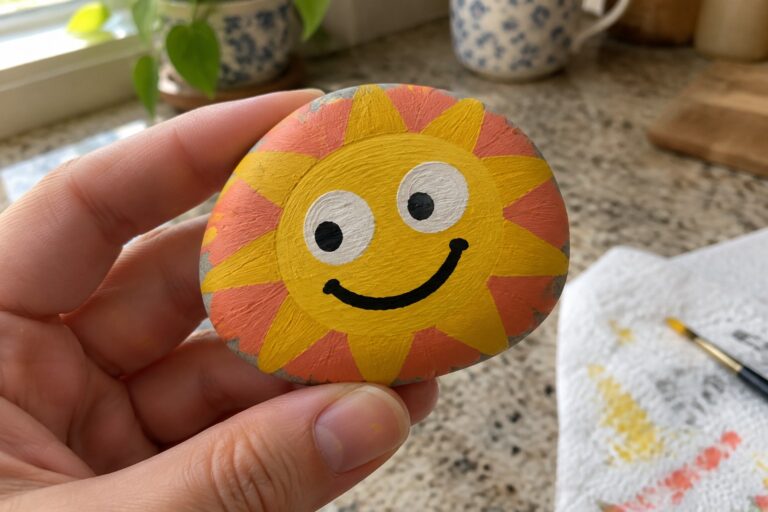
I started painting rocks with my kids a few years ago and it has turned into something we do now and then on weekends.
Large simple shapes have always worked better for them than trying to add lots of tiny details.
I put together these 19 ideas because they stick to basic forms that do not take long to finish.
My kids like them because they can pick their own colors and still end up with something they recognize.
It is an easy activity to set up with whatever paints and rocks we have around the house.
Smiling Sun Rock
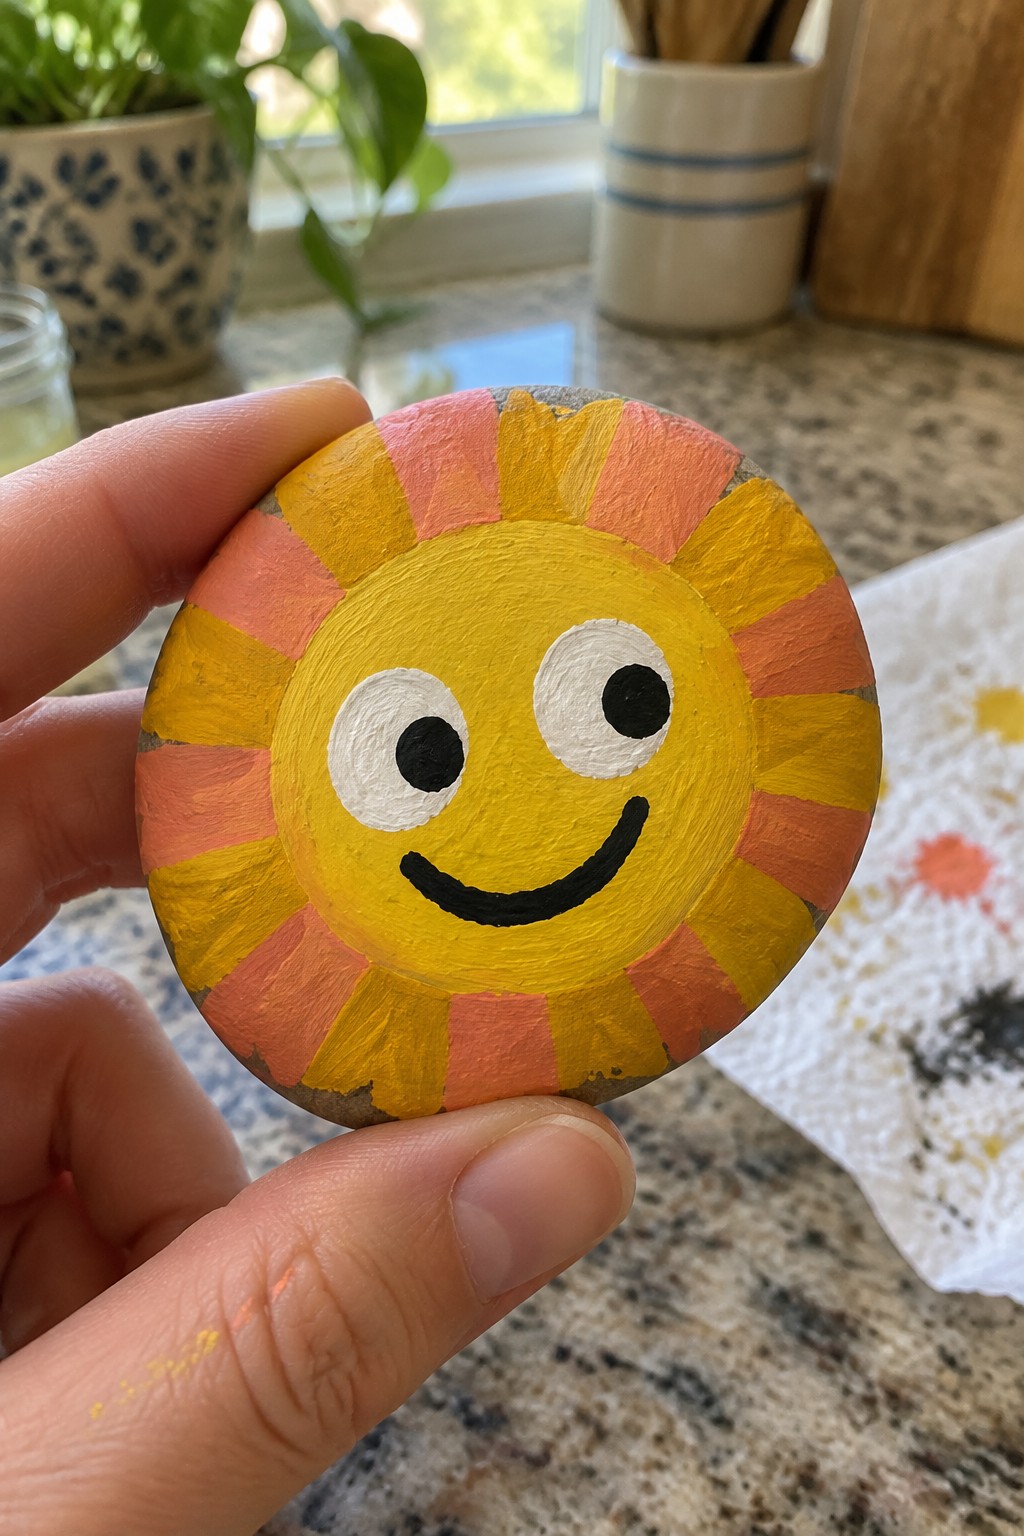
A round stone works well for this sun design because its shape already suggests the central circle of a sun. The face uses a solid yellow base with two large white circles for eyes and a simple black curve for the mouth, keeping every element bold and easy to paint. Thick wedges in yellow, orange, and pink radiate outward to form the rays, using the rock’s curved surface to guide the stripes without needing precise lines.
What makes this idea useful is how the large wedge shapes let kids cover the rock quickly while still creating a clear sun pattern. The same round stone and color-blocking approach could swap the smile for a different expression or shift the ray colors to match a different season. This painted rock fits nicely in a planter, on a windowsill, or as part of a small collection for a table display, and the simple shapes make it straightforward to repeat on stones of different sizes.
Striped Color Band Stone

A smooth, rounded stone works well for this project because its natural curve lets broad bands of color wrap across the surface without needing straight lines or precise edges. The design uses three simple horizontal bands in soft purple, pink, and mint green, with each stripe following the rock’s shape rather than fighting it. This approach keeps the focus on large color areas instead of small details, which matches the goal of using simple shapes on big rocks.
The rock shape does a lot of the work here since the rounded form turns flat stripes into gentle arcs that feel balanced without extra effort. A painted rock like this works especially well as a shelf accent or tucked into a planter where the soft colors can stand out against soil or wood. The same idea could be reworked by swapping in different color combinations or adding one more band if the stone is larger. For kids, the wide stripes make it easy to cover the surface quickly while still ending up with a clean, finished look.
Daisy Flower Rock Using Simple Shapes
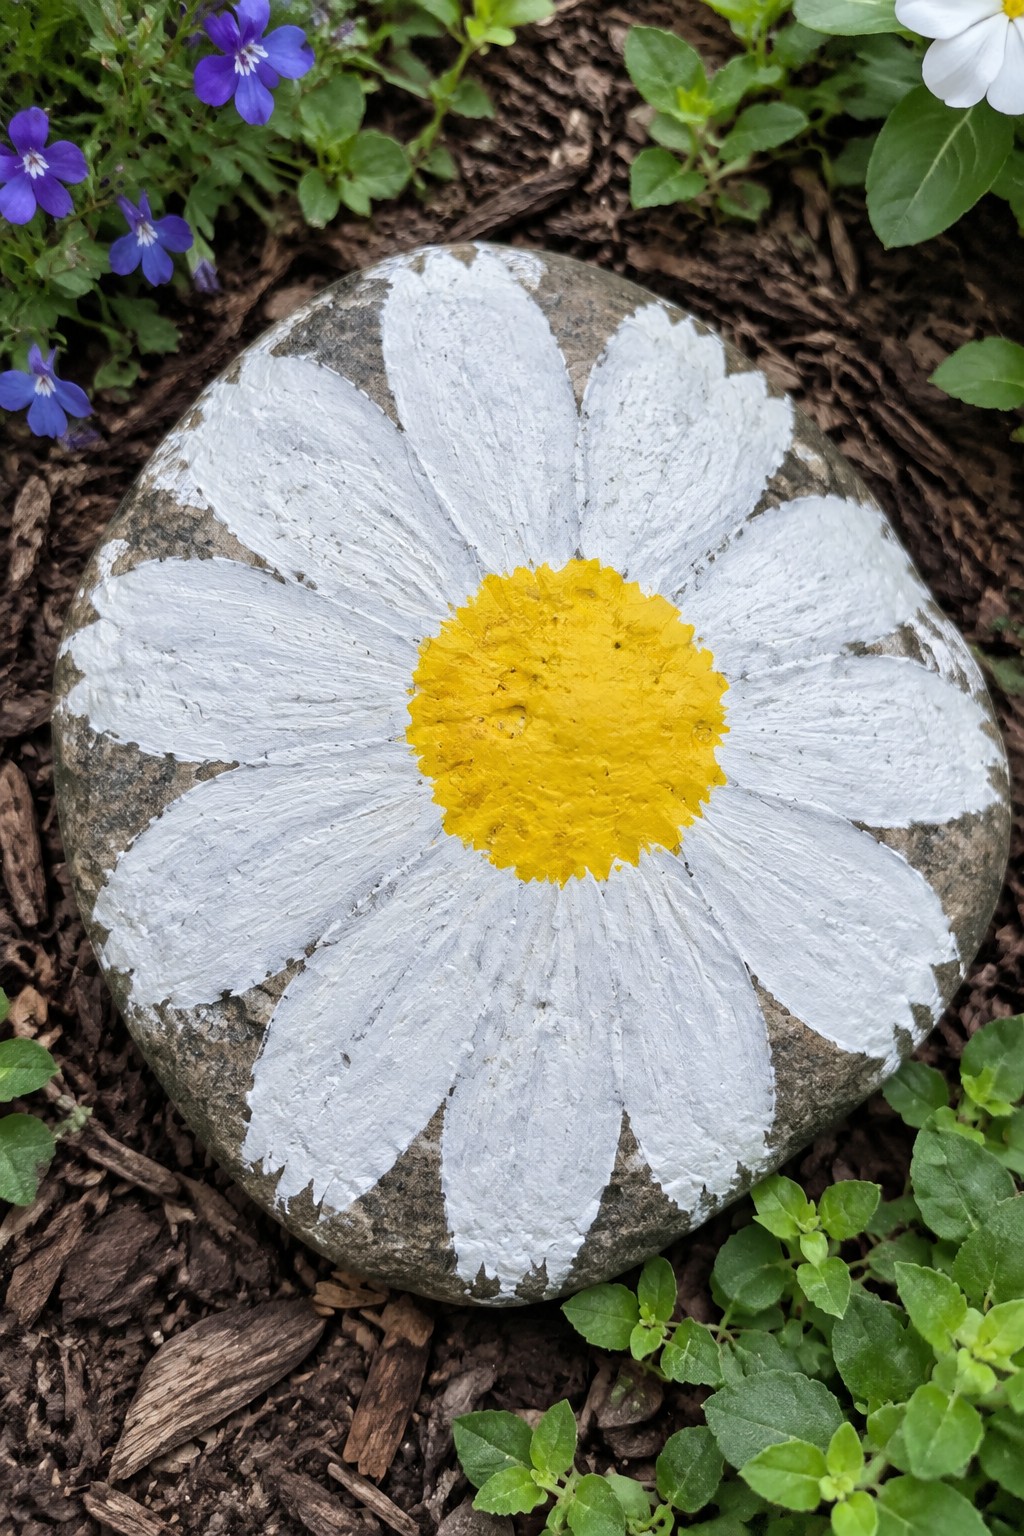
A daisy rock uses a rounded garden stone as the base for large white petals that radiate from a solid yellow center. The design stays effective because the petals are blocked in as broad shapes that follow the stone’s natural curve, with the rough texture left visible between the painted areas. This fits the flower rock category and serves as garden decor that can sit directly in soil or mulch.
The rock shape does a lot of the work here since the round form already suggests a flower head. You could swap the yellow center for orange or leave some petals partially unpainted to create variation across a set of stones. For garden decor, this type of painted rock tucks easily into flower beds or along paths where the bold color blocks remain clear from a few feet away. The same large petal layout can be scaled down onto smaller stones for a matching collection.
Two-Tone Heart on a Rounded Stone
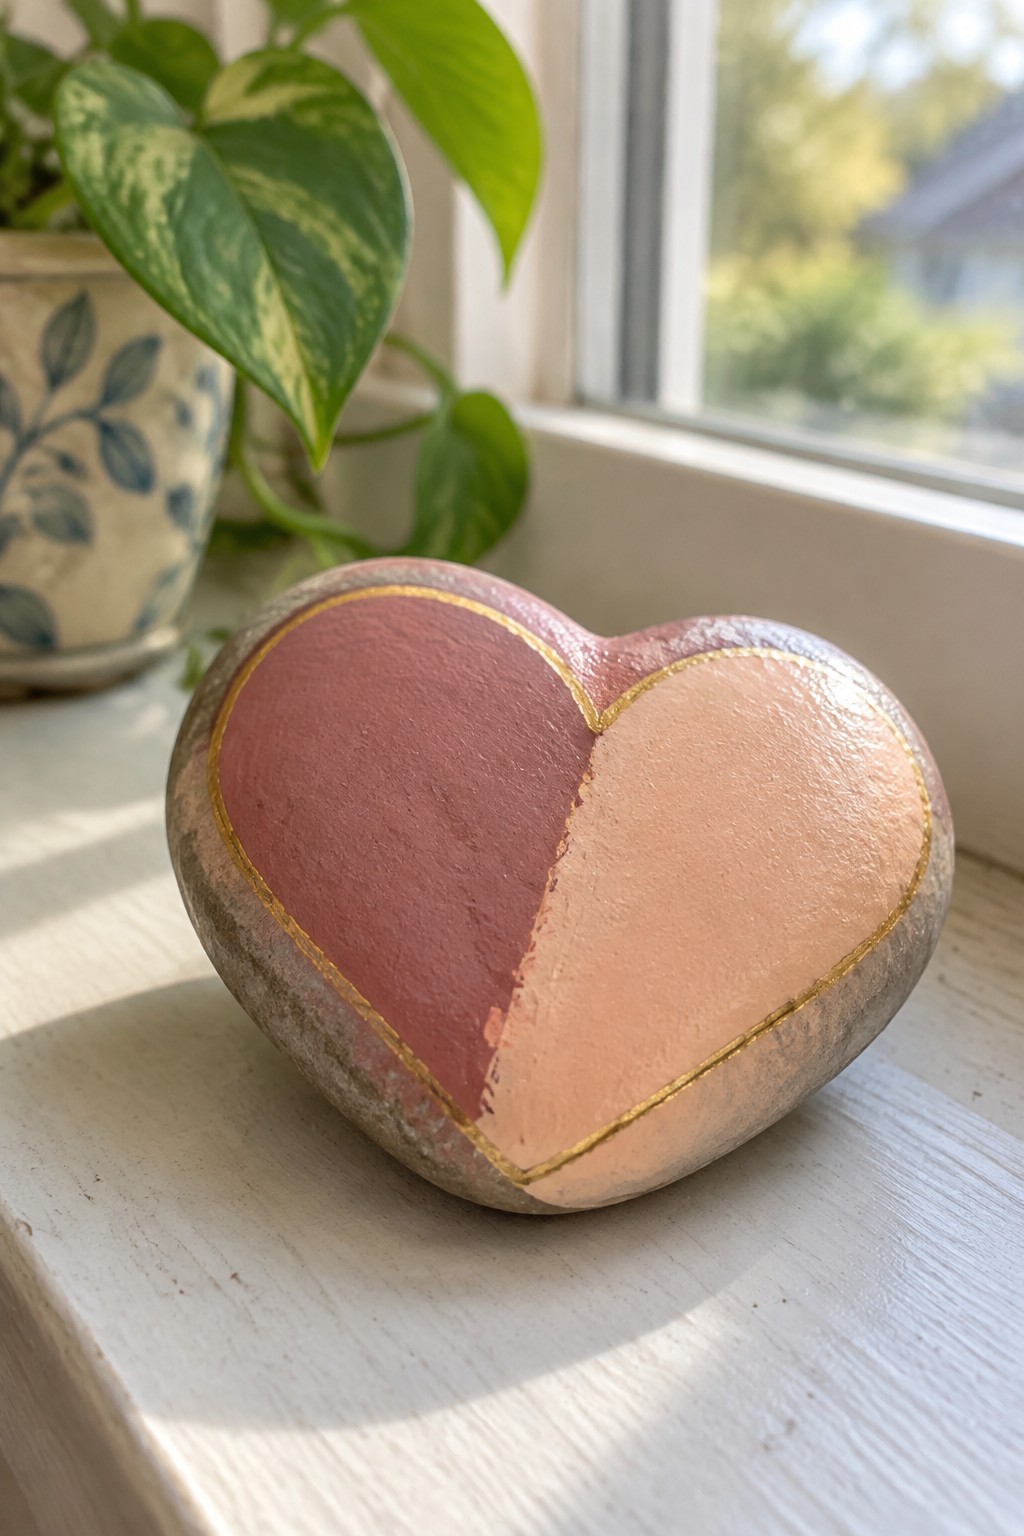
A heart-shaped stone painted in two solid colors creates a clean design using one large shape. The rock is divided down the middle with one half in a deeper rose shade and the other in a lighter peach tone, and a narrow gold line traces the outer edge and the center split. This keeps the project simple by relying on broad color areas rather than small details or patterns. The idea works as a positive symbol rock that fits the large-shape approach for kids.
The natural heart form already gives the project its main shape, so the painting stays limited to two big sections and one outline. Kids can swap the pink tones for any two colors they have on hand or change the rock to a different large form like an oval or circle while keeping the same color-block method. The design works well as a shelf accent, a small gift, or a garden marker because the bold split makes it visible without extra decoration. It is easy to scale up or down depending on the size of stone available.
Watermelon Slice Rock
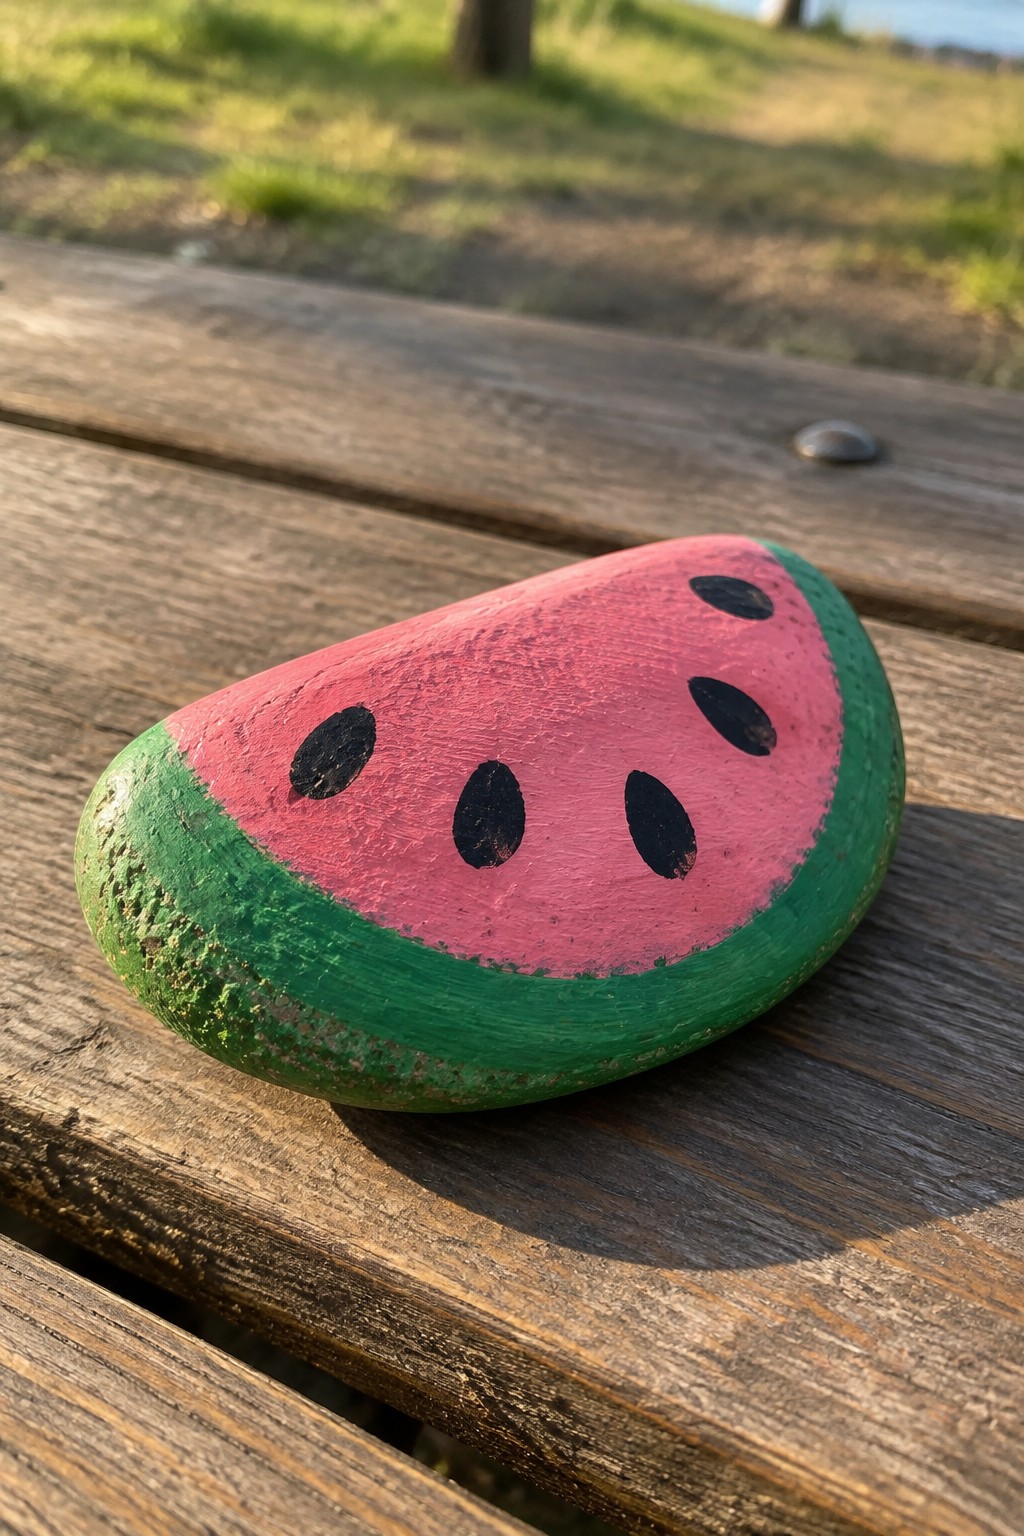
A smooth oval rock works as the base for this fruit design by getting a curved green band painted along one long edge to stand in for the rind. The remaining surface is filled with a solid pink area and finished with five or six simple black ovals scattered across it as seeds. The natural rounded form of the stone already suggests a cut fruit slice, so only large color blocks and basic seed shapes are needed to complete the look.
The rock shape does a lot of the work here by giving the slice its curve without extra drawing. This idea works especially well as a summer table accent, tucked into a planter, or placed along a garden path with other fruit rocks. The same large-shape approach could be reused for other simple fruits by changing only the color blocks and adding a few matching details like leaves or stems.
Ladybug Rock Using Large Black Spots
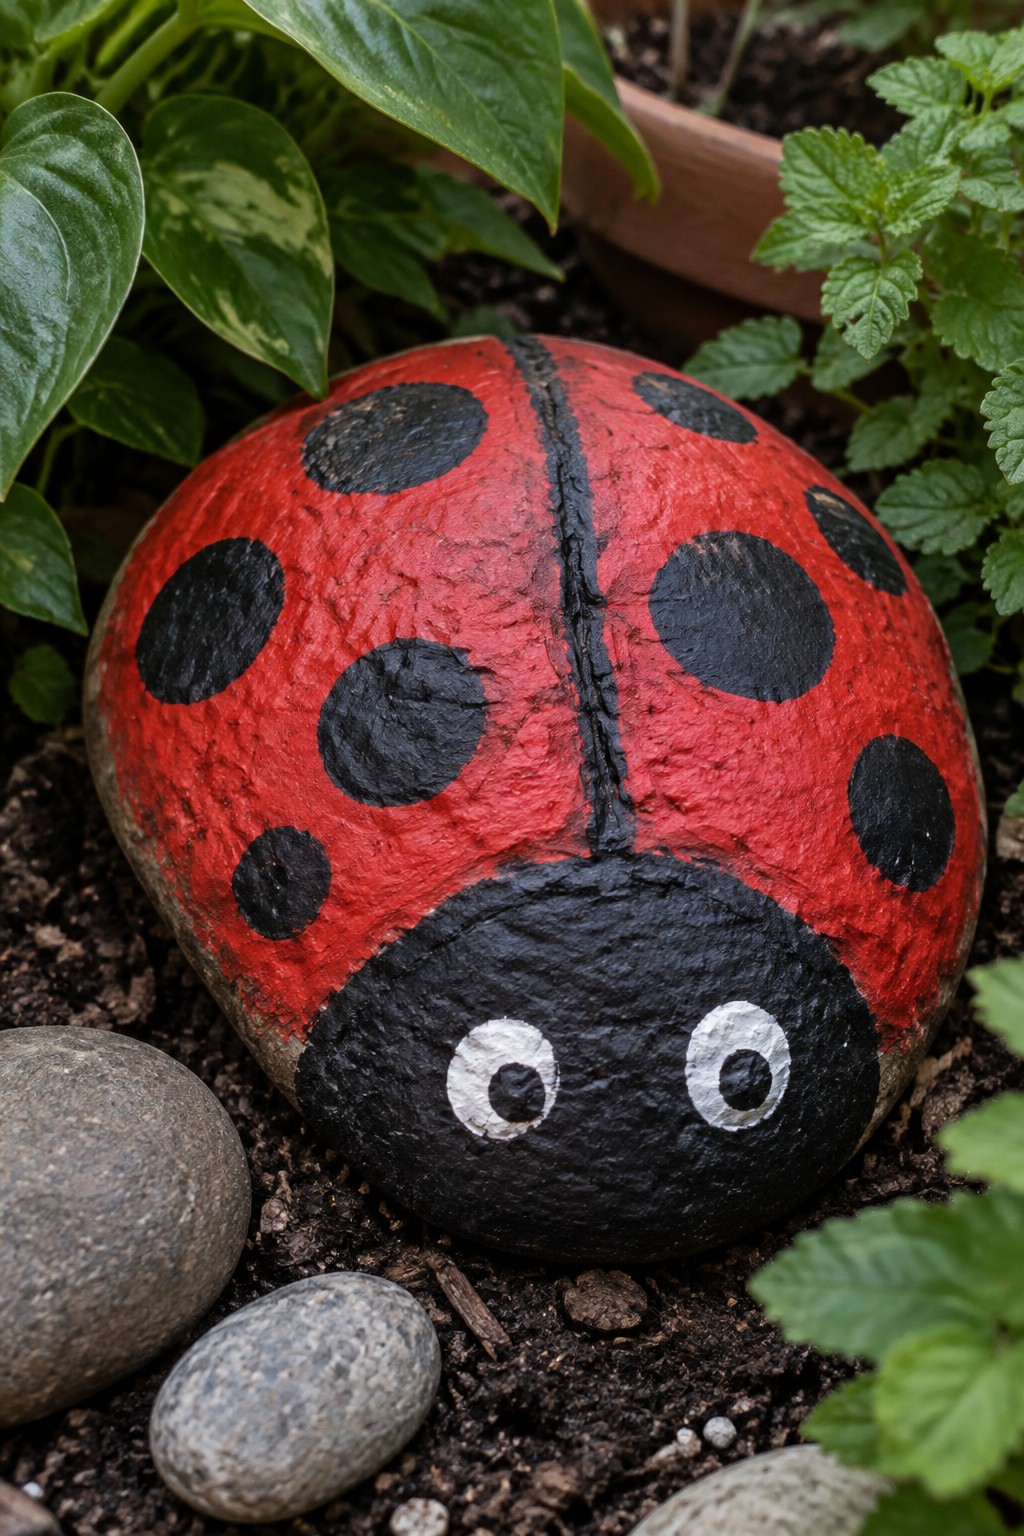
A rounded stone painted red with oversized black circles forms a simple ladybug design that follows the natural curve of the rock. The head section is blocked off in black and finished with two large white circles containing smaller black dots for eyes. This bug rock idea relies on basic color blocking and big dot shapes rather than small details. The design fits the large simple shapes approach because the spots and head area use bold outlines that stay readable even on an uneven surface.
What makes this idea useful is how the same spot pattern can be scaled up or down depending on the size of the stone available. It works especially well as garden path markers or accents in flower beds where the bright red shows up against soil and mulch. The rounded form does most of the work here since the curve already suggests the ladybug shape without extra painting. Kids can swap the spot count or try different bug colors while keeping the same simple layout.
Chick Rocks Using Basic Shapes
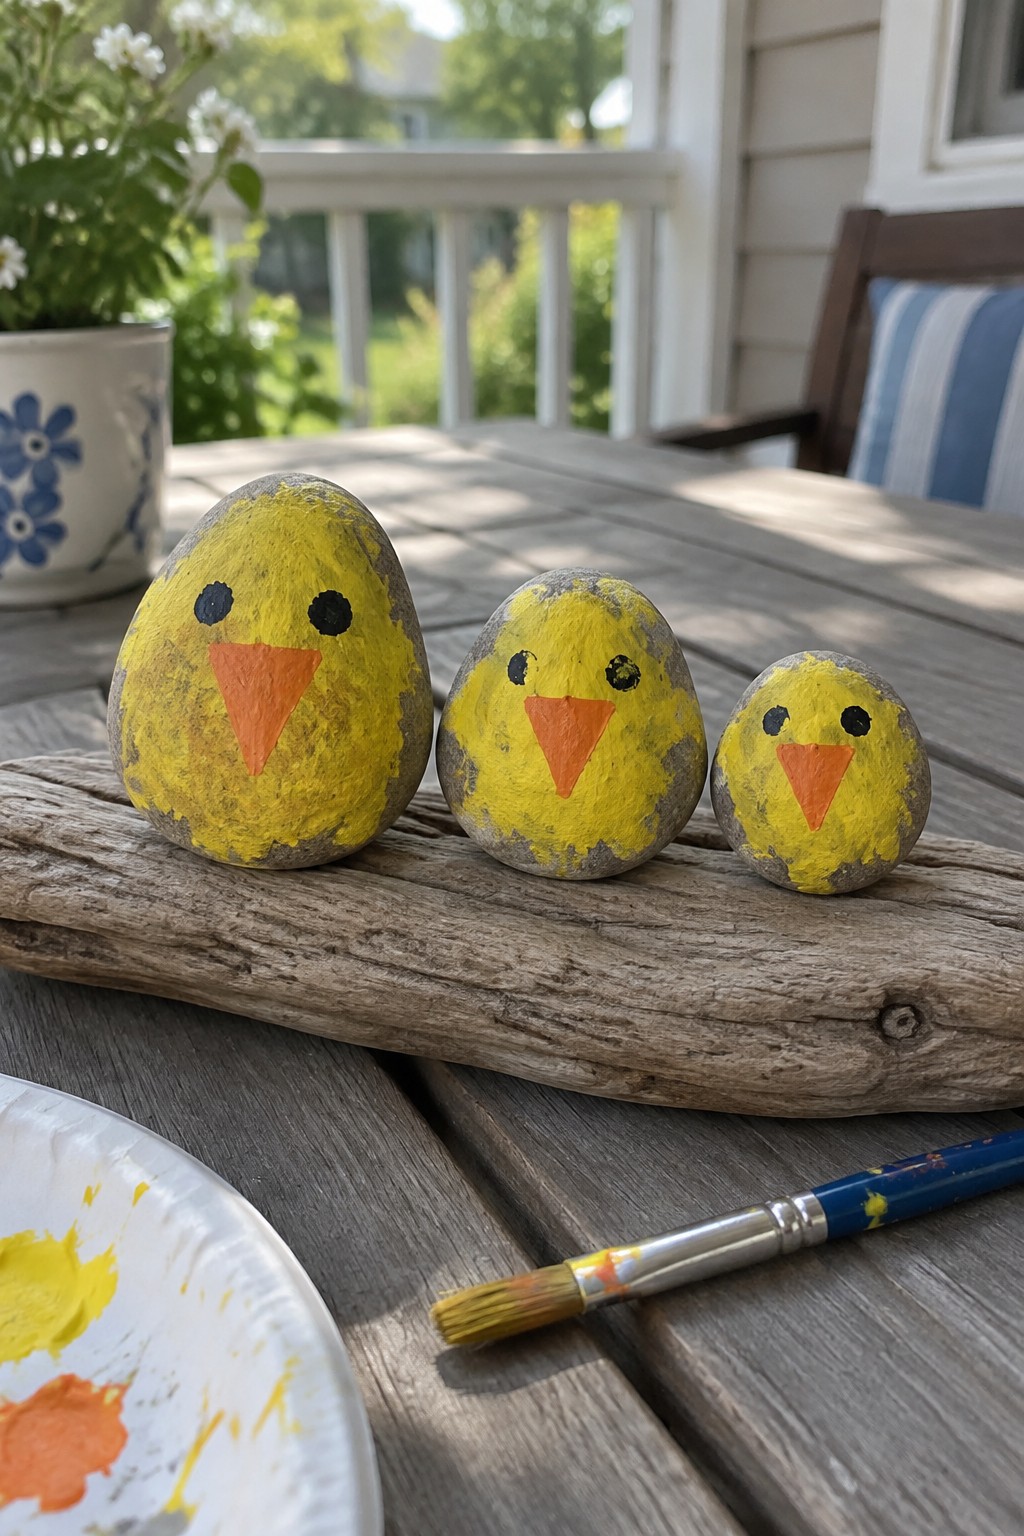
Oval rocks painted solid yellow work as the base for simple chick designs made with just two black dots and one orange triangle per stone. The rounded edges and smooth surfaces of the rocks naturally suggest egg shapes, so the color blocking stays clean without needing extra outlines or shading. This approach fits the animal rock category and keeps the whole project focused on large, easy-to-dill shapes that read clearly from a distance.
What makes this idea useful is how fast the same three shapes can be repeated across a group of rocks for a matching set. These painted stones sit nicely on a porch step, in a planter, or along a windowsill without taking up much space. The design adapts easily by swapping the yellow for other bright colors or stretching the same triangle-and-dot layout into different bird faces on longer stones. The large rock surface also gives kids room to practice filling areas evenly before moving on to smaller details.
Simple House Painted on a Rounded Stone
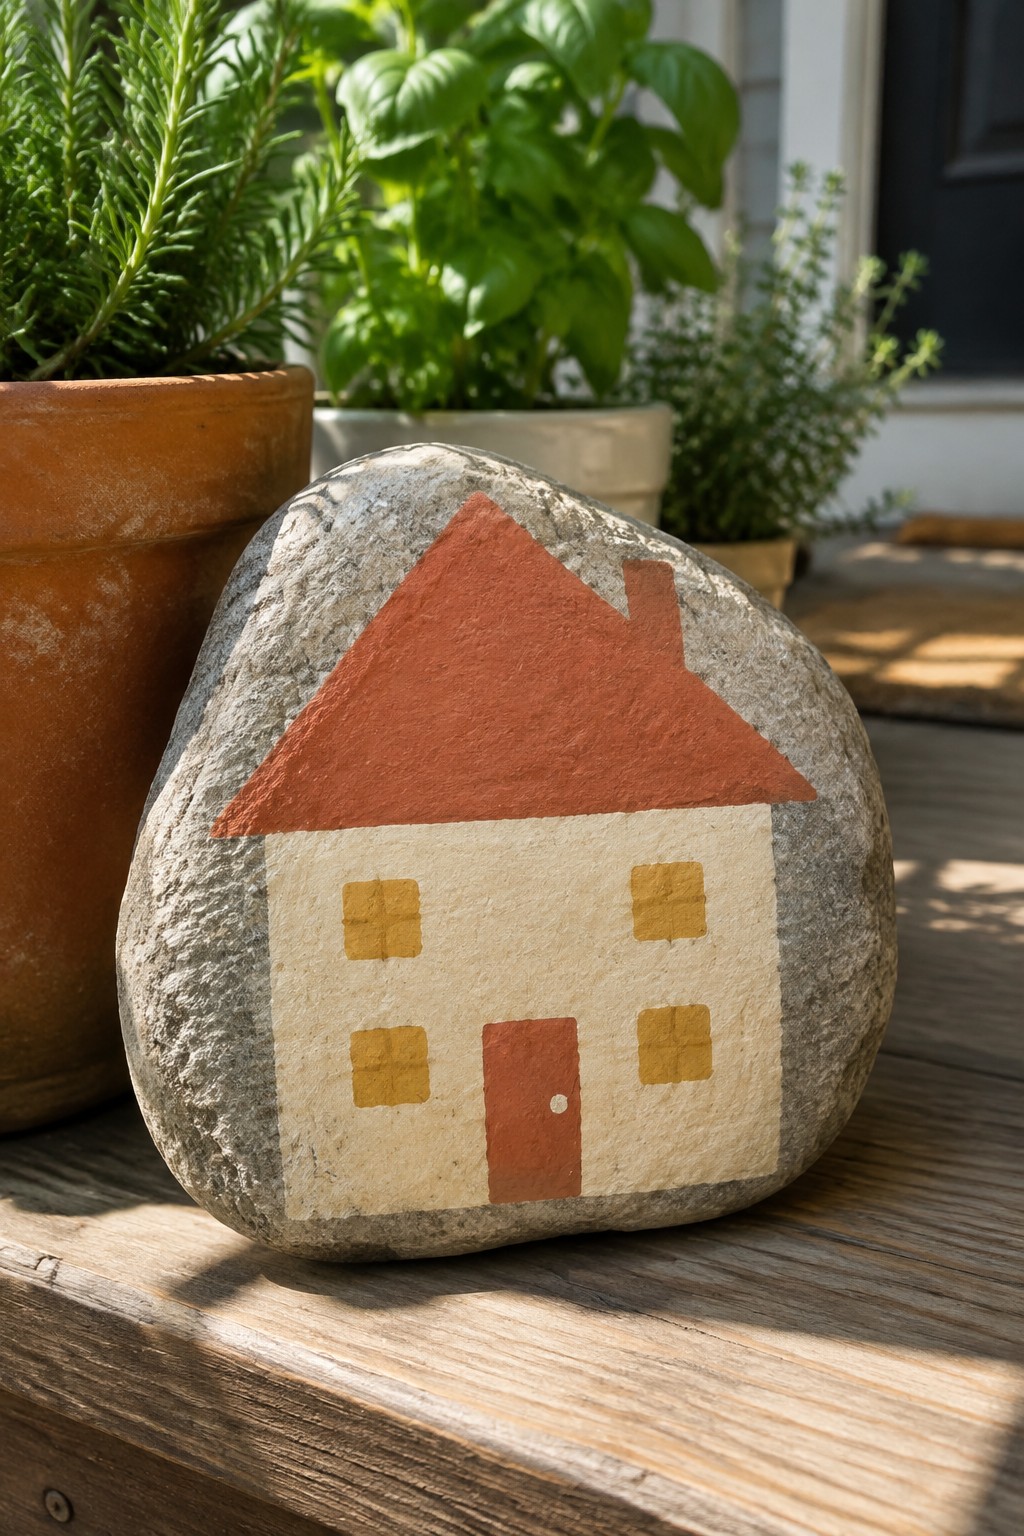
A large rounded stone makes a strong base for a house painting project because its natural shape already suggests a peaked roof and solid base. Use big color blocks to paint a triangle across the top in one shade for the roof, then fill most of the remaining surface with a lighter rectangle for the walls. Add four small squares for windows and one taller rectangle for the door, keeping every shape simple and bold so the design stays readable even on an uneven surface. This approach turns an ordinary garden stone into a decorative piece that works as outdoor accent or porch decor.
What makes this idea useful is how the rock’s curve does most of the work shaping the roof without needing perfect lines. You can change the roof color or swap window placement to create different house styles while still using the same large shapes. A painted rock like this sits well in a flower bed, along a walkway, or inside a big planter where the simple blocks show up clearly. The same layout works on smaller stones if you want a set of houses for a table display or gift.
Simple Striped Bee Rock
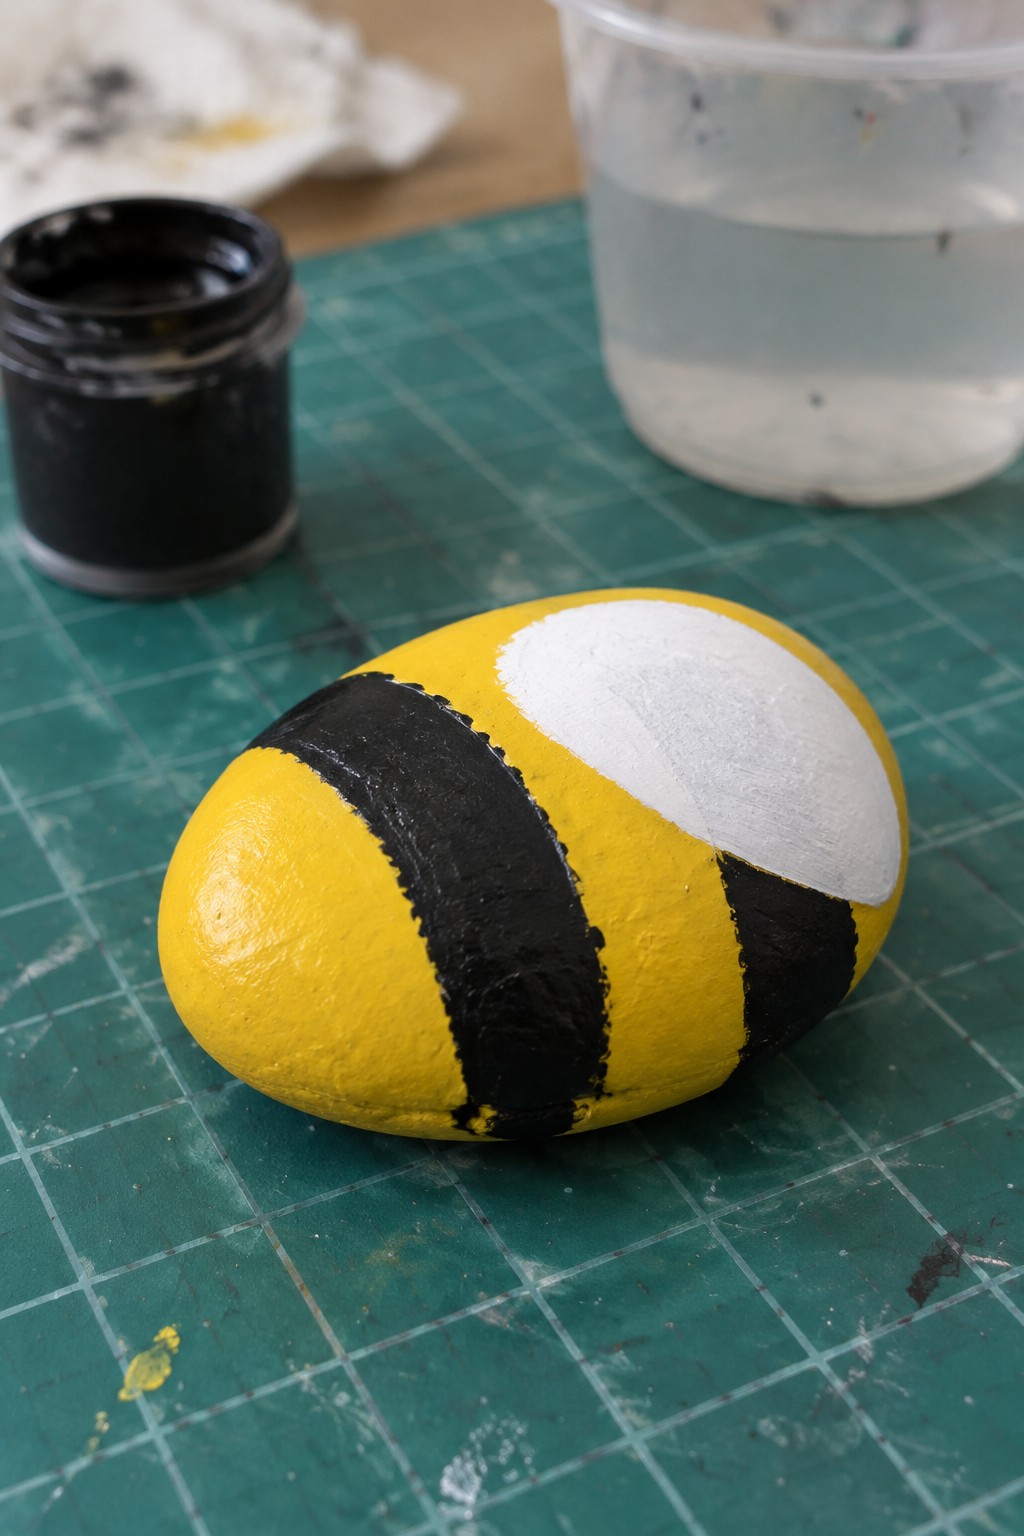
A smooth oval rock painted yellow with wide black stripes creates a clear bumblebee design using only large color blocks. One white half-circle shape placed on the side suggests a wing without any extra lines or details. This bug rock idea fits the large simple shapes approach because the stripes and wing area follow the stone’s natural curve and require minimal planning.
The rock shape does a lot of the work here since the rounded form already reads as an insect body. Kids can repeat the same stripe pattern on other oval stones or change the white wing to light blue or gray for variety. A painted rock like this works especially well in garden beds or on porch steps where the high-contrast yellow and black remain visible from a distance.
Green Frog Face Using Oversized Eye Shapes
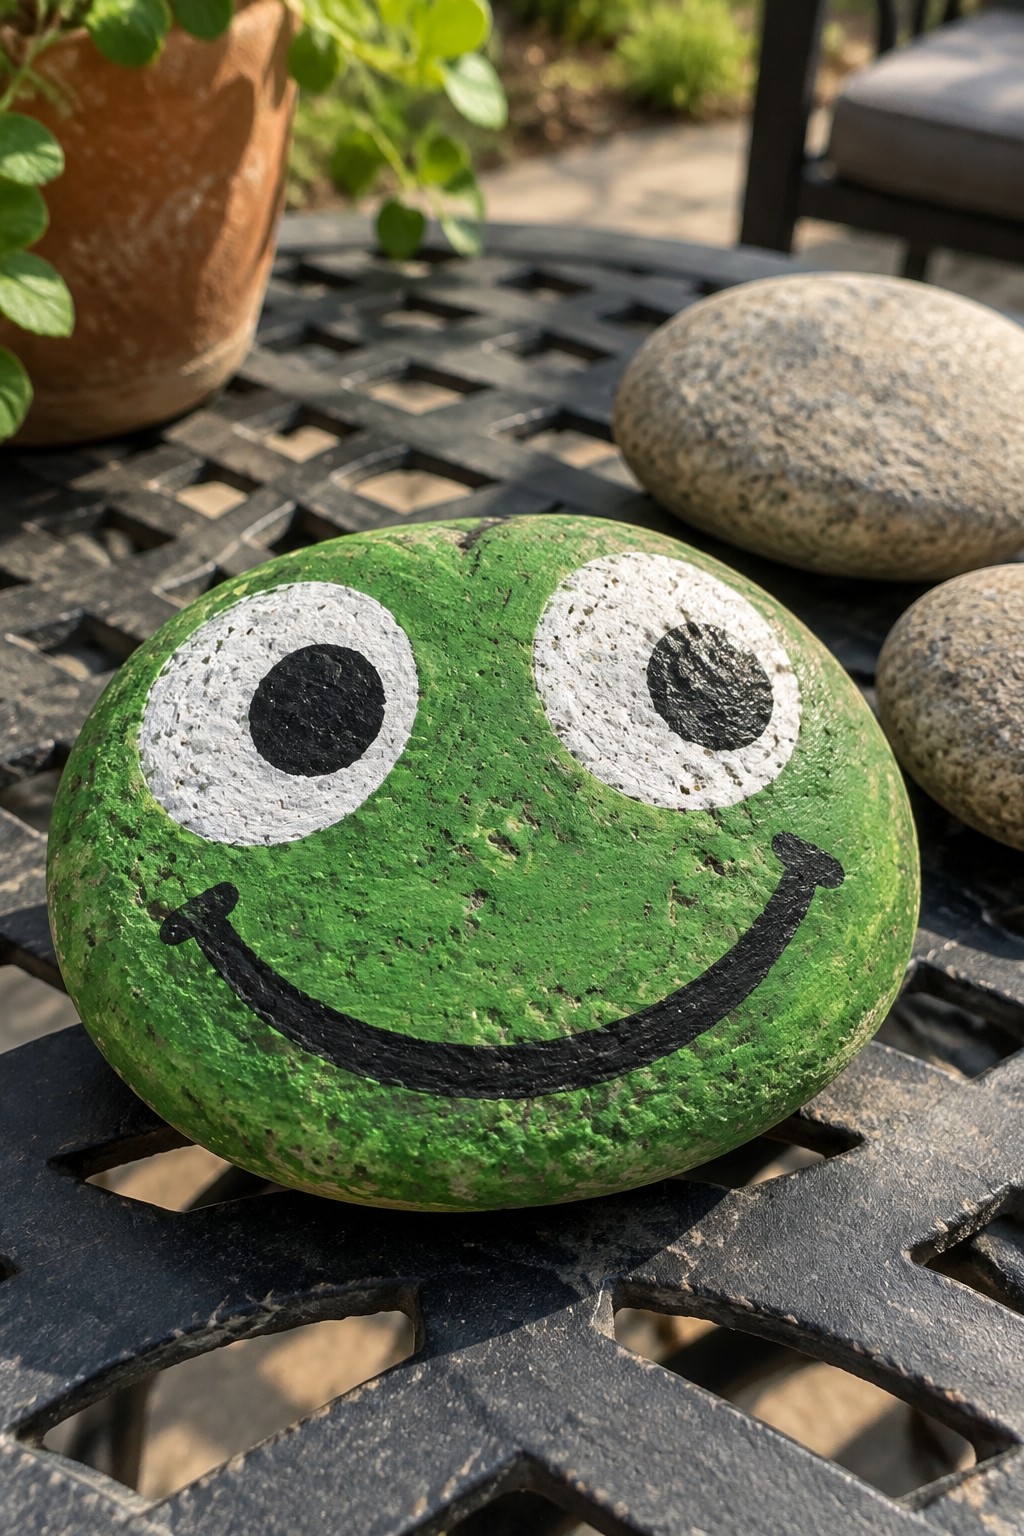
A smooth rounded stone painted solid green works as a frog face when you place two large white circles near the top and fill each with a smaller black circle for the pupils. The simple black curve underneath forms the mouth without any extra lines or details. This layout uses the rock’s natural curve to hold the big shapes in place so the design stays bold even on a small surface.
What makes this idea useful is how the rounded stone already supplies the head shape so only three main colors and two brush sizes are needed. You can swap the green base for brown or gray and keep the same eye placement to turn it into a different animal on another rock. A painted rock like this works especially well tucked into a planter or lined up with other face rocks for a quick outdoor display that kids can finish in one afternoon.
Striped Heart Stone
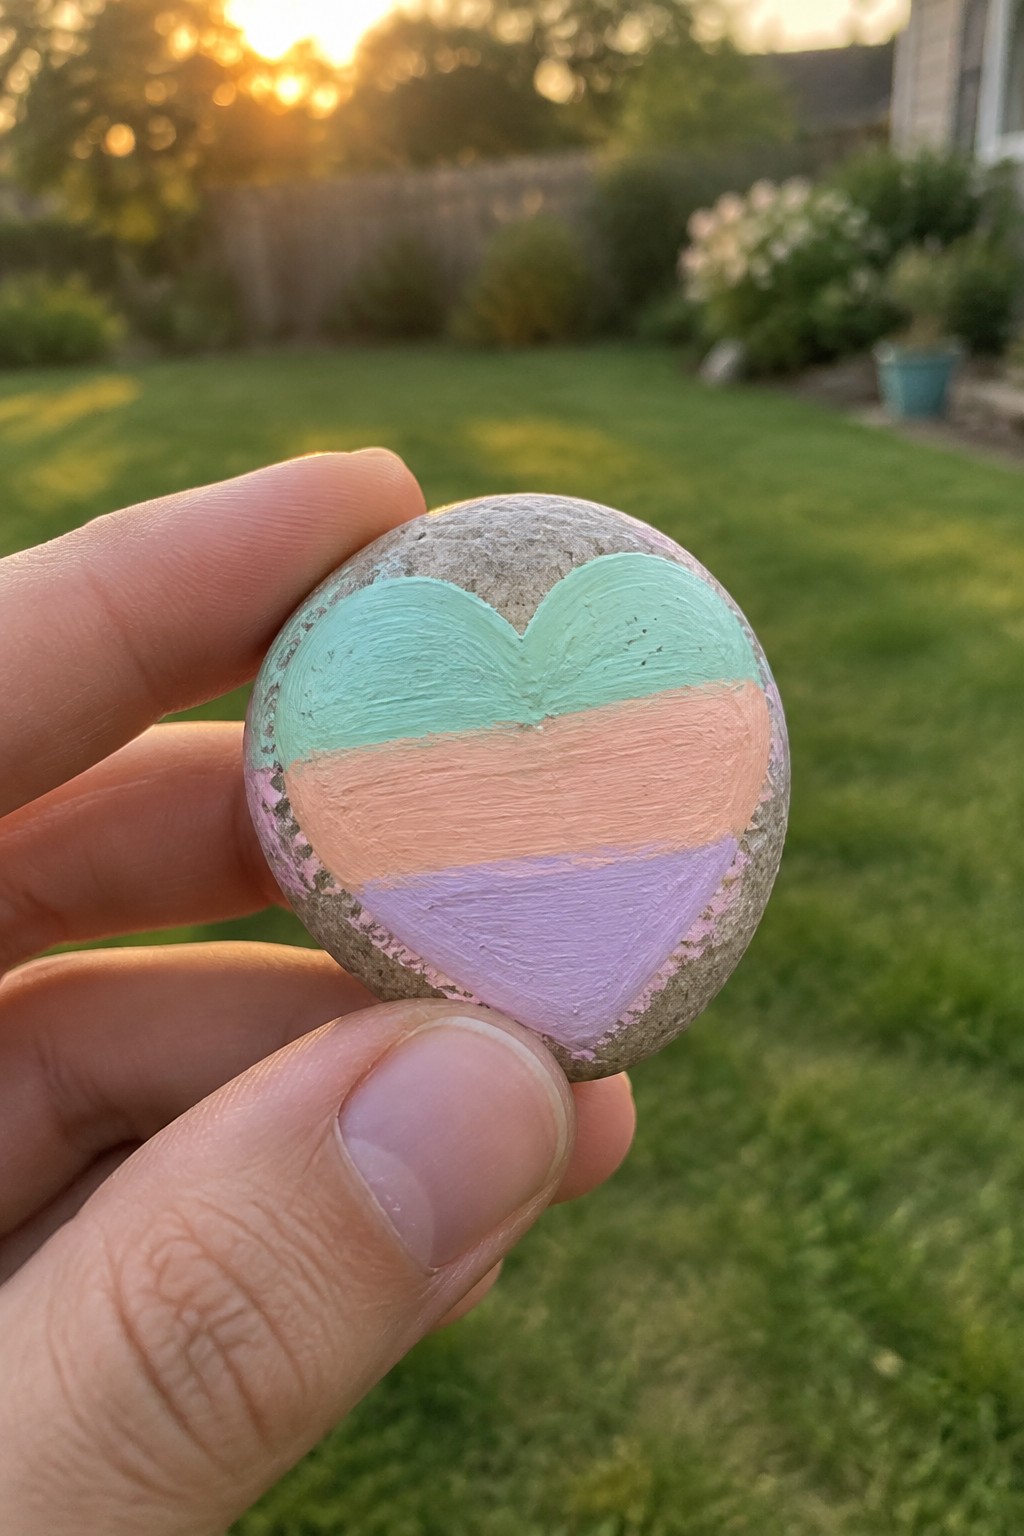
A smooth rounded stone makes a strong base for this large heart painted in three bold horizontal color blocks. The top band uses teal, the middle peach, and the bottom lavender, each applied as a solid stripe that fills the heart shape without extra outlines or detail work. The unpainted gray edges of the rock stay visible around the design, which keeps the heart crisp and lets the natural stone texture show through. This approach fits the large simple shapes category because the heart comes from broad color areas rather than fine lines or small patterns.
The rock shape does a lot of the work here since its gentle curve helps the heart edges look smooth with minimal effort. Kids can swap the stripe colors to match seasons or other themes while keeping the same three-band layout on any similar sized stone. This painted rock works especially well as garden path marker, porch accent, or small gift because the soft palette and clear shape read well from a short distance. The design scales easily to larger or smaller rocks by adjusting how wide each color band sits inside the heart.
Strawberry Rock Using Bold Color Blocks
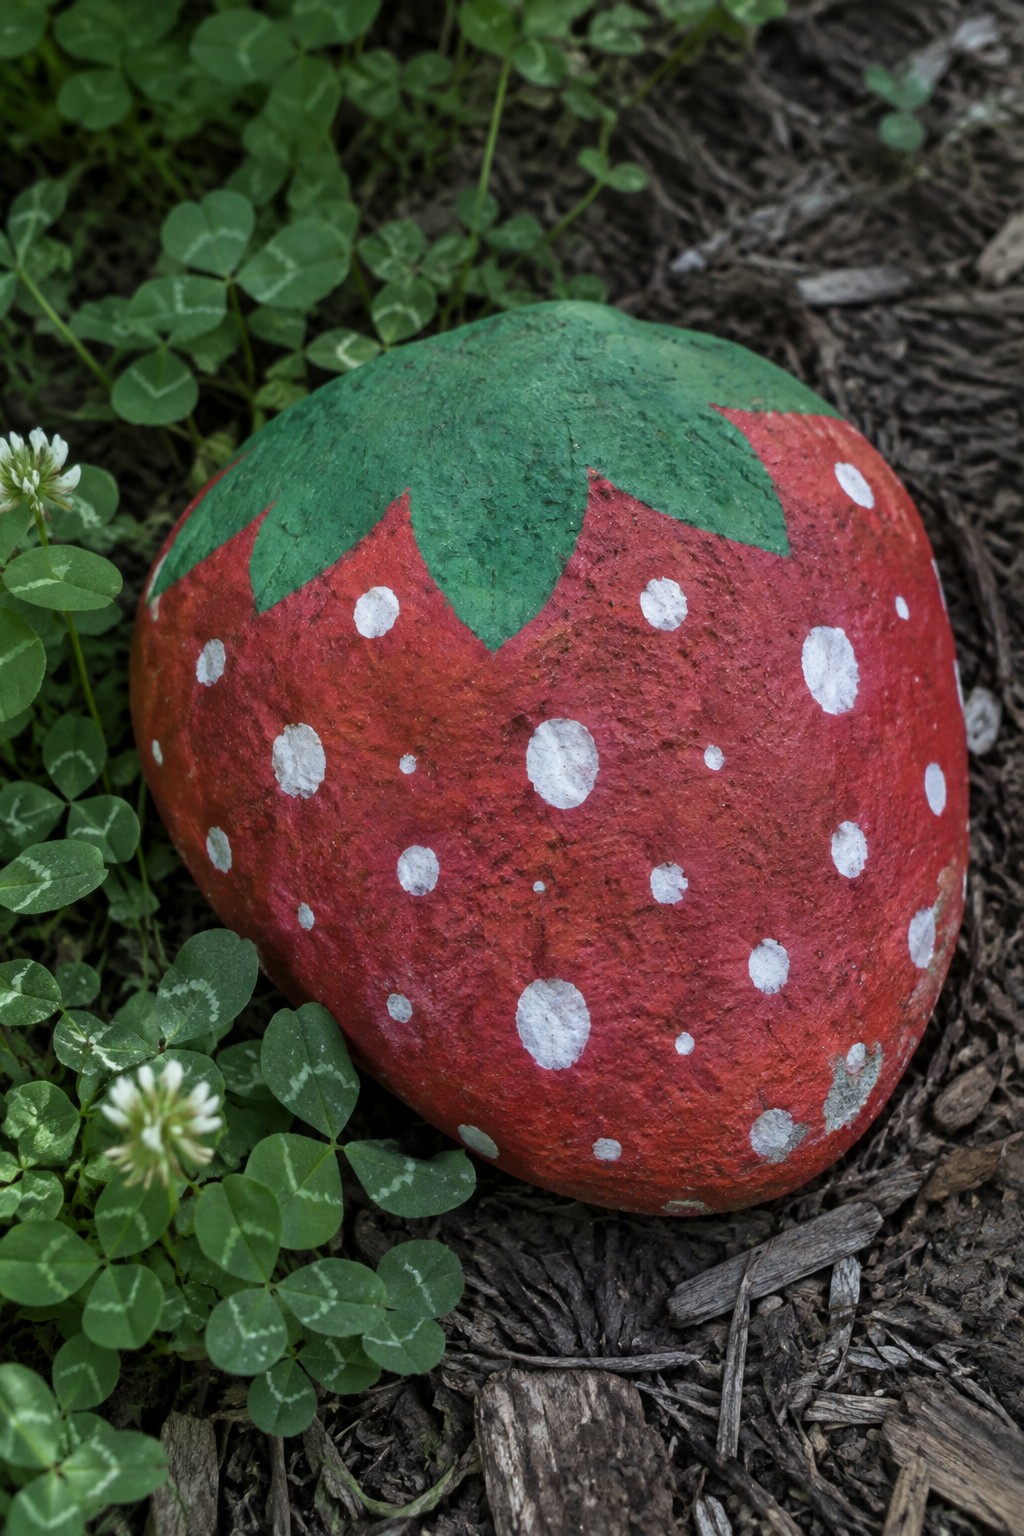
A large rounded stone works well for this fruit rock project because its natural shape already suggests a strawberry form without extra carving or sculpting. Painting the main body in solid red, adding a green leafy section at the top, and scattering white dots across the surface creates the classic strawberry look through simple color blocking and basic dots. The design stays effective on an uneven rock surface since the large shapes and repeated dots do not require precise lines or small details.
What makes this idea useful is how quickly it translates to other fruits by swapping the main color and adjusting the top shape or seed pattern. A painted rock like this sits nicely in garden beds, mulch, or near potted plants as seasonal decor. The same large shape approach can be reworked onto a flatter stone for an apple or turned into a blueberry by using different dot placement and a blue base.
Fish Rocks with Bold Simple Shapes

Painted fish rocks turn smooth oval stones into bright underwater creatures using just a few large color areas. Choose rounded river rocks that already suggest a fish body, then block in the main color, add a white circle eye with a black dot, and finish with curved shapes for fins and tail. The simple shapes stay visible even when the rocks are small, and the design works on any stone that has a flat side for the main pattern.
What makes this idea useful is how well the natural rock shape does the work of forming the fish body. Kids can swap colors for different species or add stripes instead of the wavy scale pattern without changing the basic layout. These rocks look good scattered in a planter, along a windowsill, or in a shallow dish of water for a quick table display. The same approach adapts easily to other oval stones or even flatter pebbles if you keep the shapes large and the details minimal.
Mushroom Rock for Garden Beds

A mushroom painted rock uses a rounded stone with a natural dome shape to create the cap and a narrower base for the stem. Large blocks of red cover the top section while a single white circle forms the spot and white lines define the edge and stem. The stone texture shows through on the lower part, keeping the design simple and tied to the rock’s actual form.
What makes this idea useful is how the basic color areas and one-spot motif work on any stone with a similar rounded profile, so kids can try it without needing perfect curves. A painted rock like this sits well in flower beds, mulch, or beside hostas and scales down to smaller stones by shrinking the white circle. The same shape also adapts to other colors such as brown caps or yellow spots for variety in a garden collection.
One-Eyed Monster Rock

A smooth, rounded stone painted solid teal forms the base for this monster face using only large basic shapes. A big white circle creates the single eye, a smaller black circle fills the pupil, and pointed ears sit on top while a wide curved mouth holds several triangle teeth. The design stays effective because the rock’s natural roundness supplies the head shape and the color blocking keeps every element bold and easy to read from a distance.
The rock shape does a lot of the work here since the curved surface already supports the wide eye and mouth without extra outlines. A painted rock like this works especially well as a garden accent or shelf decoration that kids can make quickly with three or four paint colors. The same idea could be adapted to a flatter stone by shortening the ears or swapping the teal for any bright color while keeping the triangle teeth and single eye.
Penguin Rock Using Large Color Blocks
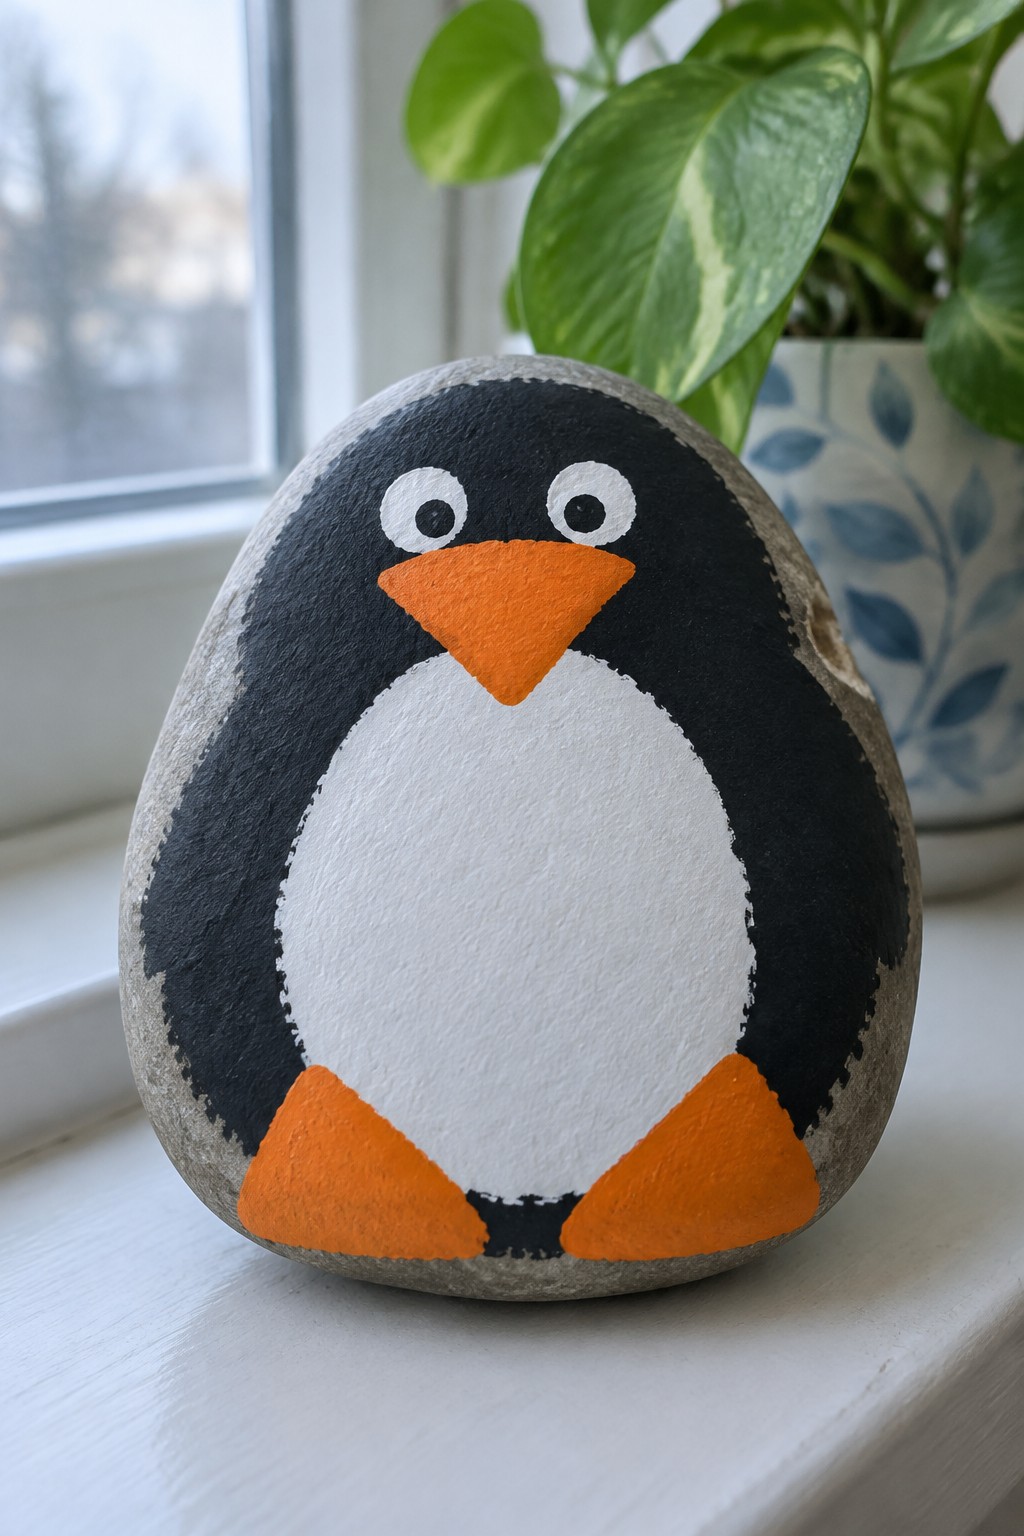
A penguin rock starts with a rounded, egg-shaped stone and uses big blocks of black, white, and orange paint to form the body, belly, beak, and feet. The design keeps every shape simple and separate so the natural curve of the stone becomes the penguin’s torso without extra outlining or shading. This type of animal rock works because the large color areas follow the stone’s form and stay readable even when the surface is slightly uneven.
The rounded stone shape does a lot of the work here by giving the body its basic outline already. Kids can repeat the same color-blocking method on other oval rocks to make different birds or animals by changing only the beak color and foot position. A painted rock like this fits well on a windowsill or shelf where the bold shapes stay clear from a distance. The idea scales easily to larger or smaller stones since it relies on simple areas rather than tiny details.
Apple Painted Rock
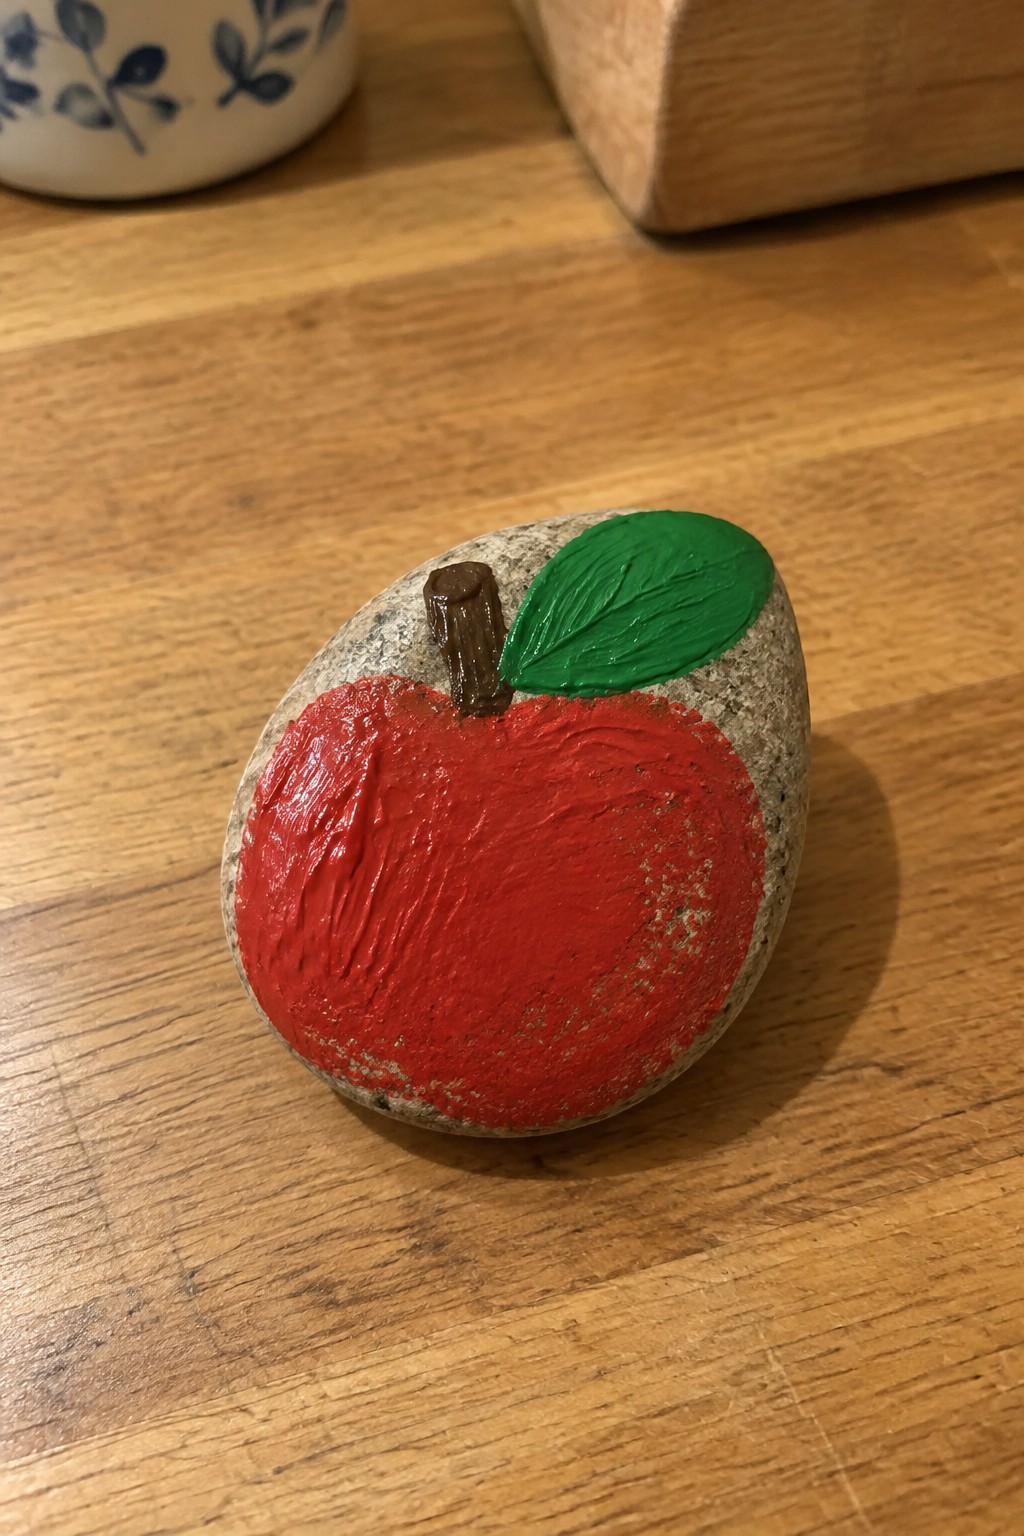
A smooth, rounded stone makes a strong base for this fruit rock idea. Large areas of red cover most of the surface to form the apple body, while a smaller green section at the top becomes the leaf and a short brown stroke adds the stem. The design relies on simple color blocking that follows the rock’s natural curves instead of needing many small details.
This painted rock works well as a quick table accent or tucked into a planter. The same layout can be changed to other fruits by swapping the main color and adjusting the leaf shape slightly. Because the rock itself supplies the rounded form, kids only need to focus on filling the large areas without worrying about perfect outlines.
Bunny Face Rock
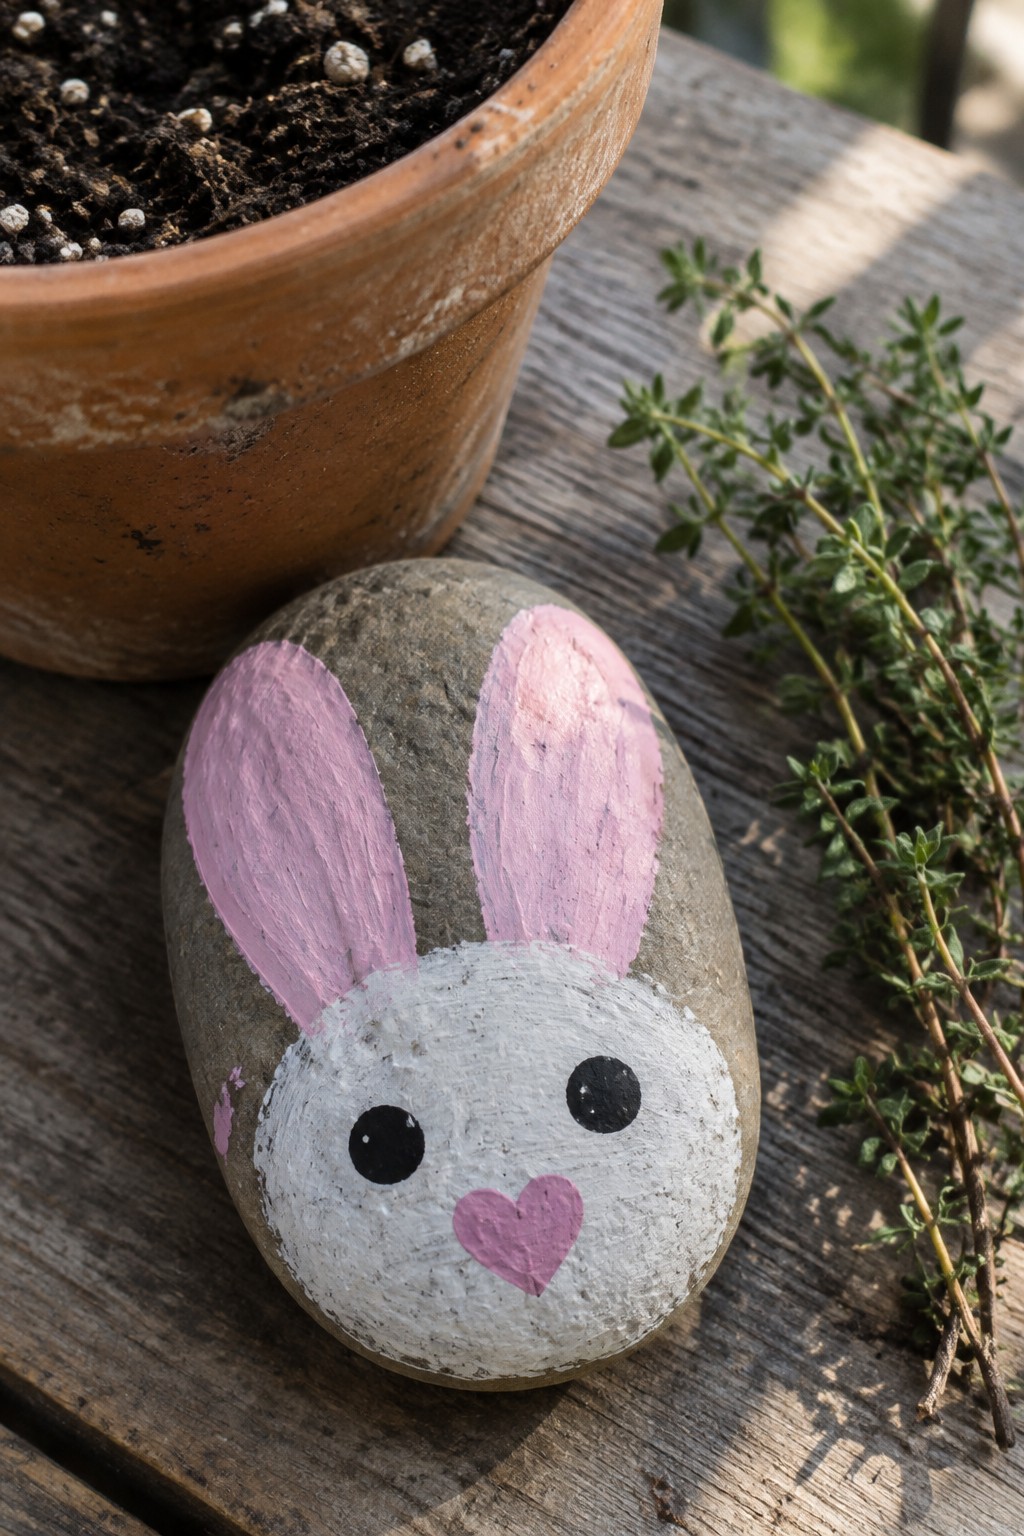
A smooth oval stone painted as a bunny uses two large pink shapes for the ears and a broad white area for the face. Black dots form the eyes and a small pink heart marks the nose, keeping every element bold and readable on the curved surface. This animal rock idea relies on the stone’s natural rounded form to suggest the head shape so the paint stays simple and effective.
What makes this idea useful is how the large color blocks work on any oval or egg-shaped rock without needing straight lines. The same approach could swap the pink ears for brown or gray to make a different animal or add a few dots for whiskers. A painted rock like this fits well in a planter, along a garden path, or as a quick spring accent on a windowsill.
Large Shapes on Smooth Stones

Rocks painted with oversized circles, triangles, and wide stripes give kids a straightforward way to cover the surface quickly. Smooth, rounded stones provide flat areas that let the shapes read clearly without needing precise lines or small details. The designs rely on solid color blocks in yellow, green, red, purple, and orange, which keeps the focus on the big forms rather than fine work.
The rock shape does a lot of the work here since a round stone naturally suits a circle and a pointed one suits a triangle. These painted rocks work especially well as garden path markers or shelf accents where the bold color areas stand out from a distance. The same idea can be adapted by limiting the palette to two colors on smaller pebbles or by repeating the stripe pattern across a longer oval stone for a different look.
Frequently Asked Questions
What supplies are needed for rock painting projects with kids using large simple shapes?
Gather smooth rocks from a craft store or garden, acrylic paints in bright colors, paintbrushes of various sizes, and a sealant like Mod Podge for protection. Include paper plates for palettes, water cups for cleaning brushes, and old shirts to protect clothing. These basics keep the activity affordable and mess free while supporting the 19 ideas focused on bold shapes like circles, hearts, and stars.
How should rocks be prepared before painting begins?
Select rocks that are flat and at least four inches wide for easy shape painting. Wash them thoroughly with soap and water to remove dirt, then let them dry completely for several hours or overnight. This step ensures paint adheres well and prevents chipping, which is especially important for kids projects meant to last through play or outdoor display.
What tips help kids paint large simple shapes without frustration?
Start with a pencil sketch of the shape on the rock as a guide, then use thicker brushes for filling in color to cover areas quickly. Encourage kids to work in sections and let each color dry before adding details like faces or patterns. Supervise closely for younger children and celebrate imperfect results to build confidence, making the activity enjoyable across all 19 ideas.
How can painted rocks be protected for outdoor use?
Apply two thin coats of outdoor sealant after the paint dries fully, allowing each coat to cure for 24 hours. Place rocks in sheltered garden spots or on patios rather than high traffic areas. This method preserves the large shapes against weather, turning the projects into lasting decorations that kids can revisit.
What age groups benefit most from these rock painting ideas?
Children ages four to ten enjoy the projects most, as simple shapes suit developing motor skills while allowing creativity. Adapt by pre drawing shapes for preschoolers or adding patterns for older kids. The activities promote focus, color recognition, and fine motor practice, making them versatile for family groups or classroom settings.
