


I started painting rocks a few years ago when I wanted something quiet to do in the evenings.
Printable templates made it easier to try new designs without guessing at the shapes.
I gathered up the projects that worked best for me and ended up with 22 ideas that use them.
Some are simple patterns while others add a bit more detail.
These are the ones I reach for when I want a straightforward craft to work on.
Ladybug Painted Rocks
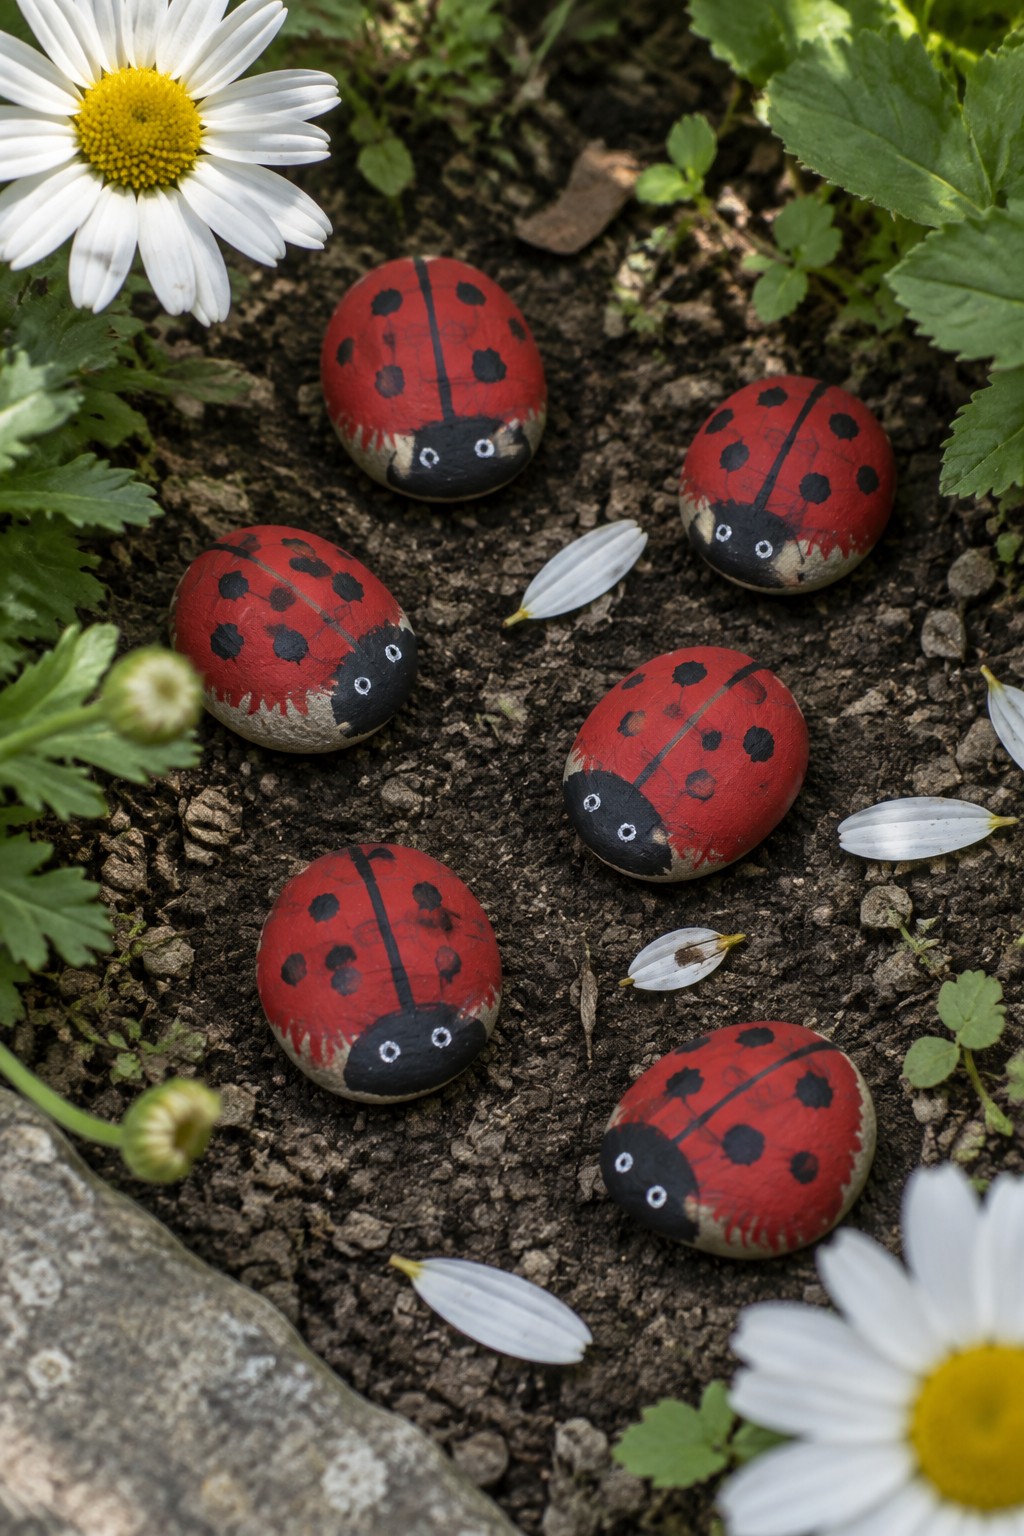
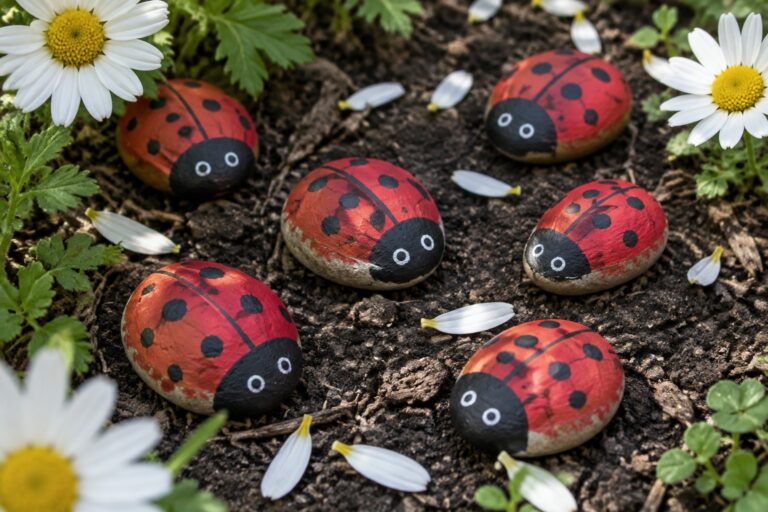
Choose smooth, rounded stones and cover them in solid red paint to create the ladybug body. Paint a black section at one end for the head, scatter black spots across the red surface, and add two small white dots as eyes. The rounded stone shape lets the spots and dividing line follow the natural curve, which keeps the design simple while still looking like a real insect. This fits the bug rock category and works as garden decor.
What makes this idea useful is how easily the rocks tuck into flower beds, mulch, or along the edge of a planter. You can vary the number and size of spots on each stone to make a small collection without needing new templates. For garden decor, this kind of painted rock stays visible against soil and greenery without competing with plants. The same red-and-black layout can be adapted to slightly flatter stones if you want pieces that sit more steadily on a windowsill or shelf.
Strawberry Painted Rock
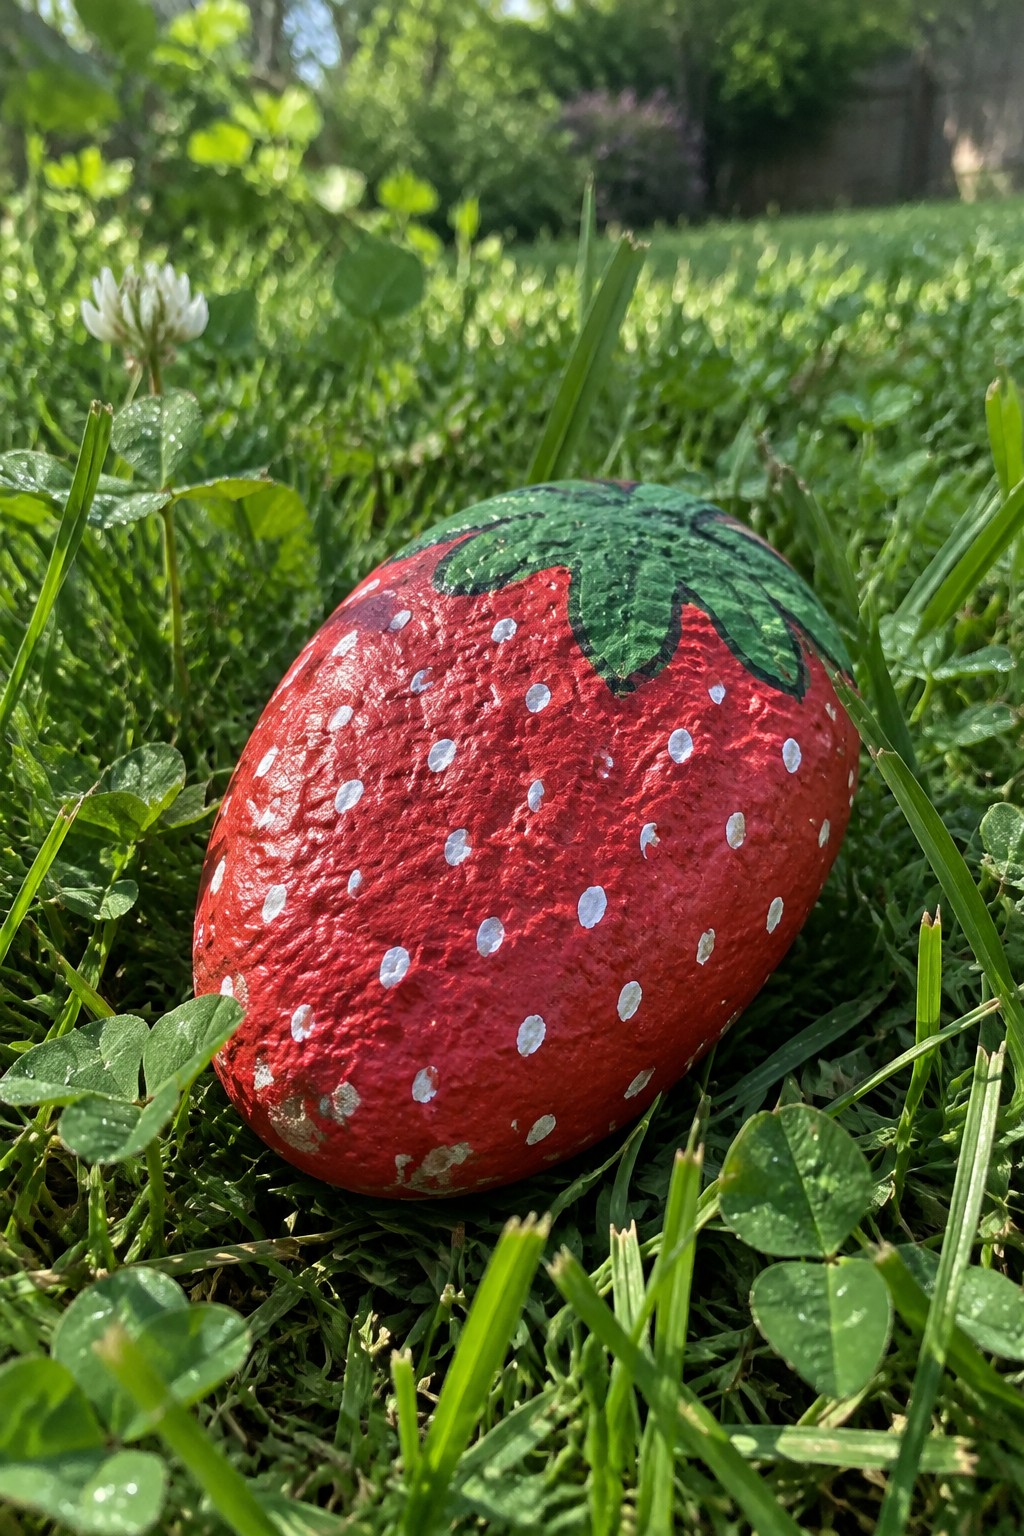
A strawberry painted rock uses an oval stone as the base for a simple fruit design, covering the surface in solid red paint and scattering white dots to suggest seeds along the rounded shape. Green paint forms a leafy top at one end, with basic outlines separating the sections so the fruit motif reads clearly from a short distance. This food-inspired rock craft works because the stone’s natural form already matches the strawberry body, letting the painted details stay minimal while still looking finished.
What makes this idea useful is how well it fits into planters, mulch beds, or along garden paths without taking up much space. The same oval shape and color blocking can be adapted to other fruits by swapping the top color or seed pattern, or scaled down for a set of smaller stones. For a gift, something like this pairs easily with printable templates to keep the proportions consistent across multiple rocks.
Burger Face Painted Rocks

A rounded stone works as the base for this food-inspired rock project where the top half becomes a tan bun dotted with white seeds and a simple smiling face. The middle section stacks painted layers in green, red, yellow, and brown to suggest lettuce, tomato, cheese, and a patty that wrap around the curve of the rock. The bottom stays a lighter bun tone so the whole piece reads as a complete hamburger from any angle. This approach fits the funny face rock category while staying easy to scale up or down.
The rounded stone shape does a lot of the work here by giving the burger its natural form without extra contour lines. You can adapt the same stacked color bands to other food themes like a taco or sandwich on stones of similar size. For garden decor this type of painted rock sits well in a planter or along a windowsill without taking up much space. The clear sections make it simple to swap in printable face templates or change the topping colors for different seasons.
Floral Wreath Painted Rock
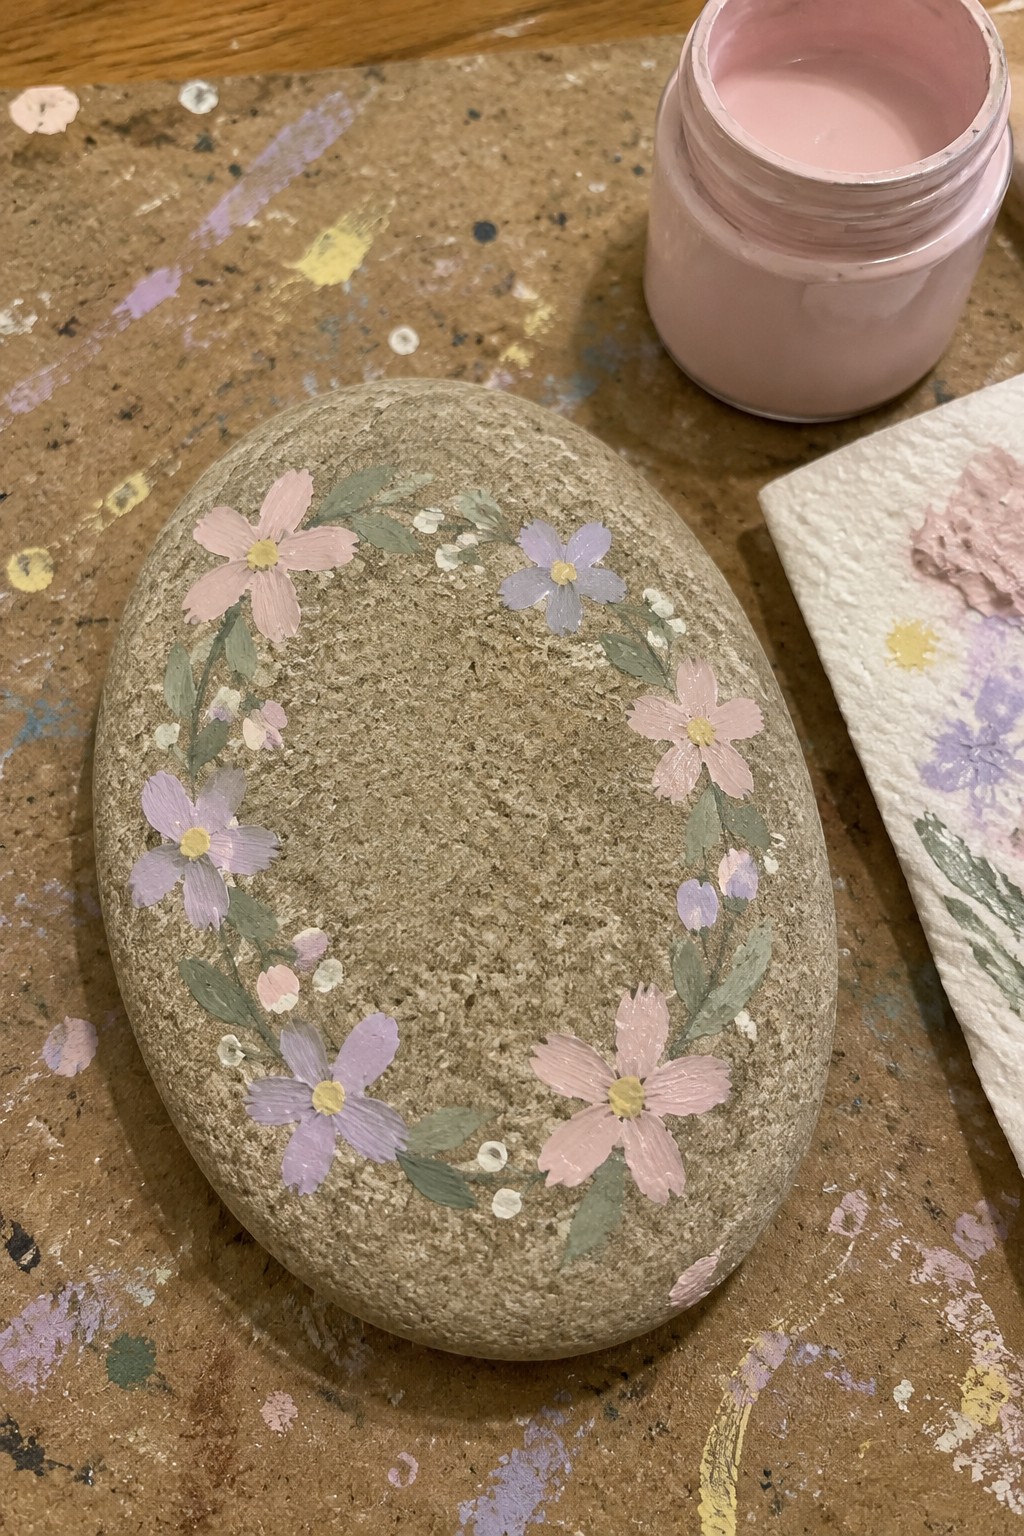
A smooth oval river rock works well for a circular floral wreath design that leaves the center bare. Pink and lavender flowers sit among green leaves and scattered white dots, creating a balanced border that follows the stone’s natural curve. The design fits the flower rock category and gives a finished look without covering the entire surface.
The oval shape keeps the wreath even and helps the motif read clearly from multiple angles. Print a basic flower template to place the main blooms, then add leaves and dots by hand to match the scale of your stone. This painted rock works in a planter, on a porch step, or as a small gift accent, and the same layout adapts easily to different sizes of rounded stones.
Sunset Cross Painted Rock
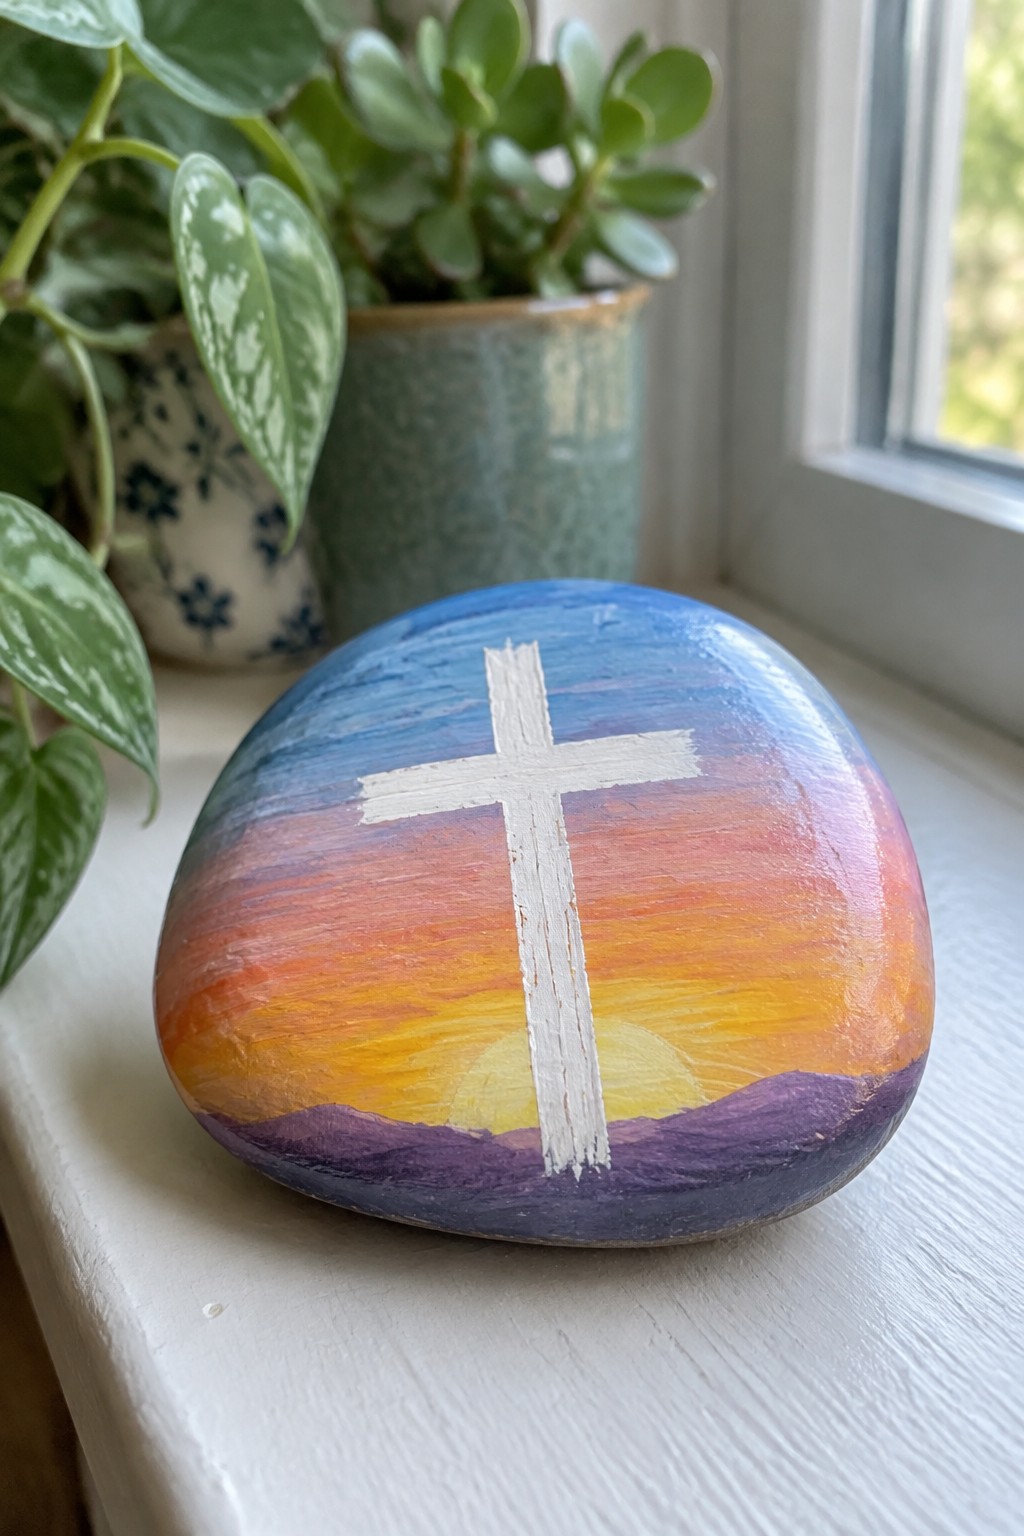
A smooth rounded stone takes on this layered sky design through simple horizontal brush strokes that shift from blue at the top through orange and yellow into a soft glowing circle near the base. A centered white cross sits over the gradient, turning the rock into a clear Christian symbol craft that works on any medium-sized garden or river stone with a gently curved surface. The color bands follow the rock’s natural shape without needing fine detail work.
What makes this idea useful is how the same stripe layout and central cross can be scaled up or down on different stones for windowsills, porch steps, or planter accents. The gradient bands adapt easily to printable templates for the sky sections while the cross shape stays simple to trace or cut from paper. For garden decor this kind of painted rock holds up outdoors once sealed and stands out in photos for sharing the finished project.
Frog Face Rock Craft
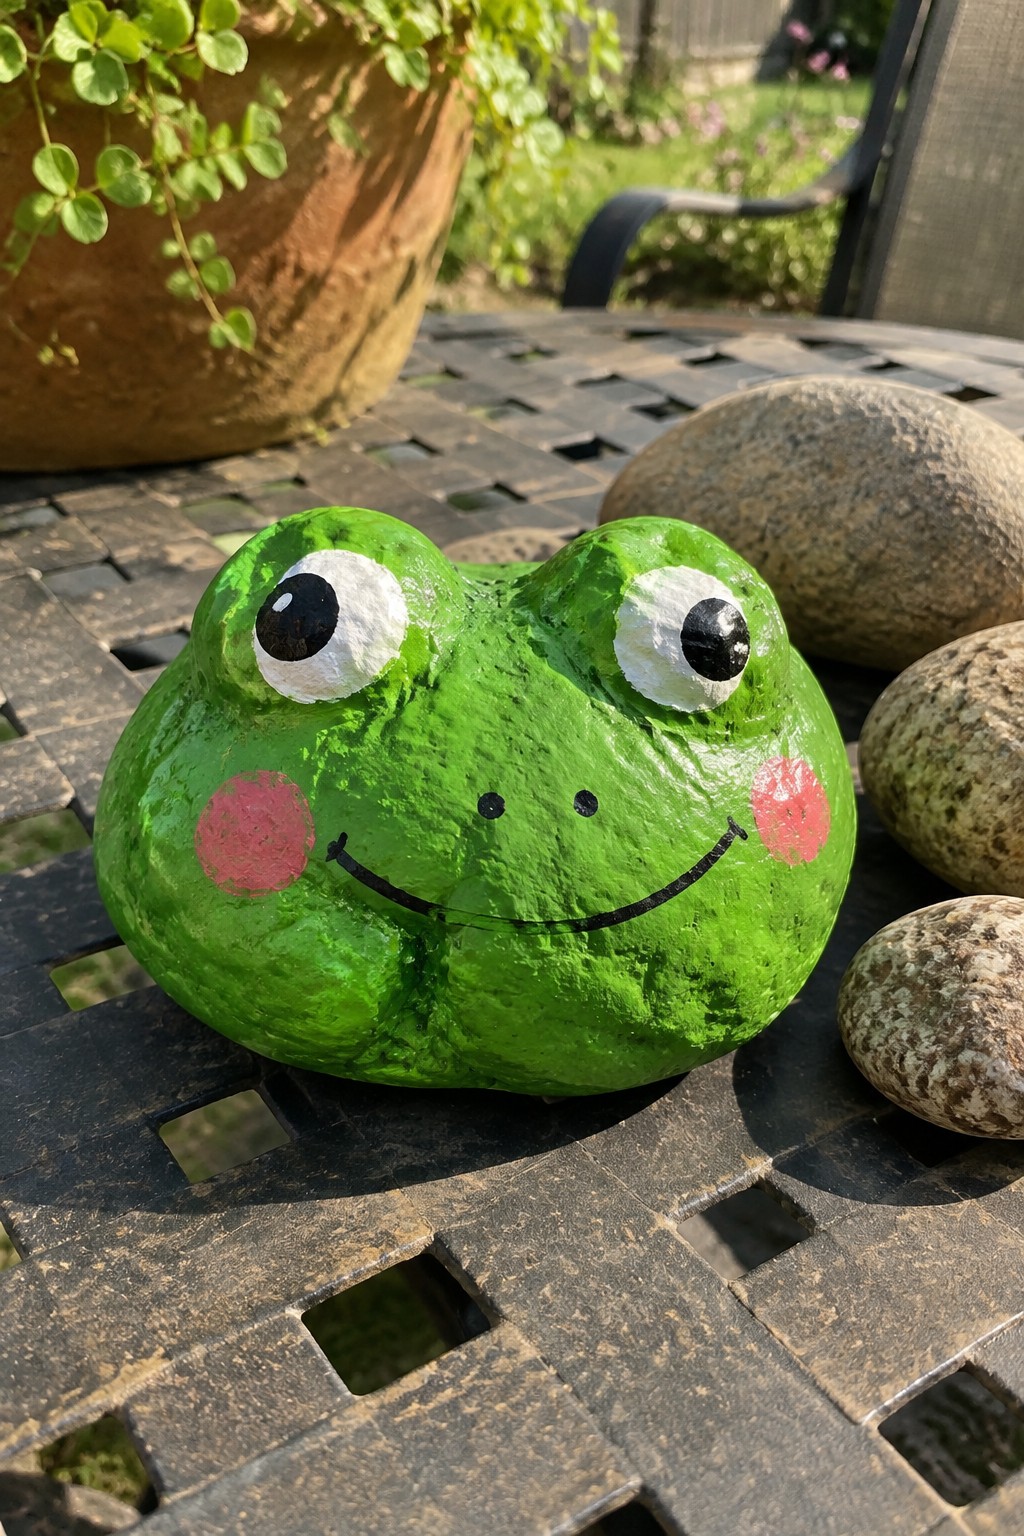
A rounded stone painted bright green forms the base for this frog design. The rock’s natural curve shapes the head and body together while the flat front surface holds the face details. Large white eyes with black pupils, pink cheek circles, and a single black smile line create the frog using simple color blocks and outlines. This approach belongs to the animal rock category and works on any smooth, egg-shaped stone.
The rock shape does a lot of the work here by giving the frog its rounded body without extra sculpting. You can reuse the same eye placement and smile curve on smaller pebbles for a set or on a bigger stone for a porch step accent. For garden decor this kind of painted rock sits well in mulch or near potted plants where the green matches the surroundings. The layout adapts quickly if you change the cheek color or add a few dots for texture.
Penguin Rocks from Oval Beach Stones

Penguin rocks use smooth oval stones painted with a black upper body and a large white belly section blocked in below. Small orange triangles form the beaks while white circles with black dots create the eyes. The natural rounded shape of the stones already suggests a penguin body so the paint only needs to follow those curves. This approach fits the animal rock category and works especially well as a matching set of three.
The rock shape does a lot of the work here because the oval form already suggests a penguin body before any paint goes on. You can scale the same template down for smaller pebbles or up for larger stones to create a whole group. For garden decor this kind of painted rock sits well along paths or in planters where the black and white contrast stands out against soil or greenery. The simple color blocking makes it easy to adapt with printable templates for consistent results across multiple rocks.
Bee Painted Rocks Using Printable Templates
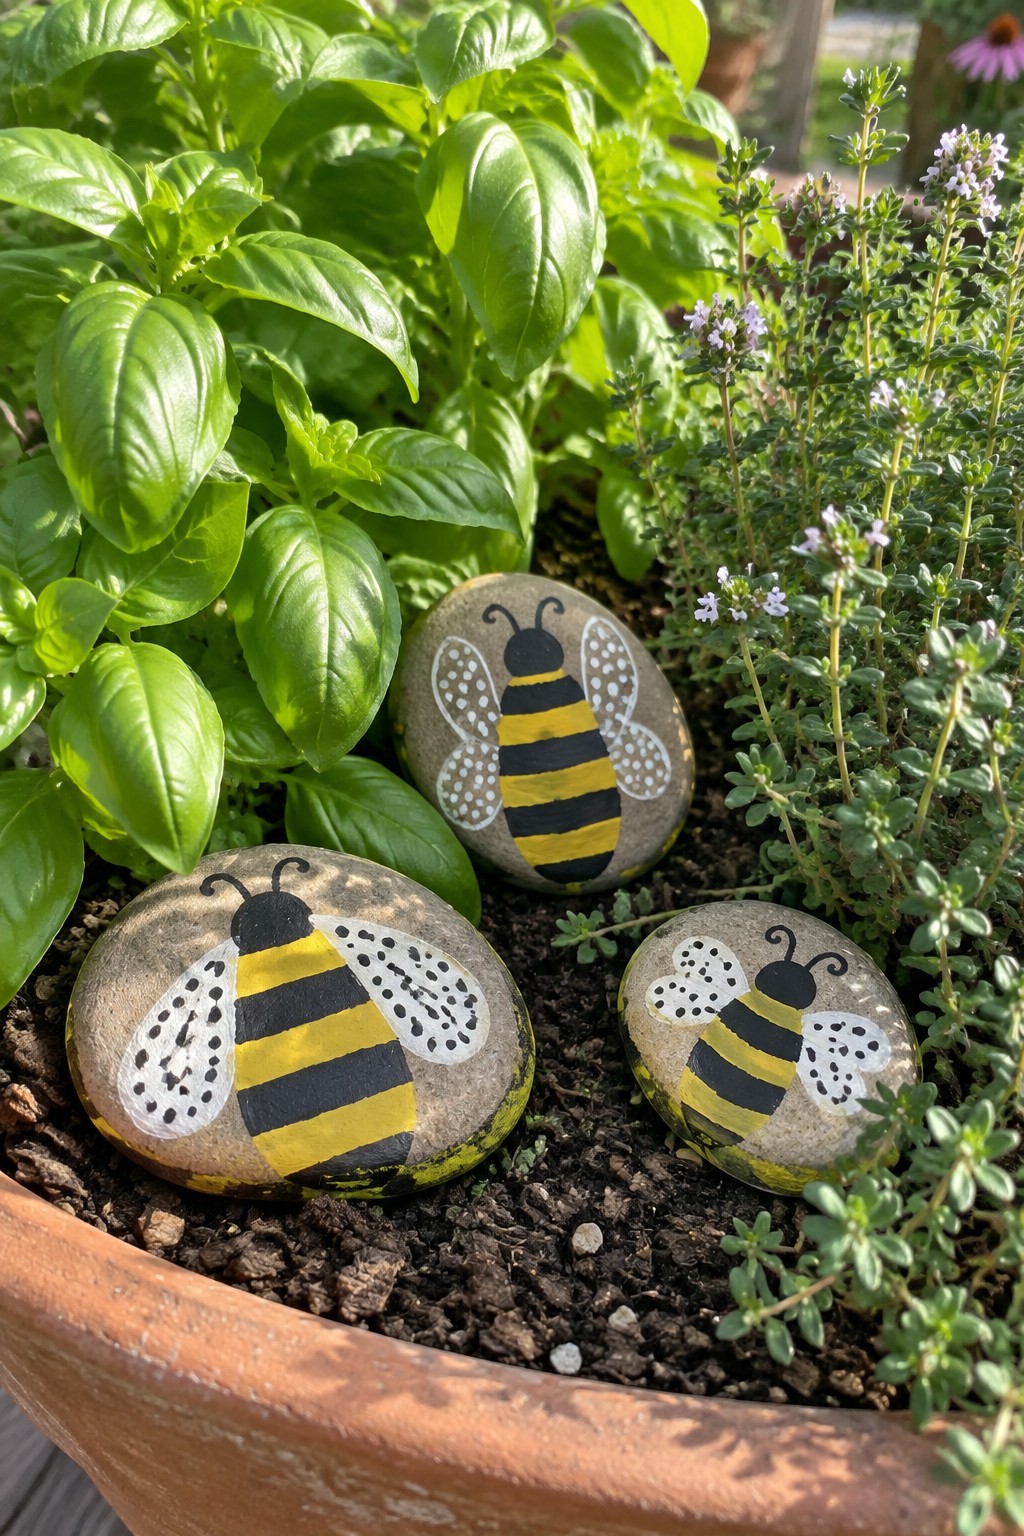
Rounded garden stones work well for this bug rock project because their smooth curves let the yellow and black stripes wrap naturally around the body. The wings are kept simple with white paint and evenly spaced dots, while the heads use solid black with thin antennae lines to keep the focus on the bold striped pattern. This approach fits the garden decor rock category and pairs easily with potted herbs or flower beds where the bees can blend into the greenery.
What makes this idea useful is how quickly a printable template can be scaled to fit different stone sizes without redrawing the bee each time. The small scale makes these rocks practical for lining planter edges or tucking into mulch around thyme and basil. You could swap the wing dot pattern or adjust stripe width from the same template to create a set that still matches. For Pinterest, the high contrast of black and yellow against the natural stone color helps the design stand out in garden photos.
Cactus Painted Rocks
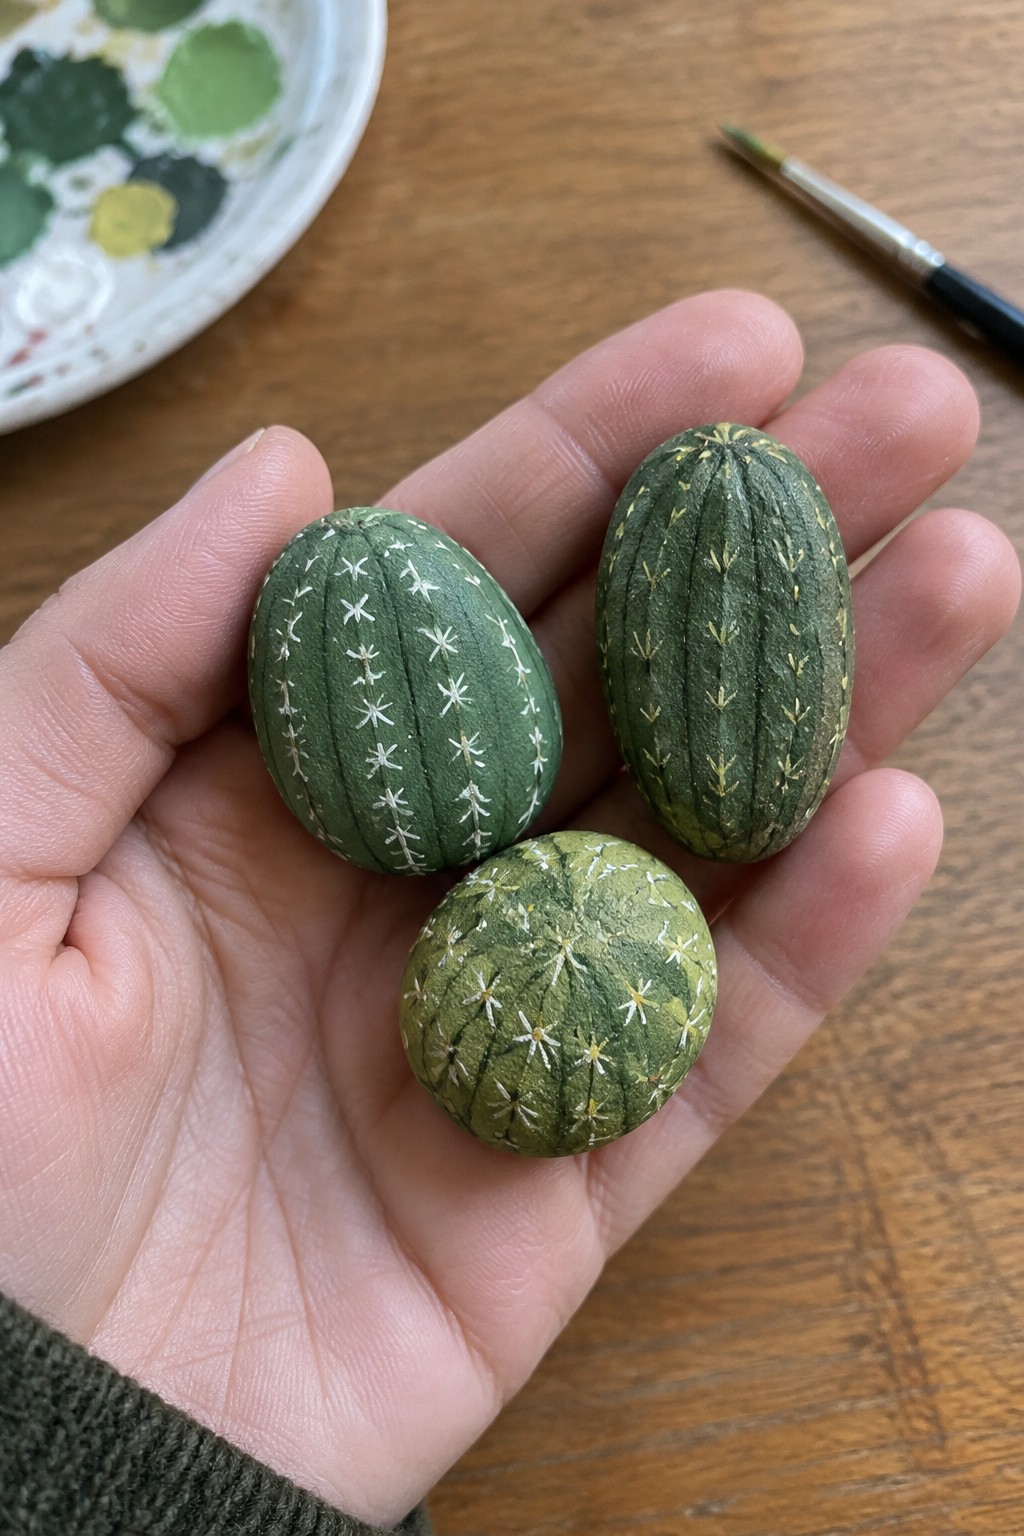
Cactus painted rocks turn smooth oval stones into plant replicas by covering the surface in green paint and adding white spine patterns that follow the rock’s rounded contours. Vertical ridges are suggested through lines of small crosses and dots that mimic the areoles and ribs of real succulents. This style belongs to the garden decor rock category and keeps the natural stone shape visible under the paint.
The rounded stone shape does a lot of the work here by letting the pattern curve naturally without extra shaping. These painted rocks fit well in planters, on windowsills, or scattered in flower beds as low-maintenance accents. The same spine motif can be adapted with a printable template of simple crosses and lines onto different sizes of stones to create a matching collection.
Pumpkin Painted Rock Using a Template
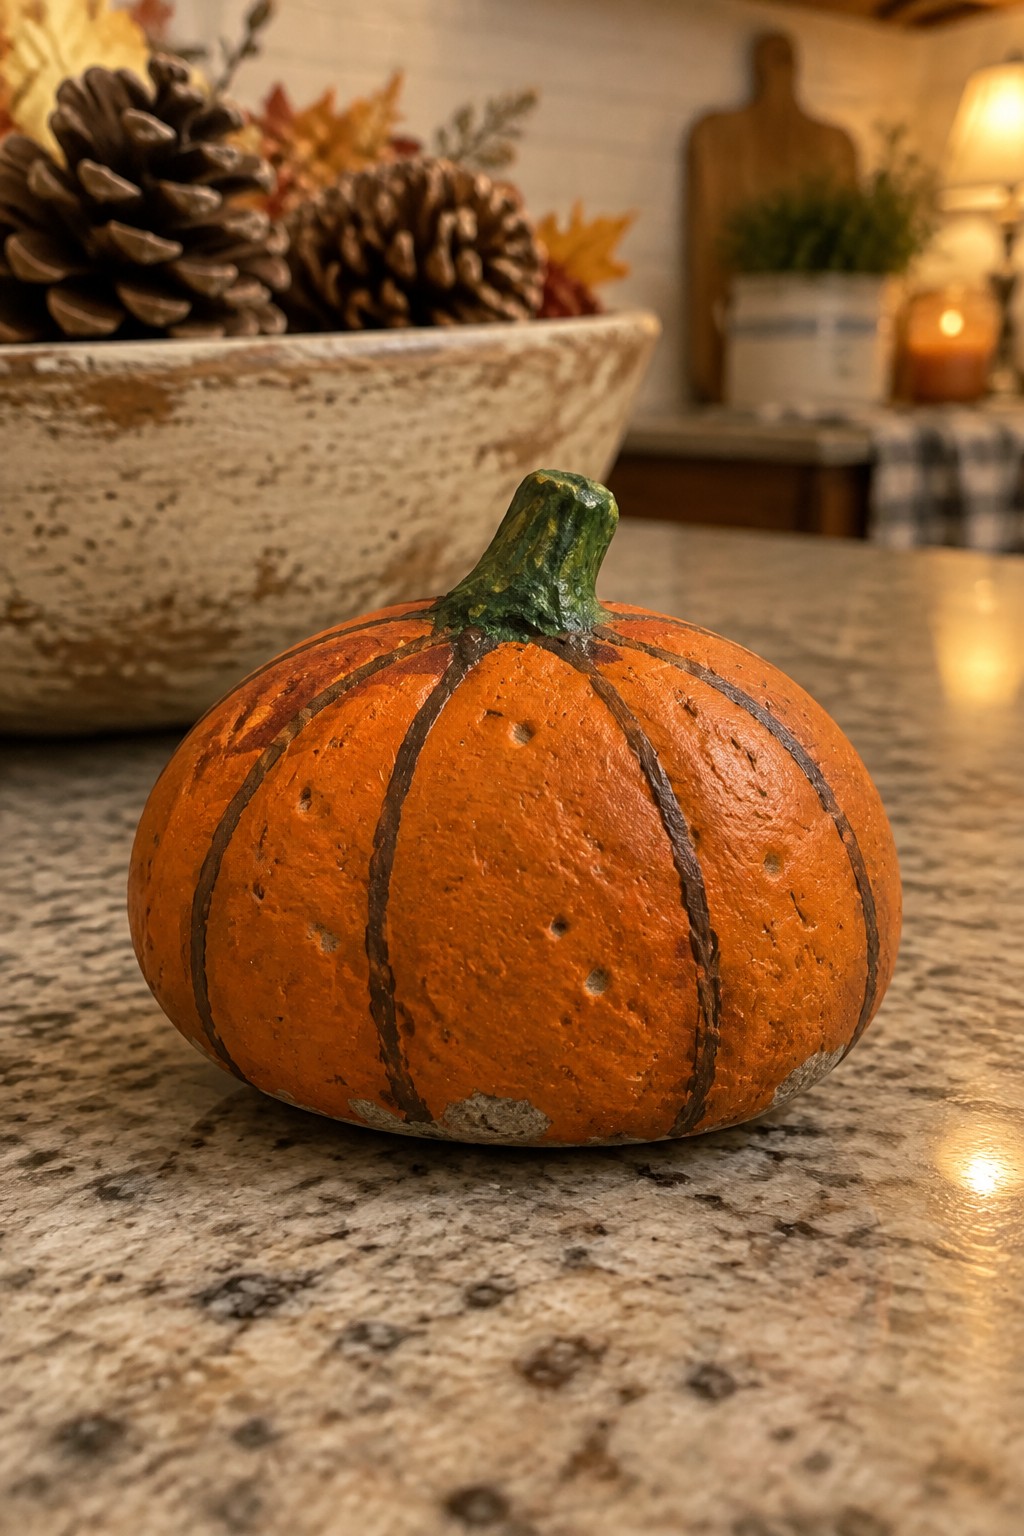
A rounded stone painted orange with dark vertical lines forms the segments of a pumpkin while the green stem sits naturally at the top. The simple color blocking and curved lines follow the rock’s shape to create a clear fruit motif without extra detail. This food-inspired rock fits the category of seasonal decor because the motif turns an ordinary pebble into a recognizable pumpkin shape that reads from a distance.
The rock shape does a lot of the work here by supplying the rounded body already suited to a pumpkin. You can scale the same design down for a set of smaller stones or swap the orange for other fruit colors using a printable template for the segment lines. For table displays or porch styling this painted rock adds a compact accent that stores easily and works in both indoor and outdoor settings.
Blue Whale Painted Rock
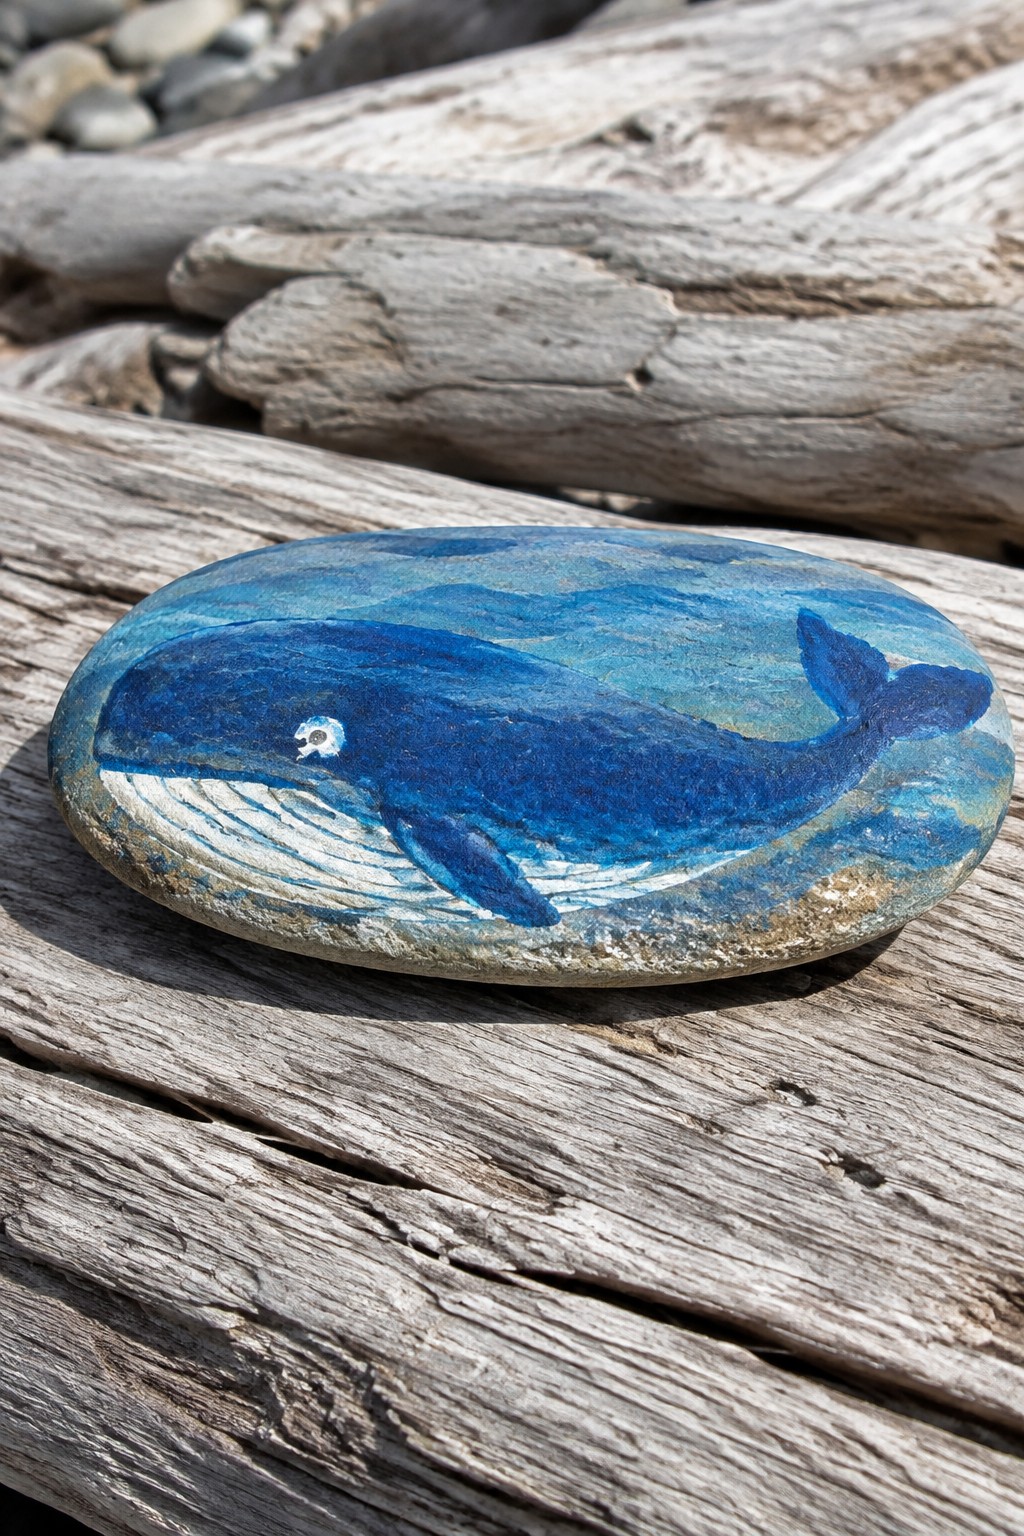
A smooth oval stone makes a strong base for an animal rock because its rounded form already suggests the body shape of a whale. Paint the whale in solid blue tones with a lighter blue ocean background and simple white lines along the belly and fins to create contrast. The curved edges of the stone help the painted waves wrap naturally around the design without needing extra borders. This approach fits the animal rock category and works especially well when you want a single focal motif rather than a full scene.
The rock shape does a lot of the work here by letting the whale follow the stone’s natural curve instead of fighting a flat surface. You can adapt the same idea to a flatter river rock by shortening the tail and using fewer wave lines, or scale it down to a pebble set with just the whale silhouette. For garden decor, this type of painted rock sits nicely in a planter or along a path where the blue stands out against soil and plants. A printable template helps transfer the whale outline accurately before filling in the color blocks.
Sunflower Garden Stone
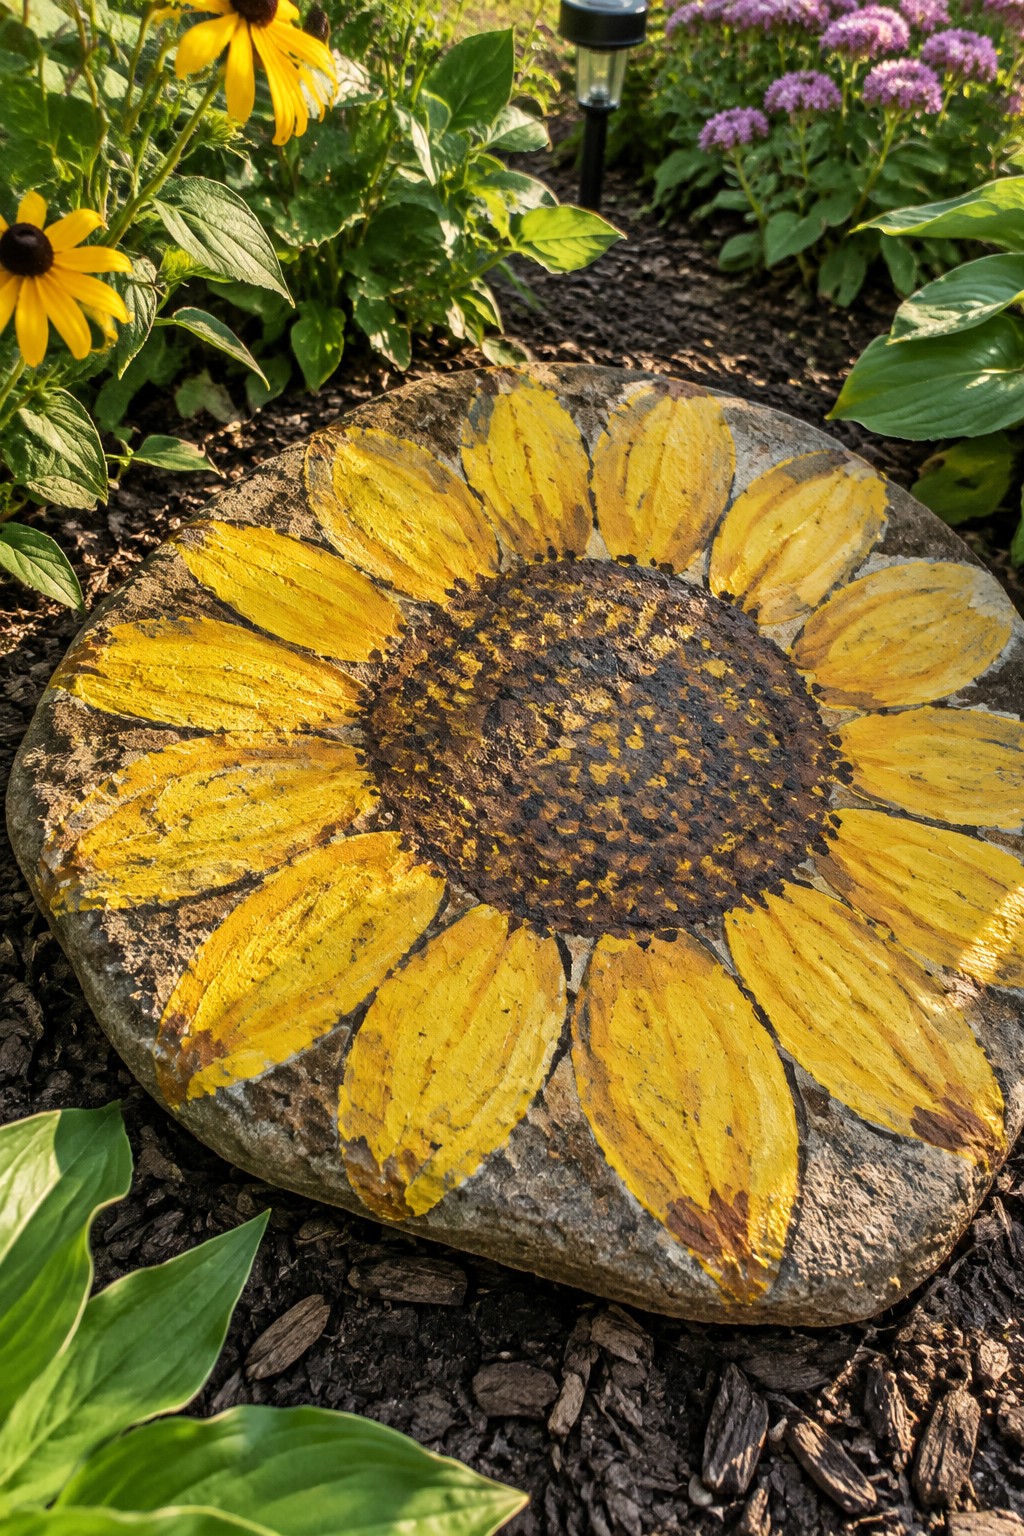
A large flat garden stone painted with a sunflower creates a simple outdoor accent that sits directly in mulch or flower beds. The design uses broad yellow petals radiating from a dark speckled center that leaves some natural stone texture visible. This flower rock approach works because the petals follow the rounded edges of the stone and the high contrast colors read clearly from a short distance. It belongs in the garden decor rock category rather than indoor or seasonal themes.
What makes this idea useful is how the sunflower stands out against dark mulch while echoing nearby real blooms. You could scale the same template down onto smaller flat stones or change the petal color to match other flowers in your beds. For garden decor this kind of painted rock works especially well along paths or tucked into planter groupings where one bold motif adds interest without clutter. The rounded stone shape makes this smart for outdoor placement because it rests stable and needs no extra hardware.
Oval Stones Painted as Sitting Birds
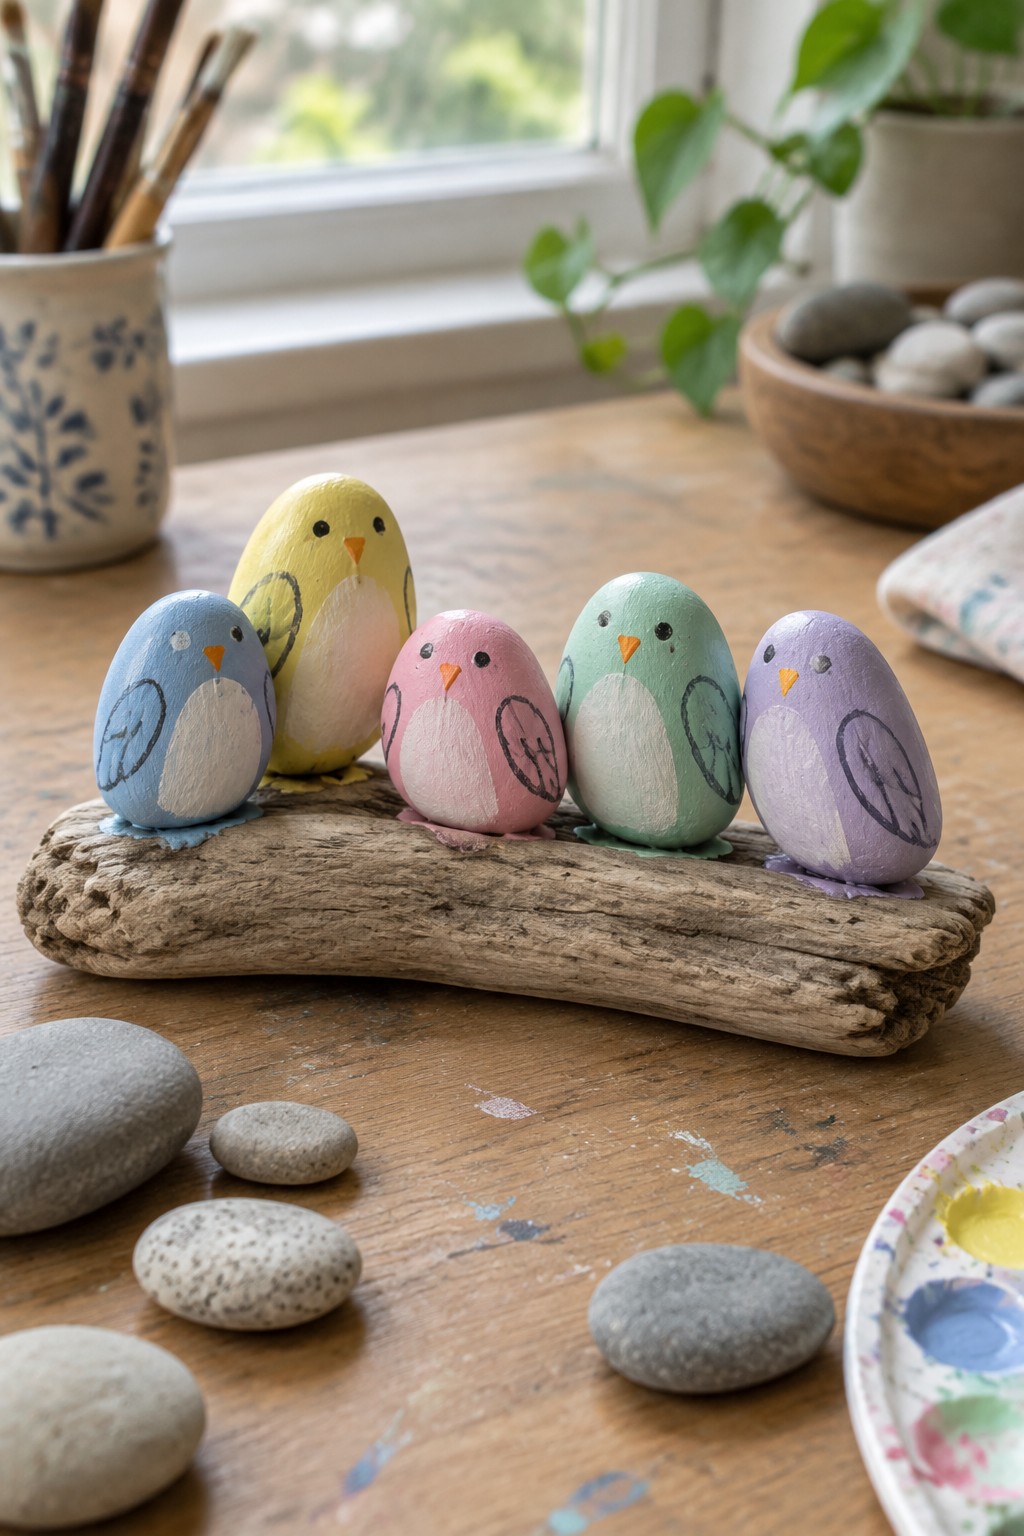
Painting smooth oval rocks into birds uses the stone’s natural egg-like shape as the body. Apply a solid color to the upper half for the back and head, then block in a lighter shade below for the belly. Add simple curved outlines for folded wings, a small triangle beak in a bright accent color, and two dots for eyes to finish each bird. This approach creates a painted rock collection that reads clearly as a group of small birds without needing complex details.
The rock shape does a lot of the work here since the rounded form already suggests a perched bird. You can adapt the same basic layout to other colors or slight wing variations to make additional birds from the same template. These painted stones work especially well grouped on a shelf, in a planter, or along a garden path where their size stays practical and the color blocking keeps them visible from a short distance. The simple outlines also make it easy to trace from printable templates onto multiple rocks in one session.
Hedgehog Painted Rock
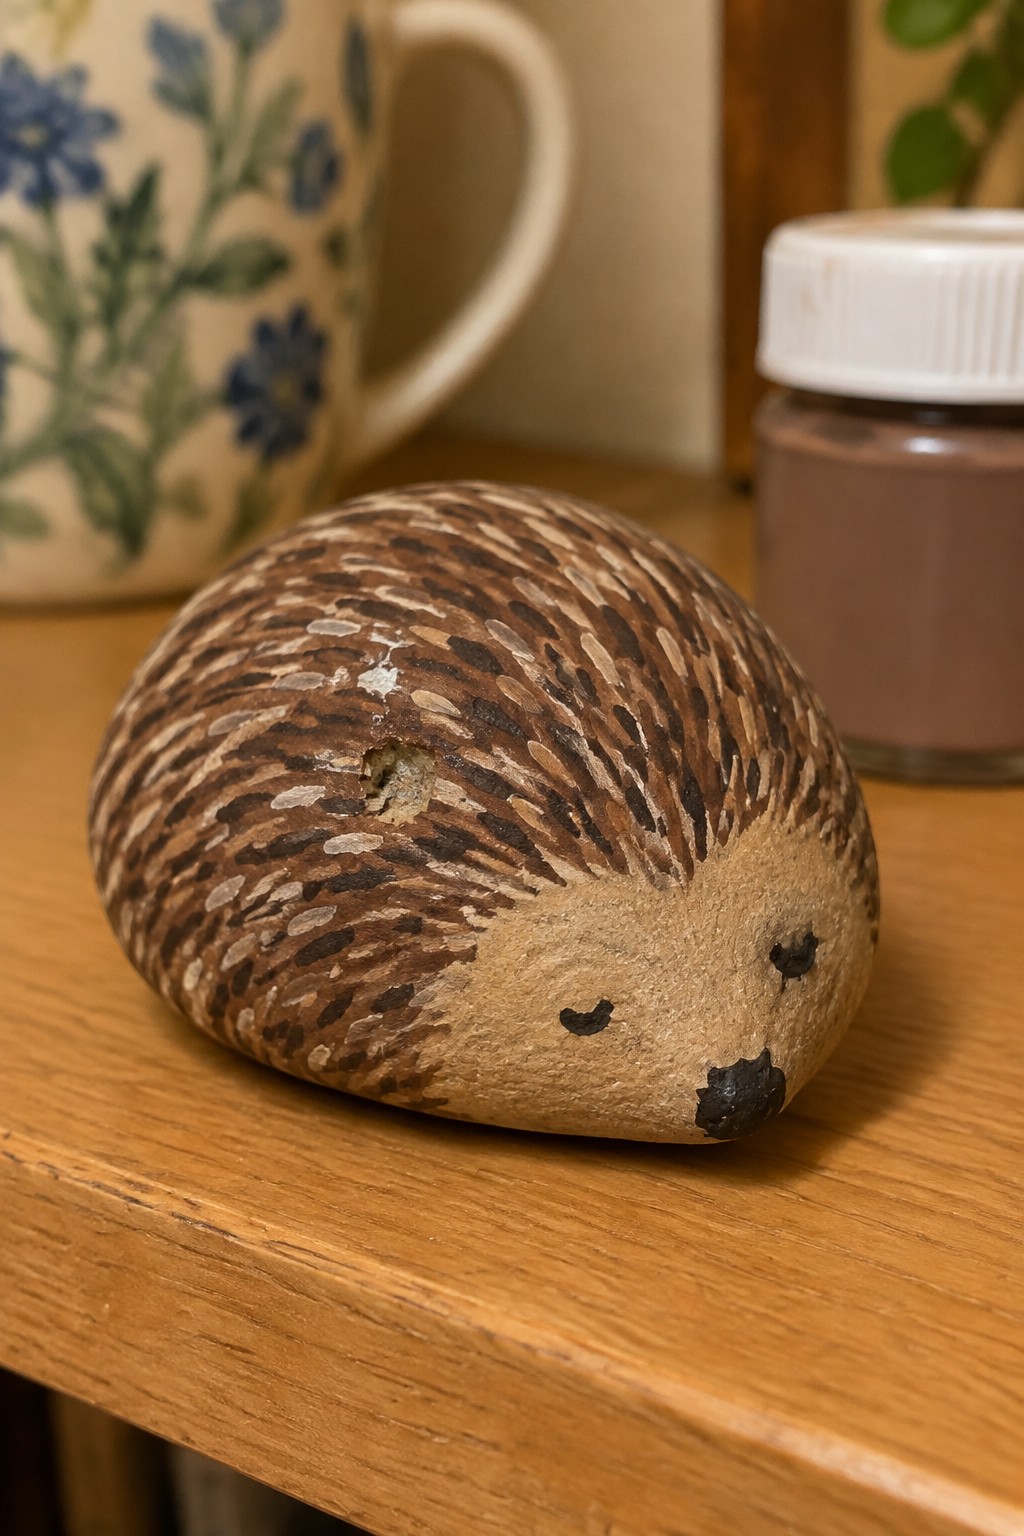
A smooth oval stone forms the base for this hedgehog project because its rounded shape already matches the animal’s curled body. Brown and tan brush strokes create the spine pattern across the upper surface while the lower portion stays plain to represent the face area. Black paint marks the eyes, nose, and mouth at one end of the stone. This fits the animal rock category and uses the natural curve of the rock to guide the stripe placement.
The rock shape does a lot of the work here since the oval form already suggests a curled hedgehog without extra carving. You can adapt the stripe pattern to other rounded stones by switching the brown tones to match garden mulch or seasonal displays. A small version like this sits well in a planter, along a path edge, or inside a windowsill collection. For a printable template, the face placement and stripe direction can be traced to keep the layout balanced on different stone sizes.
Donut Painted Rock
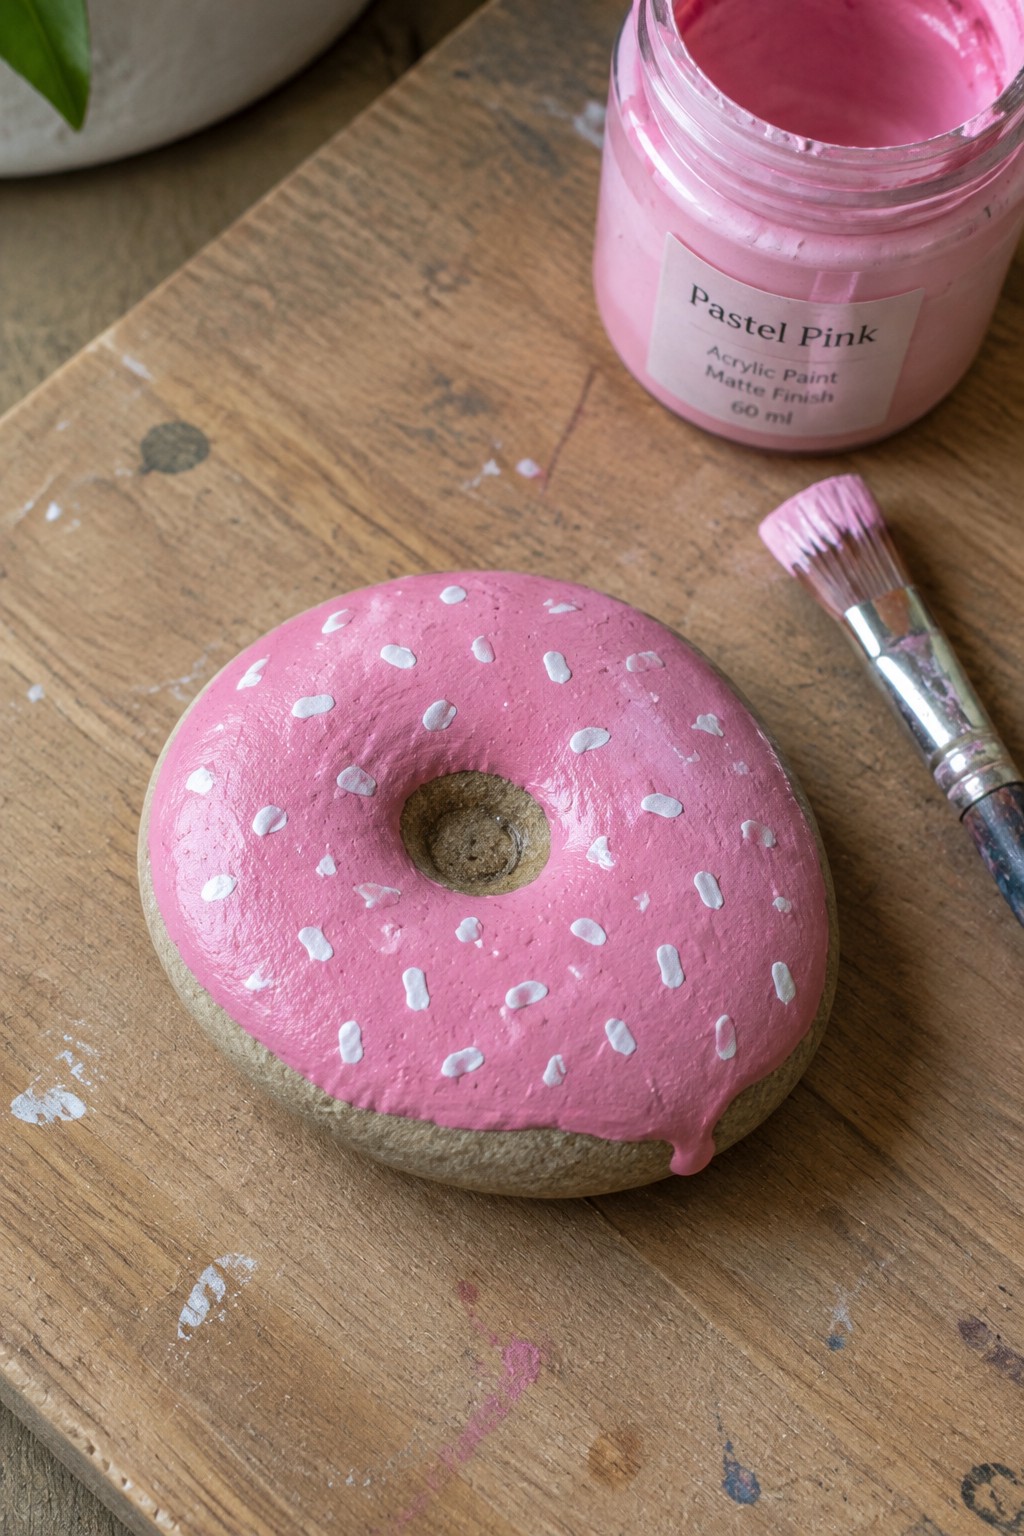
A donut painted rock starts with a rounded stone that already has a natural hole through the center. Pink paint covers the top surface to stand in for frosting, while small white dashes scattered across it create the look of sprinkles. The food-inspired design works because the stone’s curved shape and hole let the paint follow the form without needing extra shaping.
What makes this idea useful is how the basic color blocking and dot pattern translate easily to other rock sizes or frosting colors using a printable template for placement. It suits a kitchen counter, kids’ room shelf, or dessert table accent without taking up much space. The same approach can be simplified to a solid color base with fewer dots if you want a quicker version on a flatter stone.
Pastel Patterned Rocks with Stripes and Daisies
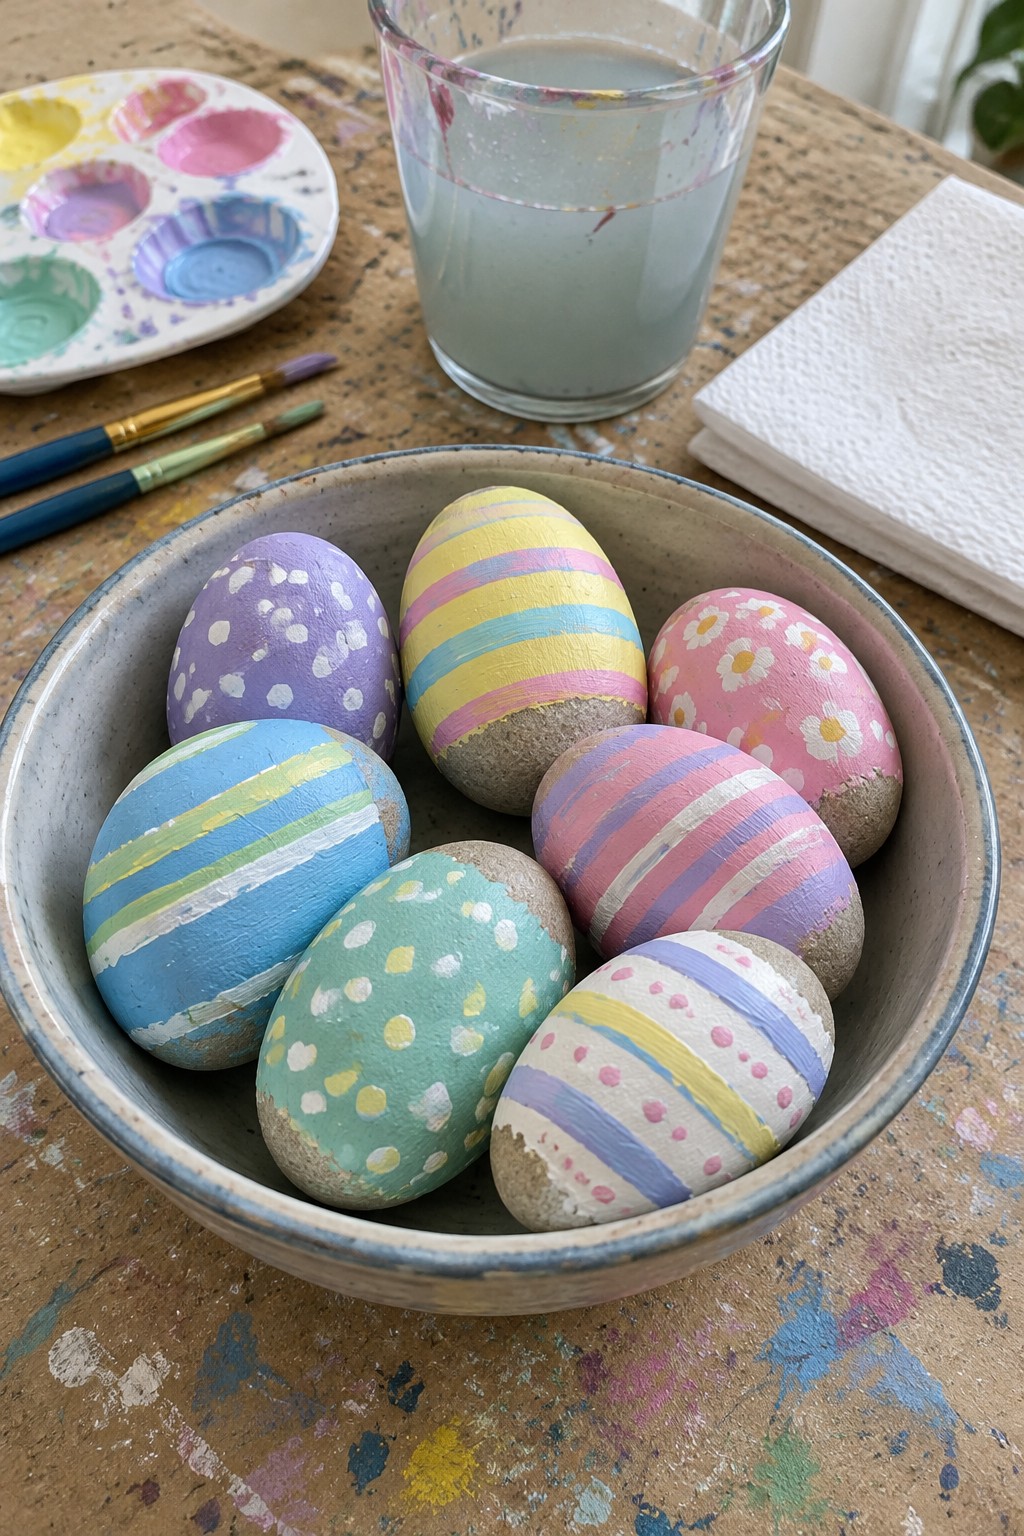
These painted rocks use smooth, oval stones as the base for simple repeating patterns. Each rock shows either horizontal stripes, scattered dots, or small daisy motifs in soft pastel colors, with the natural stone left bare at the bottom. The designs work well because the rounded shape lets the lines and dots follow the curve without needing perfect precision.
What makes this idea useful is how the same basic patterns can be pulled from printable templates and applied to any oval or egg-shaped stone you find. The stripes stay neat with painter’s tape as a guide, while the dots and daisies need only a small brush or cotton swab. These rocks fit nicely in a bowl on a table or shelf and can be swapped out seasonally by changing the color palette on the same set of stones.
Crescent Moon Night Sky Painted Rock
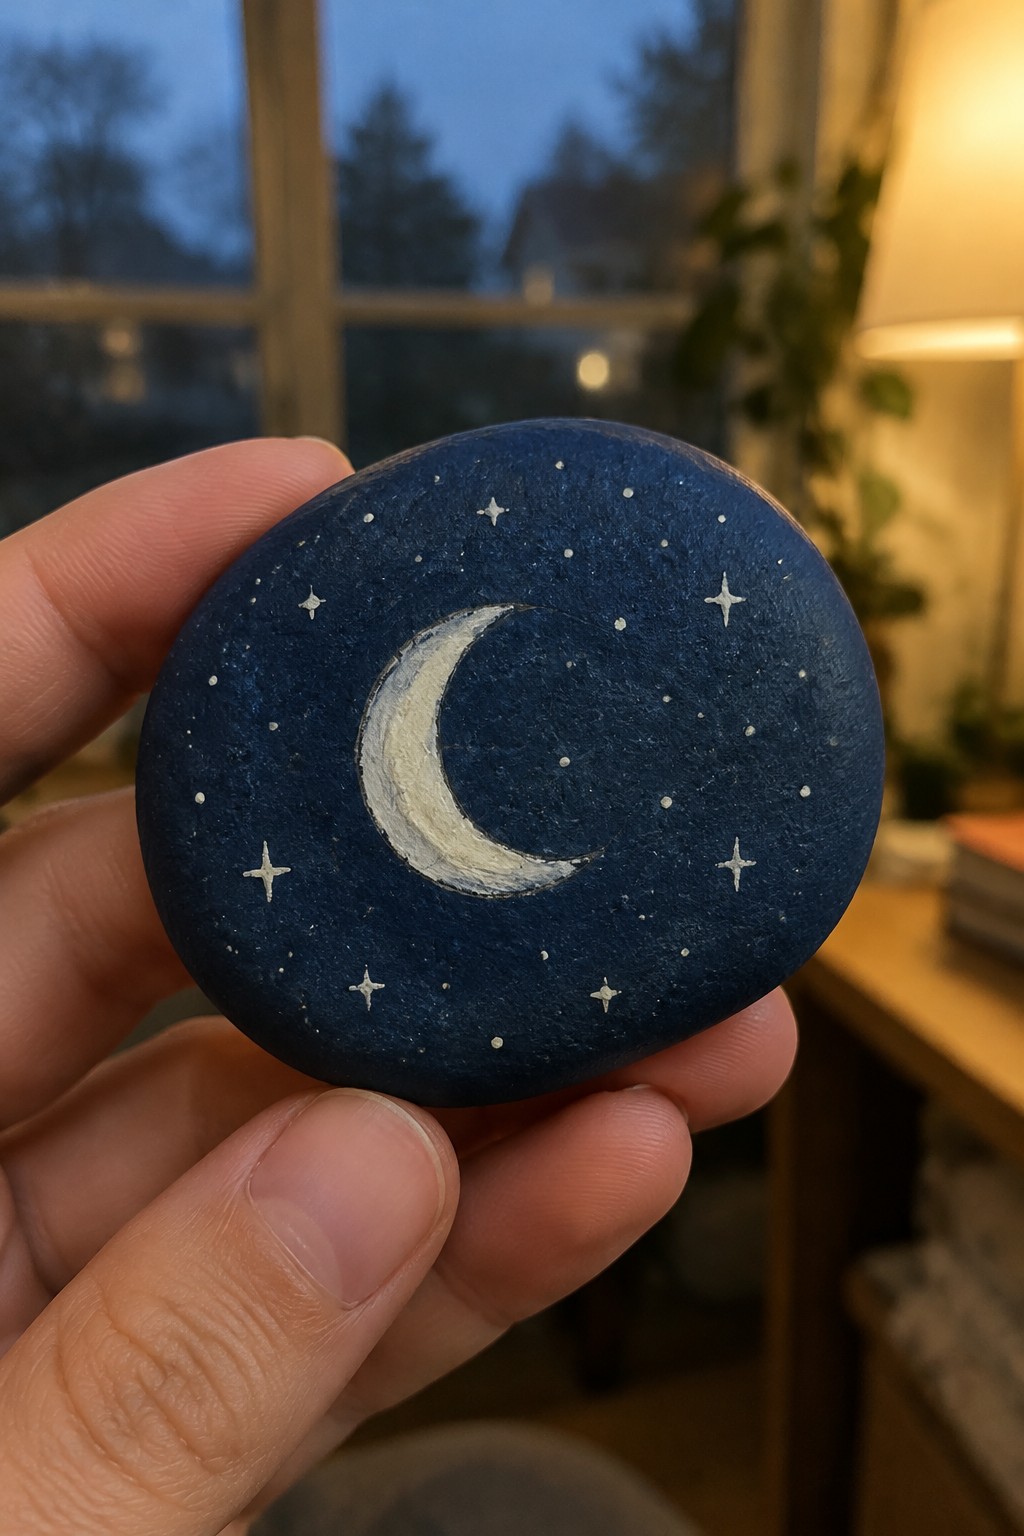
A smooth, rounded stone painted deep blue creates a simple night sky base that lets the white crescent moon stand out clearly. Scattered stars of different sizes add light points without crowding the surface, and the curved rock shape helps the moon design sit naturally in the center. This decorative stone craft works as a small celestial accent rather than a functional marker.
The basic shapes make this idea easy to adapt with printable templates for the moon and stars. It sits well in a planter, on a shelf, or among other garden stones because the dark background keeps the focus on the motif. You could scale the same layout down for smaller pebbles or swap the blue for a lighter shade to change the mood while keeping the layout intact.
Pizza Slice Painted Rocks
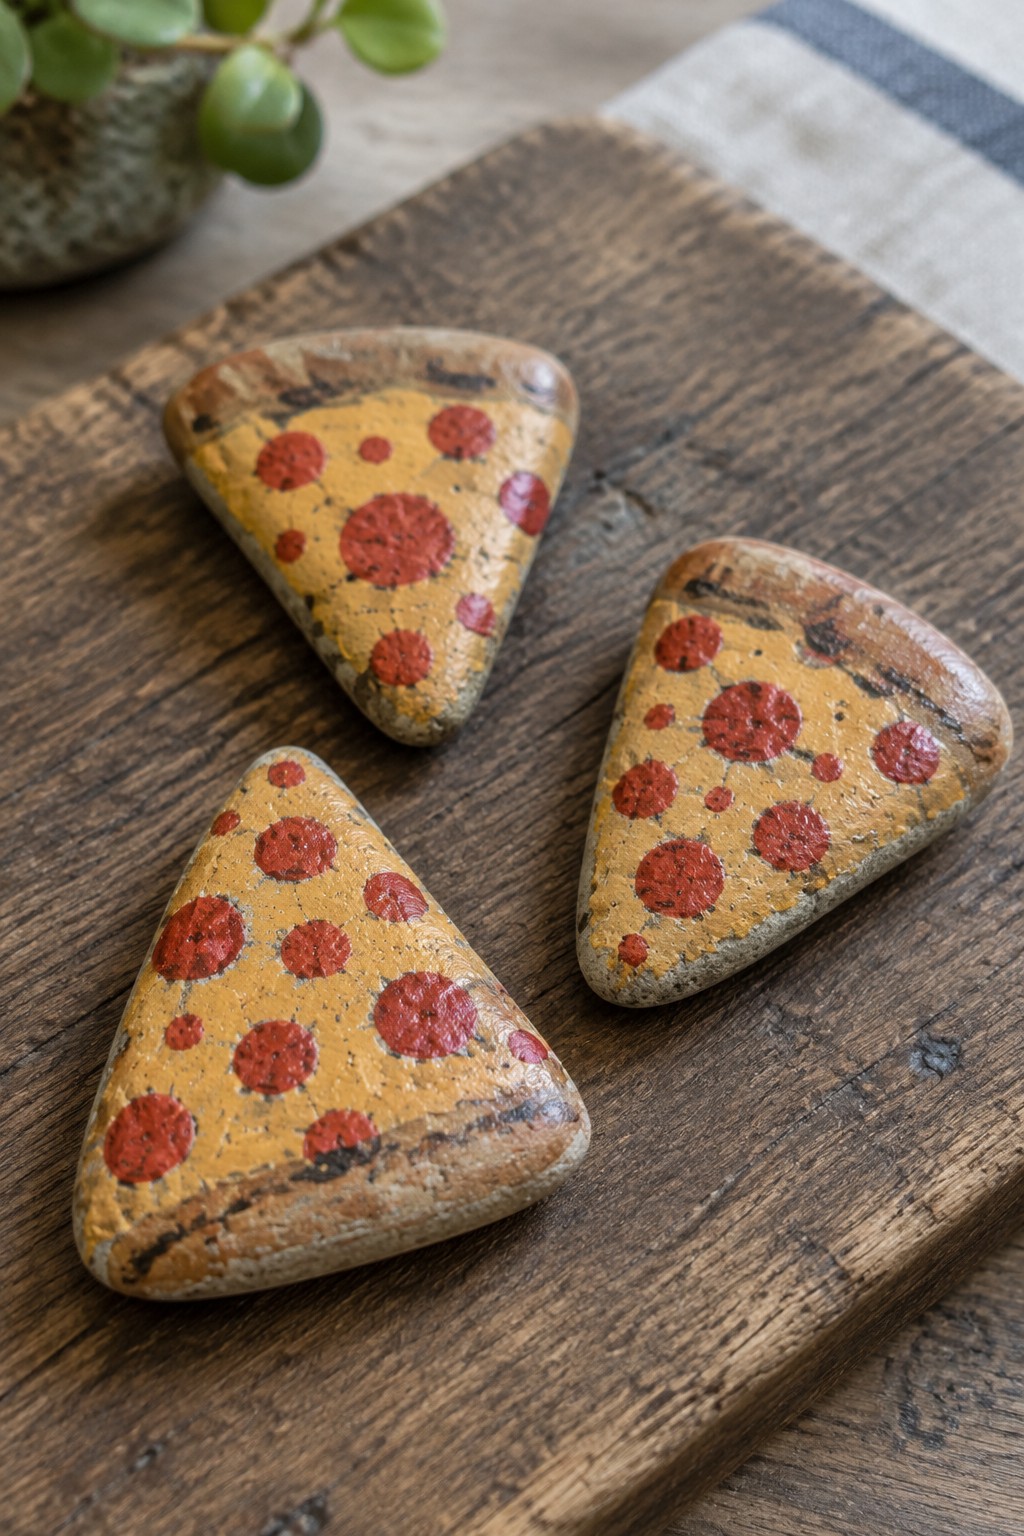
Triangular stones painted with a mustard yellow base and scattered red circles create simple pizza slice designs that follow the natural wedge shape of each rock. The uneven stone edges and visible texture add a crust-like finish without needing extra lines or shading. This food-inspired category works especially well when the rocks stay small enough to group together on a shelf or tray.
The rock shape does most of the work here, so the same idea adapts easily to any flat, wedge-shaped stones you already have. You can change the red dots to different sizes or add a few smaller marks for extra toppings while keeping the base color simple. These painted rocks stand out on Pinterest as quick party accents or kitchen shelf details because the triangle form makes the theme instantly clear without templates for every detail.
Fairy Door Painted Rock for Planters
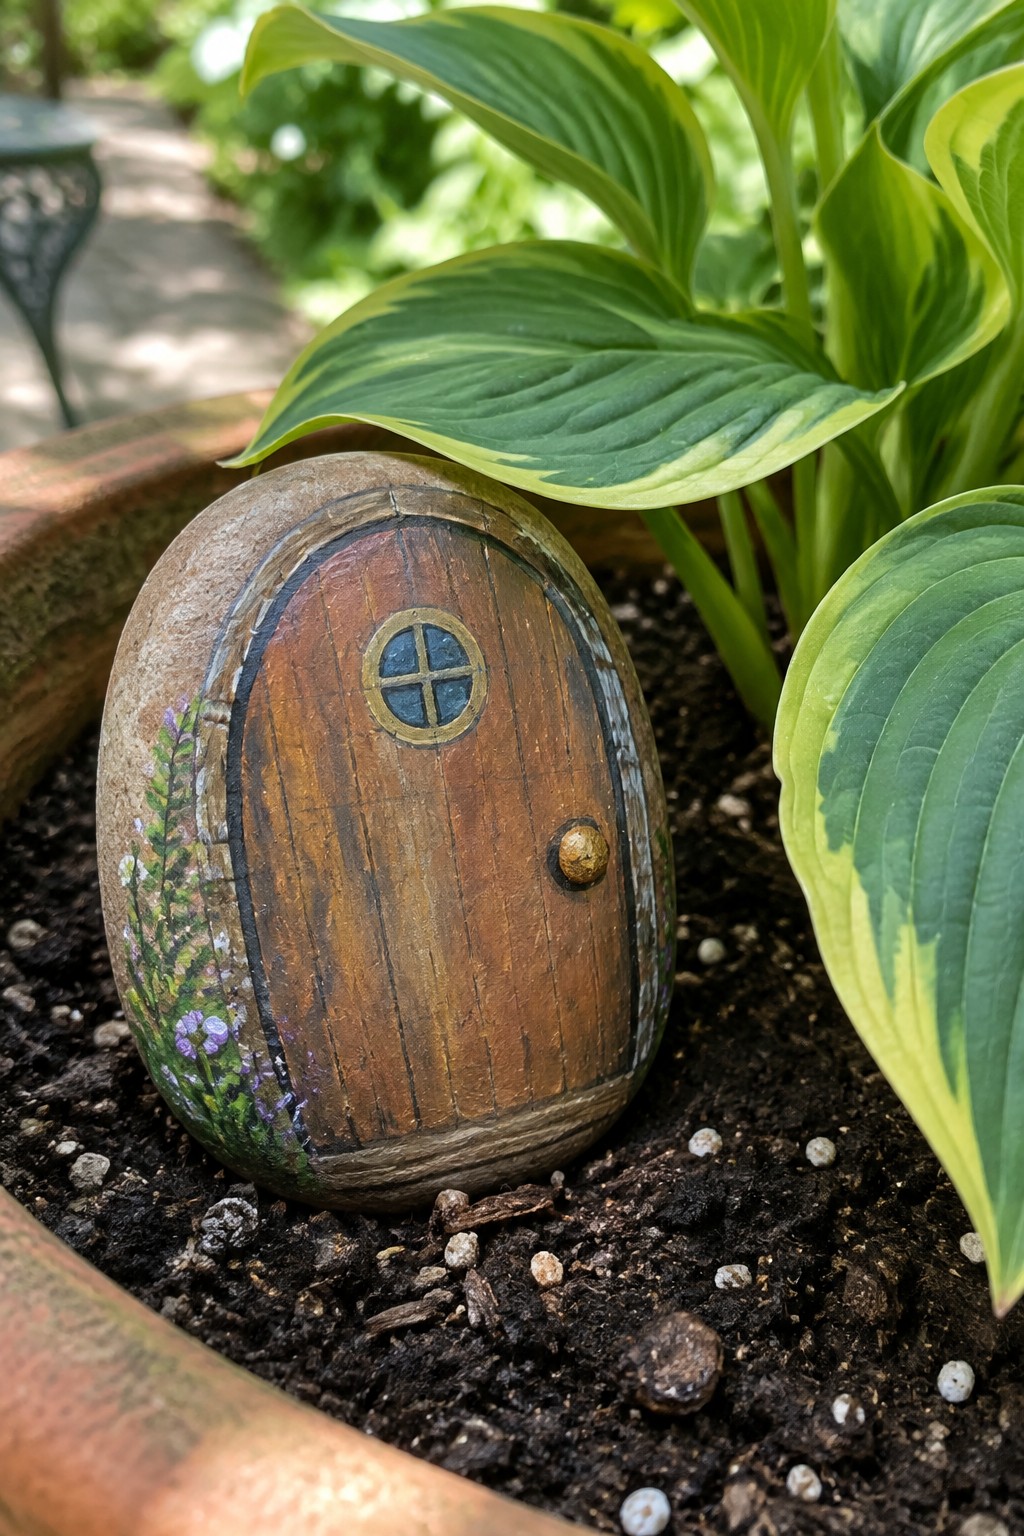
A smooth oval rock is painted with vertical wood grain in brown tones, a round window, and a small doorknob to create a miniature door effect. Dark outlines define the arched shape while a small cluster of flowers runs along one side. The natural curve of the stone helps the door motif sit realistically against soil or mulch in a garden setting.
What makes this idea useful is how the compact oval shape fits neatly into planters or along the edge of flower beds. You can adapt the design by swapping the window style or adding different leaf details using a printable template for the basic door outline. The same approach works on slightly flatter stones if you keep the color blocking simple and skip the side flowers.
Christmas Ornament Painted Rock

A smooth, rounded stone painted to look like a hanging Christmas bauble makes a simple seasonal accent. The design splits the rock into red and green bands with gold lines, then centers a poinsettia motif surrounded by small leaves and dots. The natural curve of the stone lets the color blocks and painted hanger shape follow the surface without extra effort, so the finished piece reads clearly as an ornament-style rock rather than flat painted decor.
This rock works well tucked into a planter, set on a mantel, or added to a bowl of greenery for holiday displays. The rounded shape supports the same layout on larger or smaller stones, and the poinsettia can be swapped for a star or tree cutout from a printable template to change the look quickly. For gifts, pair the finished rock with a ribbon to emphasize the ornament idea without needing extra supplies.
Arrow Painted Rocks for Garden Planters
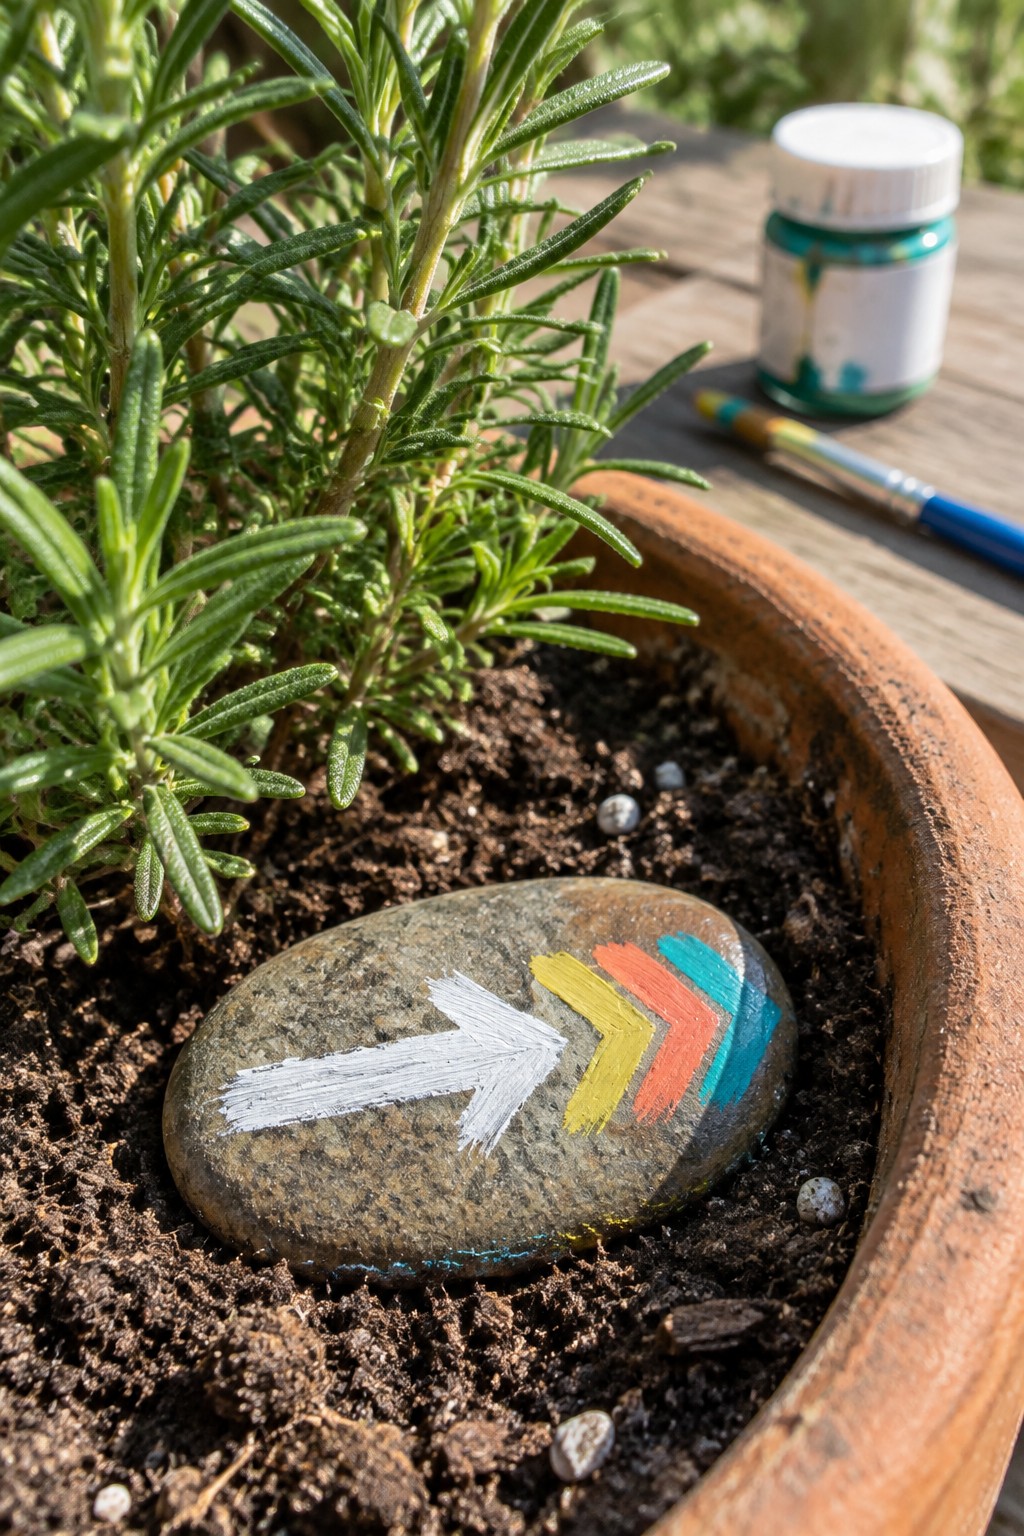
A rounded stone painted with a row of arrows creates a simple directional accent that works well tucked into soil or mulch. The design uses a solid white arrow followed by three overlapping chevrons in yellow, orange, and teal that follow the curve of the rock surface. This motif fits the garden decor rock category and stays legible on stones with natural texture and rounded edges. The layered colors give the arrows visual movement while keeping the overall pattern basic enough to copy from a printable template.
What makes this idea useful is how the arrow sequence can be shortened or lengthened to fit different stone sizes without losing impact. The small scale makes it easy to place inside pots, along path edges, or in clusters of three or four rocks. You could change the color order, switch to a single arrow style, or use the same template on flatter stones for a more graphic look. For garden displays this type of painted rock adds a clear focal point that photographs well and requires no text to read.
Snowman Face Painted Rock
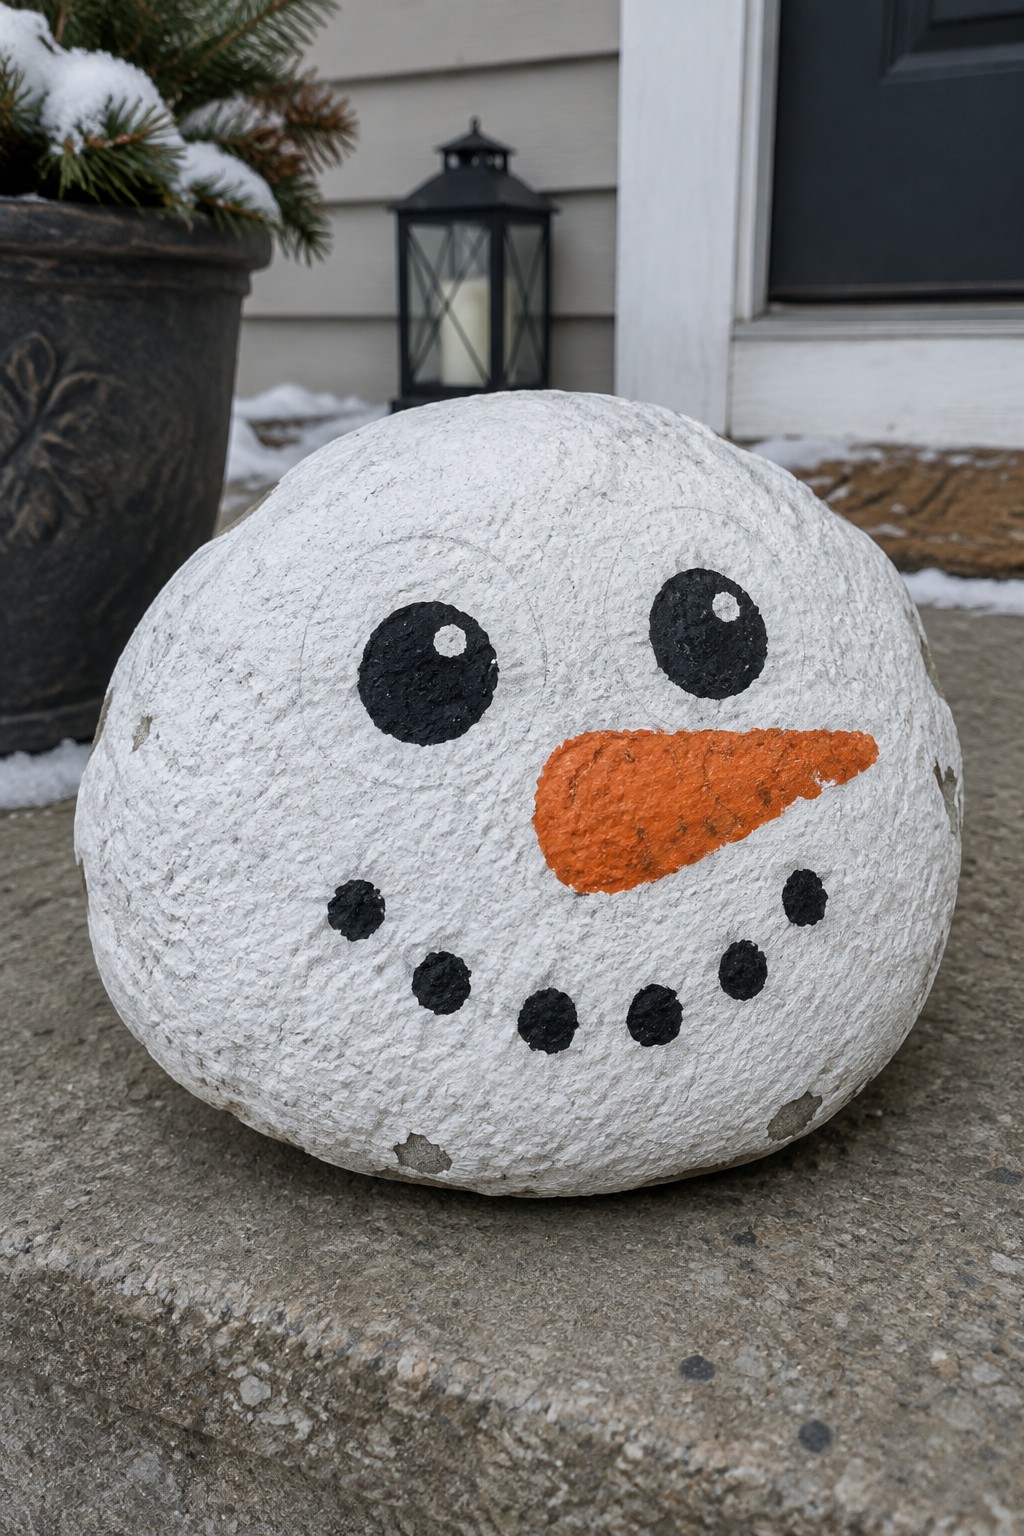
A snowman rock project uses a large rounded stone painted white as the base for a simple winter face. Black circles form the eyes with small white dots added for highlights, an orange triangle creates the nose, and a curved row of black dots makes the mouth. The design works because the stone’s natural rounded shape and rough texture support the snowball look without extra shaping. This falls into the holiday rock category and suits seasonal displays.
What makes this idea useful is how the face elements can be traced from a printable template and scaled to fit stones of different sizes. A painted rock like this works especially well as doorstep or porch decor through the winter months. The clear color blocking and basic shapes make it easy to repeat across several stones for a matching set.
Frequently Asked Questions
What supplies will I need to complete the painted rock crafts from the templates?
You will need smooth rocks that fit the template sizes, acrylic paints in various colors, fine and medium paintbrushes, a pencil for tracing, and a clear acrylic sealant spray to protect the finished designs. Gather paper towels, a cup of water for rinsing brushes, and optional items like glitter or markers for added details. Start by printing the templates on regular paper and cutting them out to match your rock shapes.
How do I transfer the printable templates onto the rocks without making mistakes?
Print the templates at the correct scale and place them over the rock to trace the main outlines lightly with a pencil. For better results on uneven surfaces, rub the back of the printed template with a graphite pencil to create a transfer sheet, then press it onto the rock. Work in sections and erase any stray lines before painting. This method keeps designs accurate even for beginners.
Can these crafts work for children, and what ages are best suited?
Many of the 22 crafts suit kids aged 5 and up with adult supervision for painting and sealing steps. Simpler designs like basic shapes or animals work well for younger children, while detailed patterns suit older kids. Use washable paints to reduce mess and choose larger rocks for easier handling. Always ensure good ventilation when applying sealant.
What if my rocks are a different size than the printed templates?
Resize the templates on your computer before printing by adjusting the scale in print settings to match your rock dimensions. You can also cut templates into parts and rearrange them or draw freehand extensions. Test fit by holding the paper against the rock first, and select flatter rocks for better template adhesion during tracing.
How should I seal the painted rocks to make them durable for outdoor use?
Apply two thin coats of outdoor-rated acrylic sealant after the paint dries completely, allowing each coat to cure for the time specified on the product label. Place the rocks in a well-ventilated area and avoid touching them until fully dry, which may take 24 hours. This protects against weather and fading while keeping colors vibrant.
