


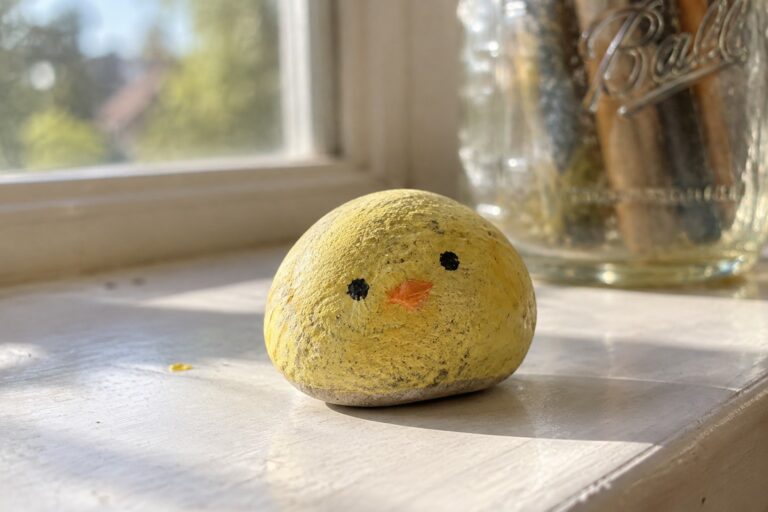
I have been painting rocks for a few years now and I tend to stick with simple designs.
Most of the time I just use a couple of colors and basic shapes that do not take long to finish.
Here are some small ideas I have tried that rely on minimal brushwork.
They work well when I want a quick project without pulling out too many supplies.
I hope a few of them give you something easy to try on your own.
Yellow Chick Pebble with Dot Eyes
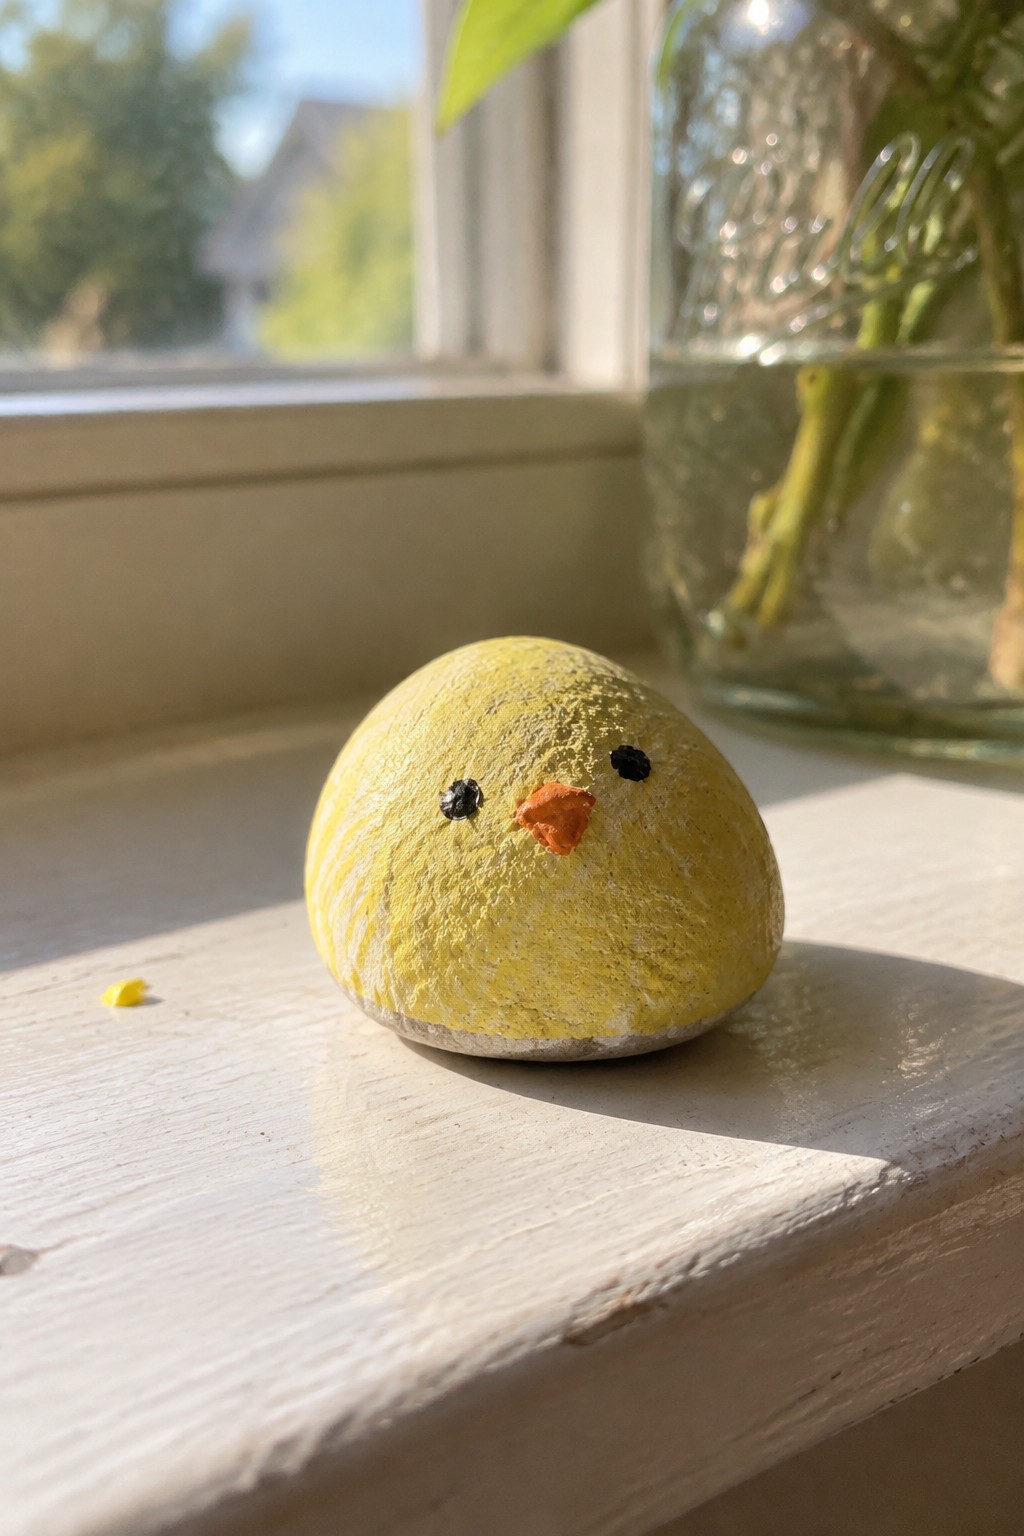
A small rounded pebble painted solid yellow works as a chick rock using almost no brushwork. Two black dots serve as eyes and a small orange triangle forms the beak, letting the stone shape carry the rounded head form. The design stays simple because the color areas are blocked in first and the details stay limited to basic marks that follow the curve of the rock. This approach fits the animal rock category where minimal shapes turn an ordinary pebble into a recognizable bird face.
What makes this idea useful is how fast it finishes on any small smooth stone you already have. The same dot-and-triangle layout can switch to other bird types by changing the beak color or spacing the eyes differently. A painted rock like this works especially well as a windowsill accent or dropped into a houseplant since the yellow shows up clearly against soil and wood. You could repeat the pattern across several pebbles to make a quick set without needing extra supplies or time.
Strawberry Painted Rock for Garden Accents
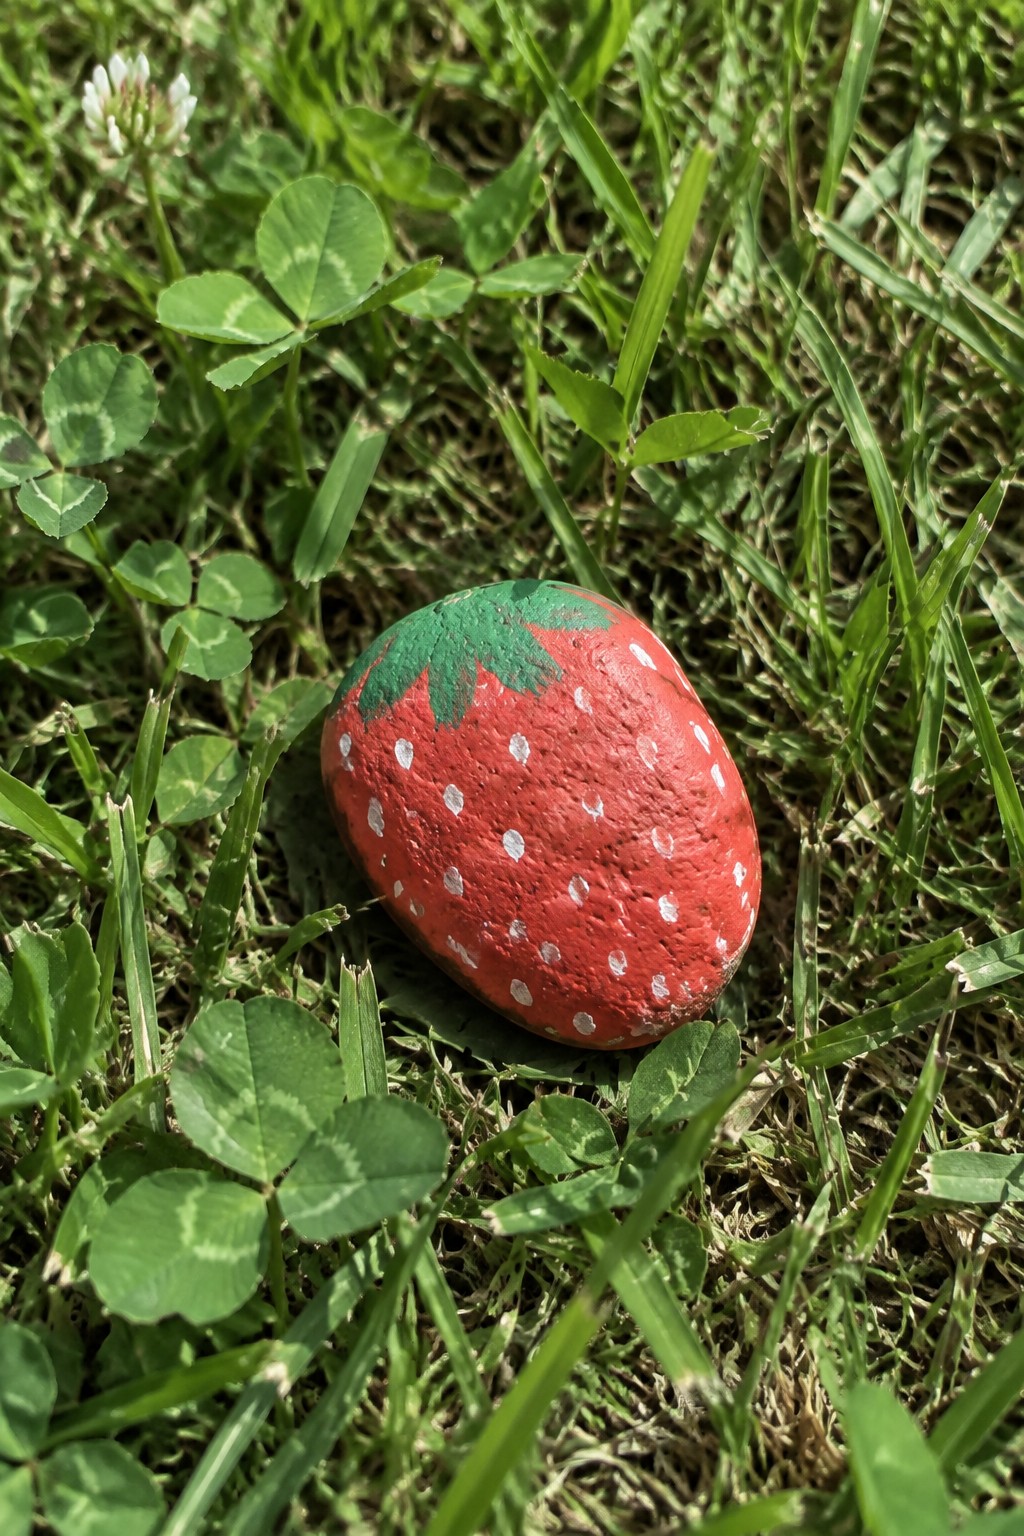
A smooth oval stone painted bright red with scattered white dots forms the base of this strawberry design while a simple green leaf shape at one end completes the look. The rounded form of the rock does most of the work by suggesting the fruit’s natural shape without extra shaping or carving. This food-inspired rock uses basic color blocking and dots to create a clear motif that reads well from a short distance.
What makes this idea useful is how the stone’s curve supports the main red area so only the green top and white dots require extra brushwork. A painted rock like this works especially well tucked into mulch or placed among potted plants where the color stands out against green foliage. The small scale makes this easy to adapt by switching to a flatter stone or changing the dot spacing to suggest a different berry or fruit.
Ladybug Rocks with Dots and Lines
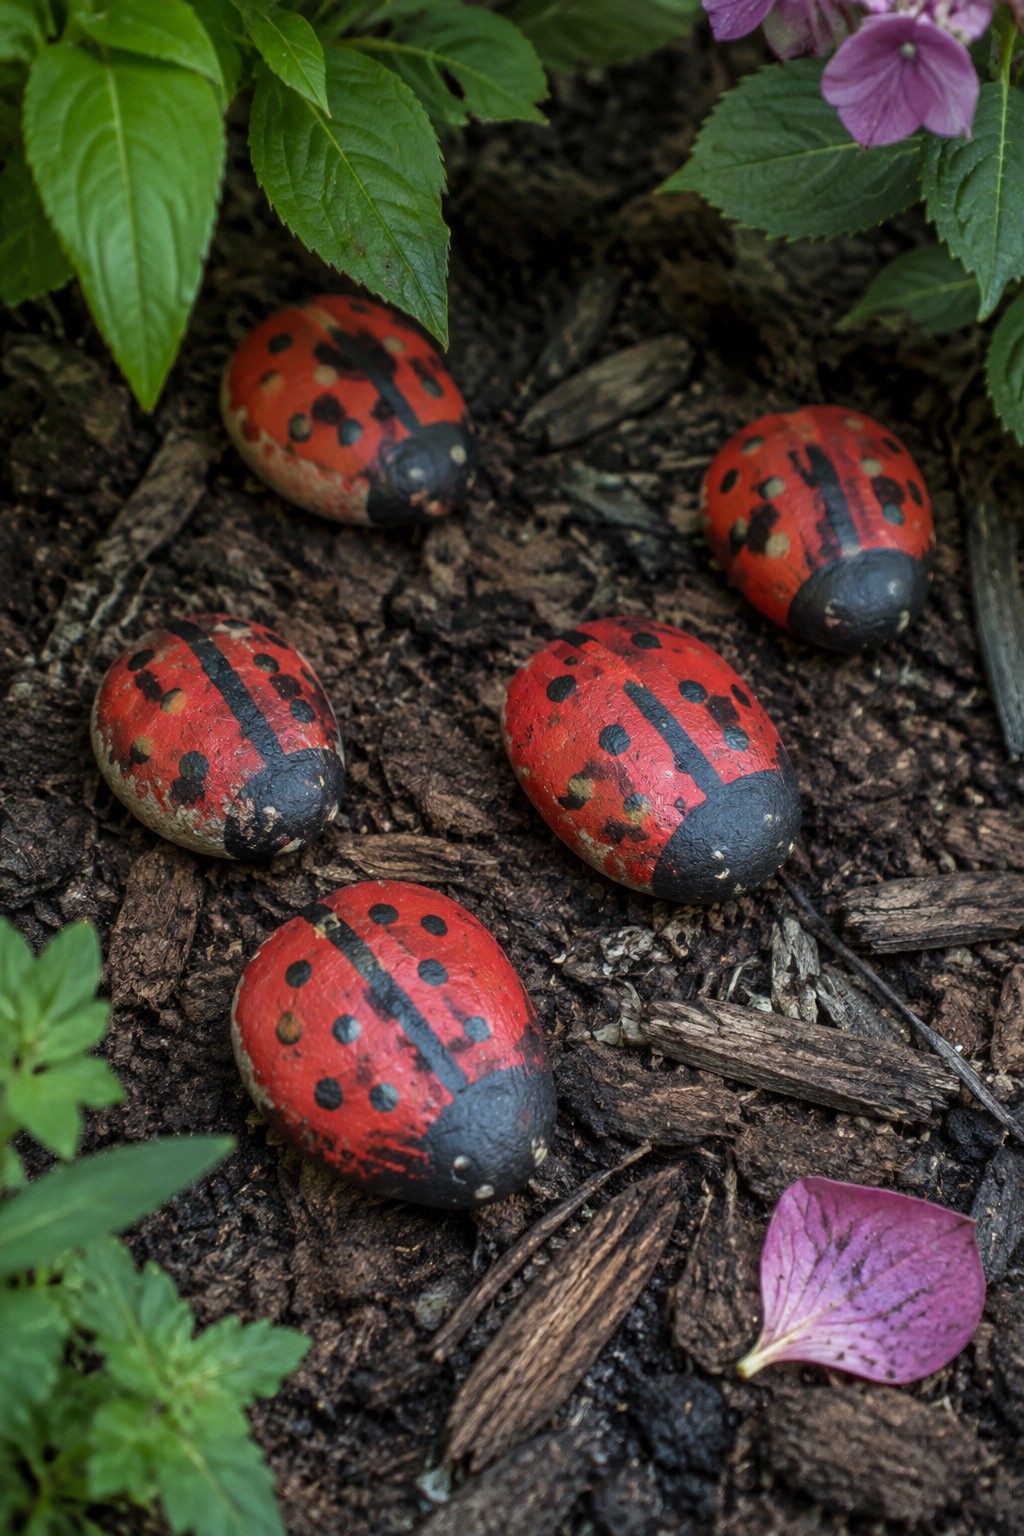
Ladybug rocks turn smooth oval stones into simple garden accents by painting the main body red, adding a thick black stripe down the center, and scattering black dots across the surface. One end of each stone gets a solid black area to mark the head. The design stays effective because the natural rounded shape of the stone already suggests the beetle form, so only basic color blocking, one line, and dots are needed.
These work well tucked into mulch beds, planter edges, or along garden paths where the red stands out against dark soil. The same layout adapts easily to smaller or narrower stones by reducing the number of dots or shortening the center stripe. You can also swap the red for other bright colors if you want a set of generic beetles instead of classic ladybugs.
Two-Tone Half Painted Stone
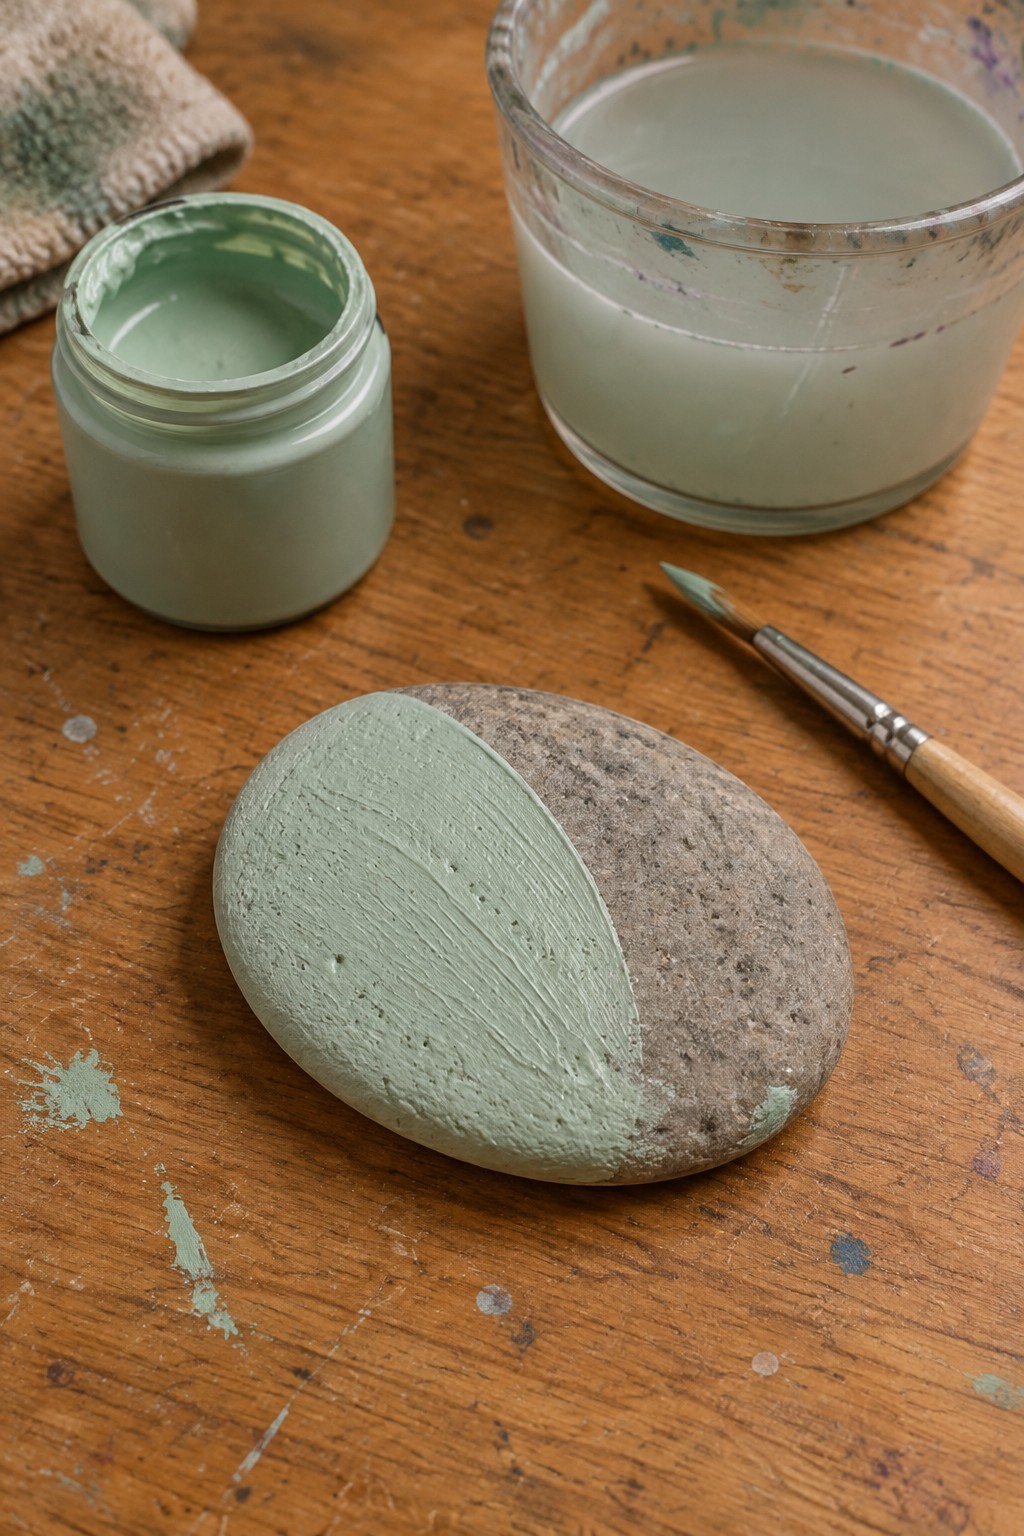
A smooth, rounded stone works well for this simple project where one half gets covered in a single soft green color using wide, visible brush strokes while the other half stays natural. The flat surface lets the paint sit evenly without much effort, and the contrast between the matte painted side and the rough stone texture creates the whole effect. This fits into the decorative stone craft category as a low-detail option that relies on the rock’s own shape and surface rather than added patterns or details.
The rock shape does a lot of the work here since the rounded form already gives a clean dividing line between painted and unpainted areas. A painted rock like this works especially well as a shelf accent, paperweight, or tucked into a planter where the natural texture can still show through. The same idea could be reworked with any color or by painting just a smaller section instead of a full half, keeping the minimal brushwork approach intact.
Minimal Line Cat Face on a Rounded Pebble
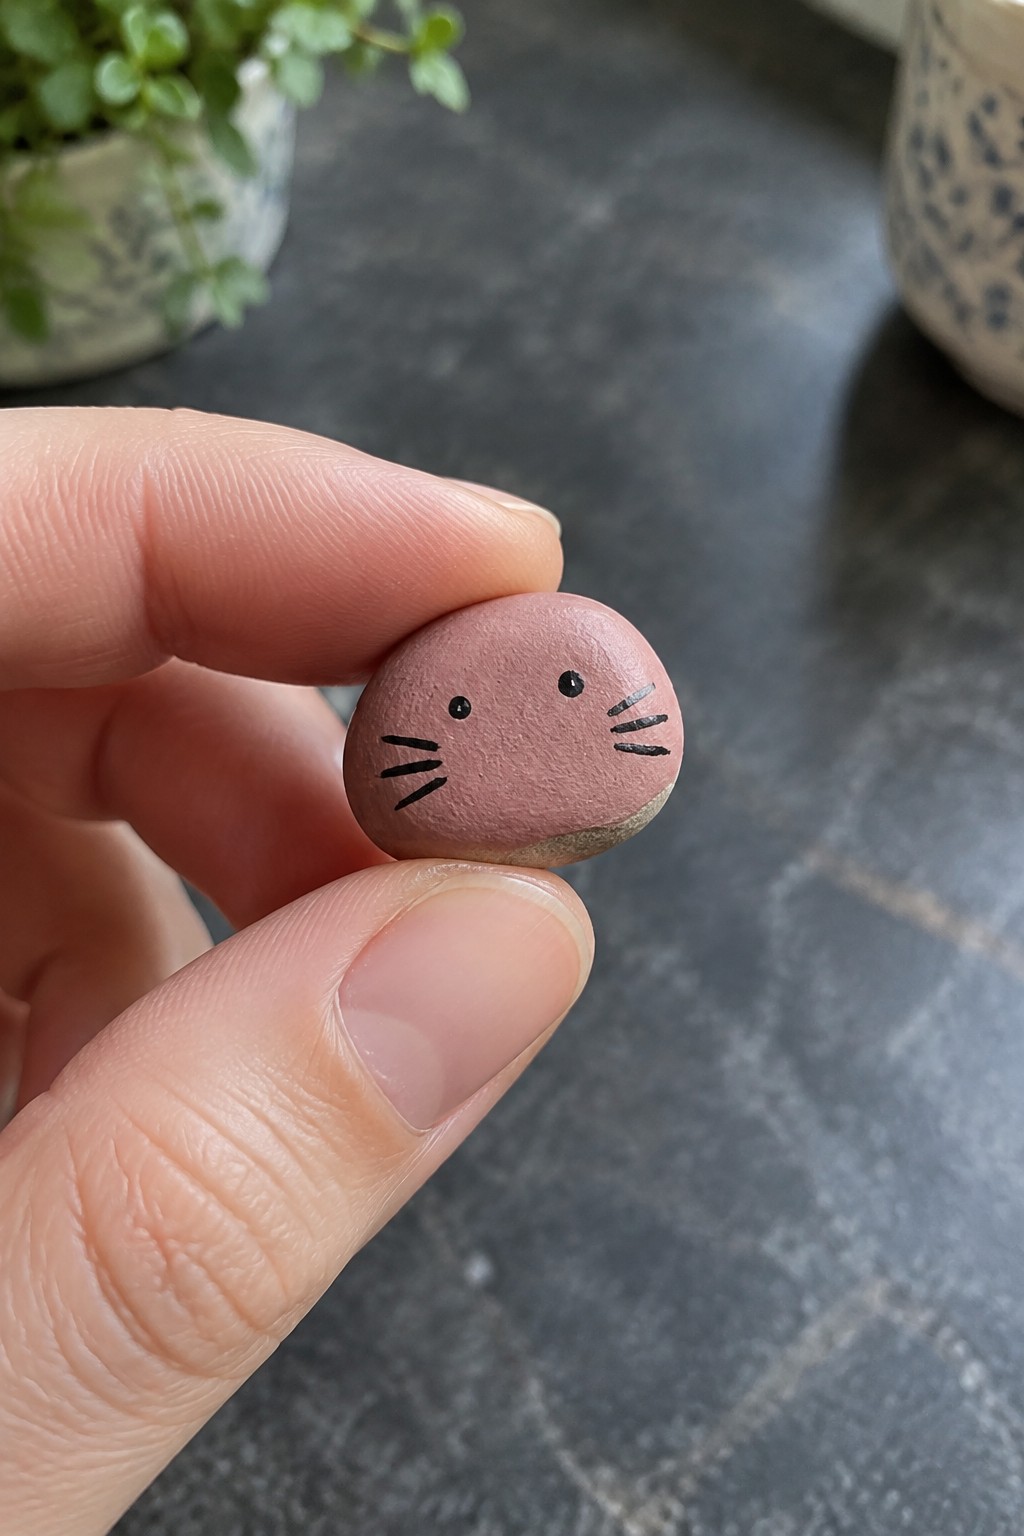
A small rounded pebble painted in a solid pink base color makes a simple cat face using only dots and short lines. The natural curve of the stone supports the placement of two eye dots and whisker strokes on each side without extra prep. This animal rock idea relies on minimal brushwork to keep the features clean and balanced across the surface.
The rock shape does a lot of the work here since the smooth rounded form lets the lines sit evenly with little adjustment. A painted rock like this works especially well as a small accent in a planter, on a shelf, or added to a group of other animal pebbles. The same dot and line approach can be repeated on similar stones in different base colors to build a quick collection or changed slightly to suggest other small animals.
Simple Blue Whale on a Rounded Stone
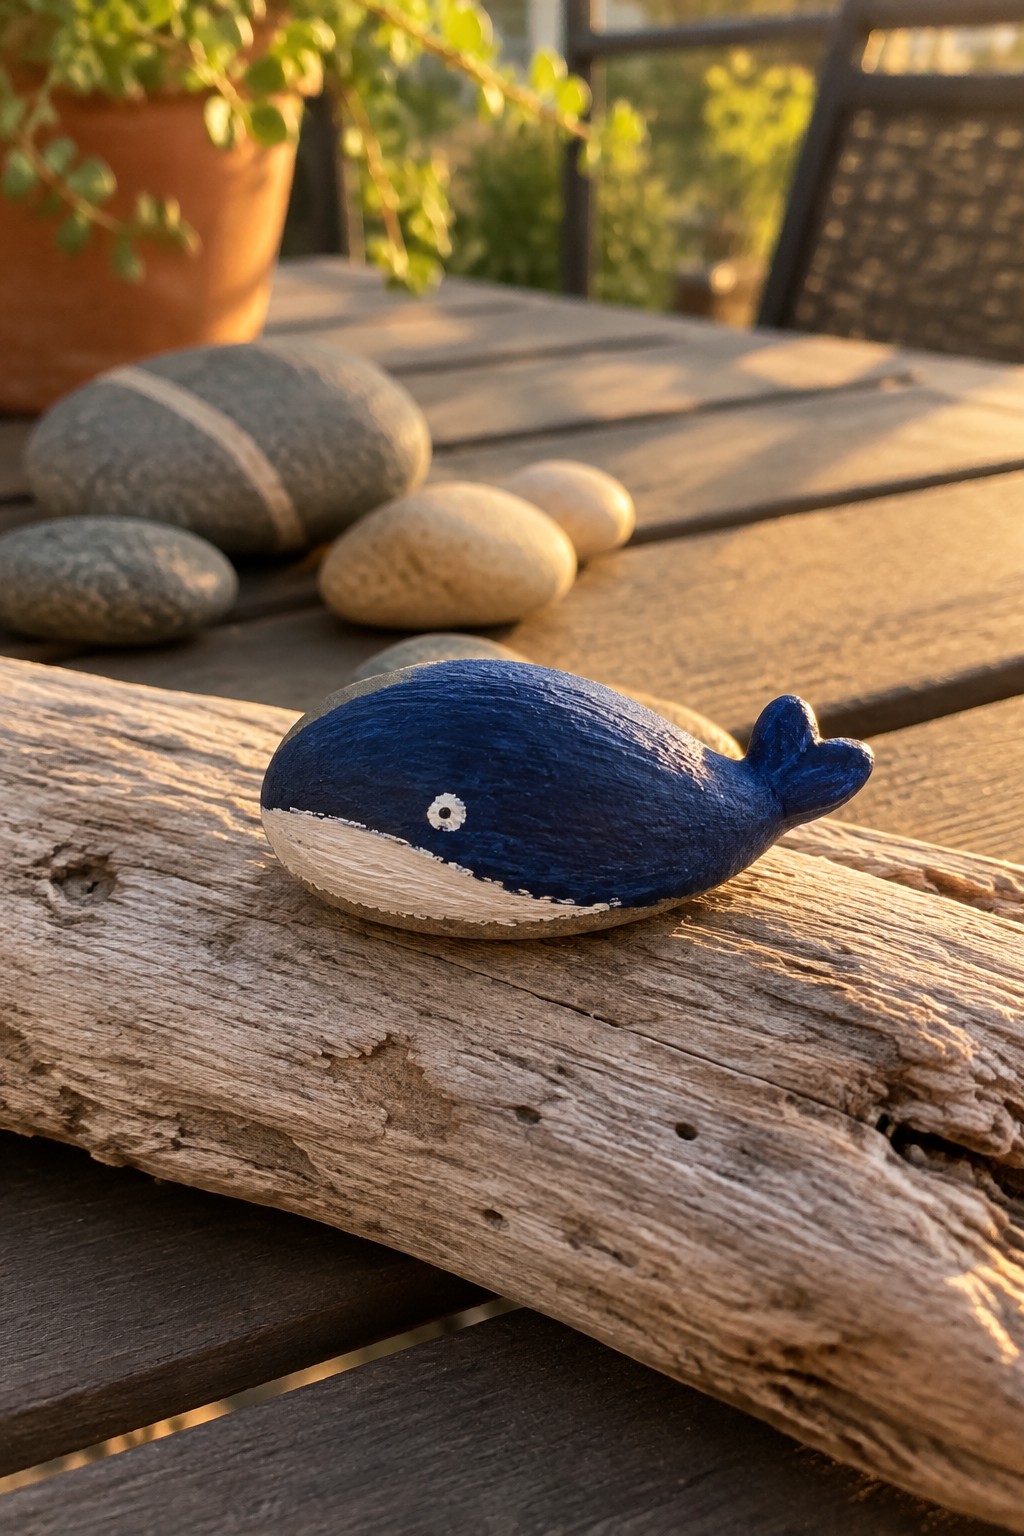
A smooth rounded stone makes a natural base for this whale rock painting. The design uses broad color blocking with dark blue across the top half and a lighter band along the bottom to suggest the belly, while a single white dot with a small center creates the eye. This animal rock idea relies on the stone’s curve to form the whale’s body without needing many lines or details.
The rock shape does a lot of the work here since the oval form already suggests a whale’s profile. A painted rock like this works especially well as a small accent on a shelf, in a planter, or tucked into a garden bed. You could easily adapt the same approach by changing the tail shape into a fish or dolphin or by using different color blocks for seasonal versions. The minimal brushwork also helps the design photograph cleanly for sharing.
Mushroom Painted Stones
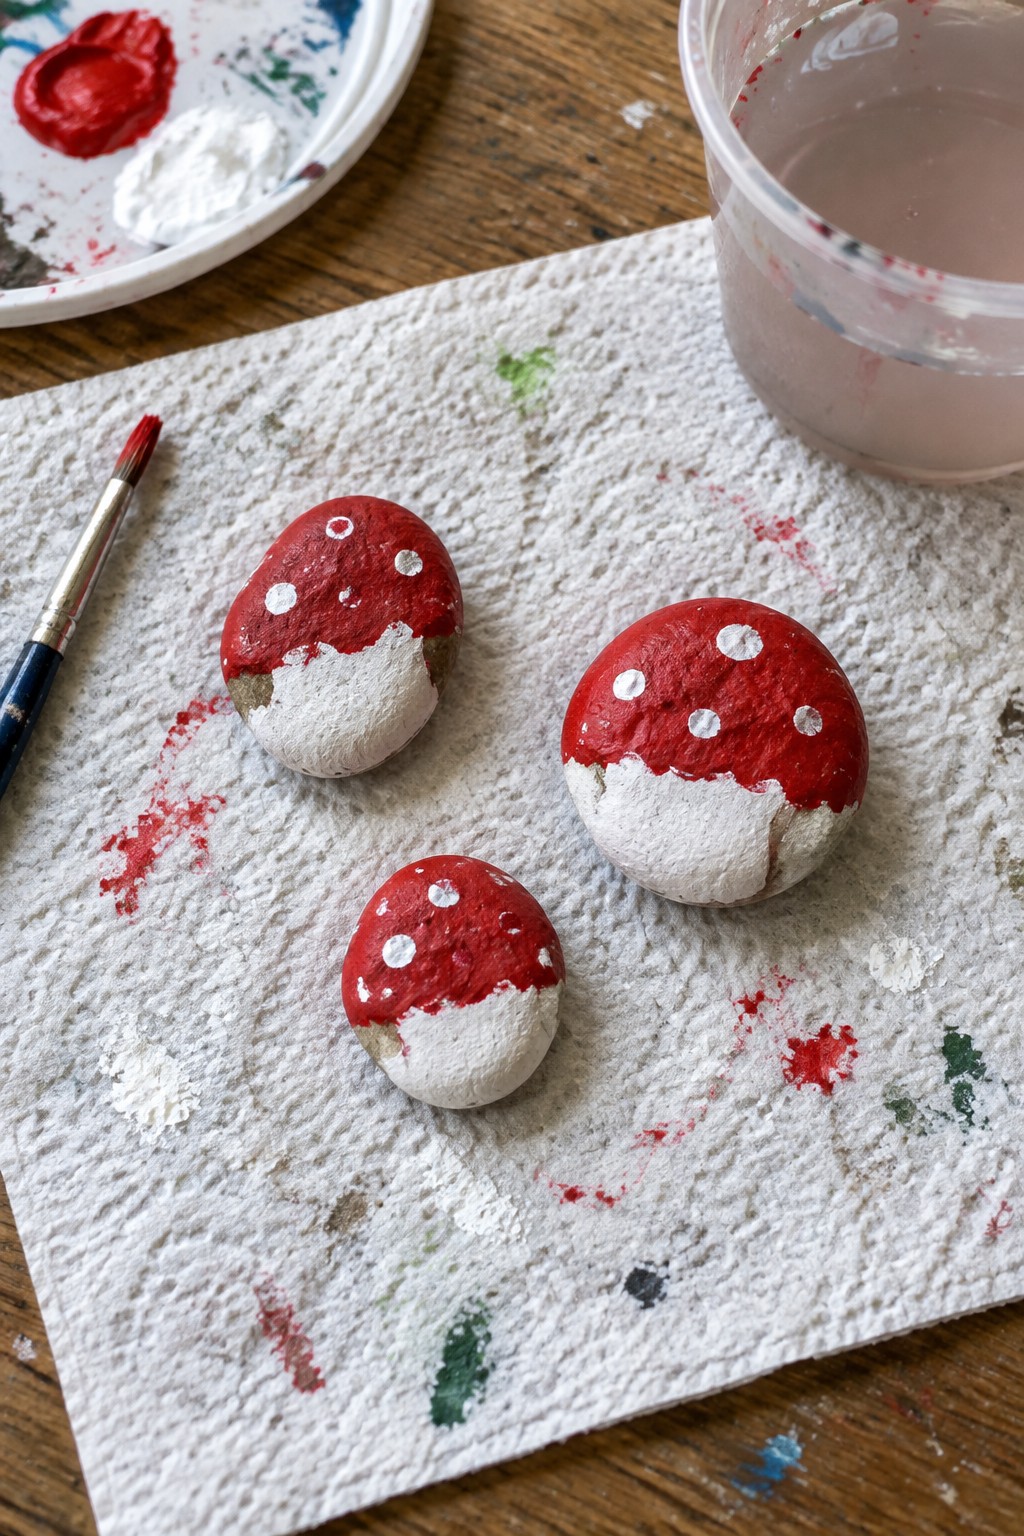
These small rounded stones become mushrooms through simple color blocking, with red paint covering the upper half and white filling the lower section to suggest a cap and stem. The natural curve of each stone helps the shapes read clearly without extra lines, and scattered white dots across the red areas finish the look using only basic marks. This style suits garden decor or planter accents because the design stays bold even when the rocks sit among soil or mulch.
The rock shape does a lot of the work here by letting the paint follow the existing form instead of requiring precise outlines. You can adapt the same blocking and dot method to flatter stones for shelf displays or scale it down for tiny pebbles in a tabletop arrangement. For garden use, group several together in different sizes so the repeated motif stands out without extra detail.
Sunflower Rock Using Radiating Strokes
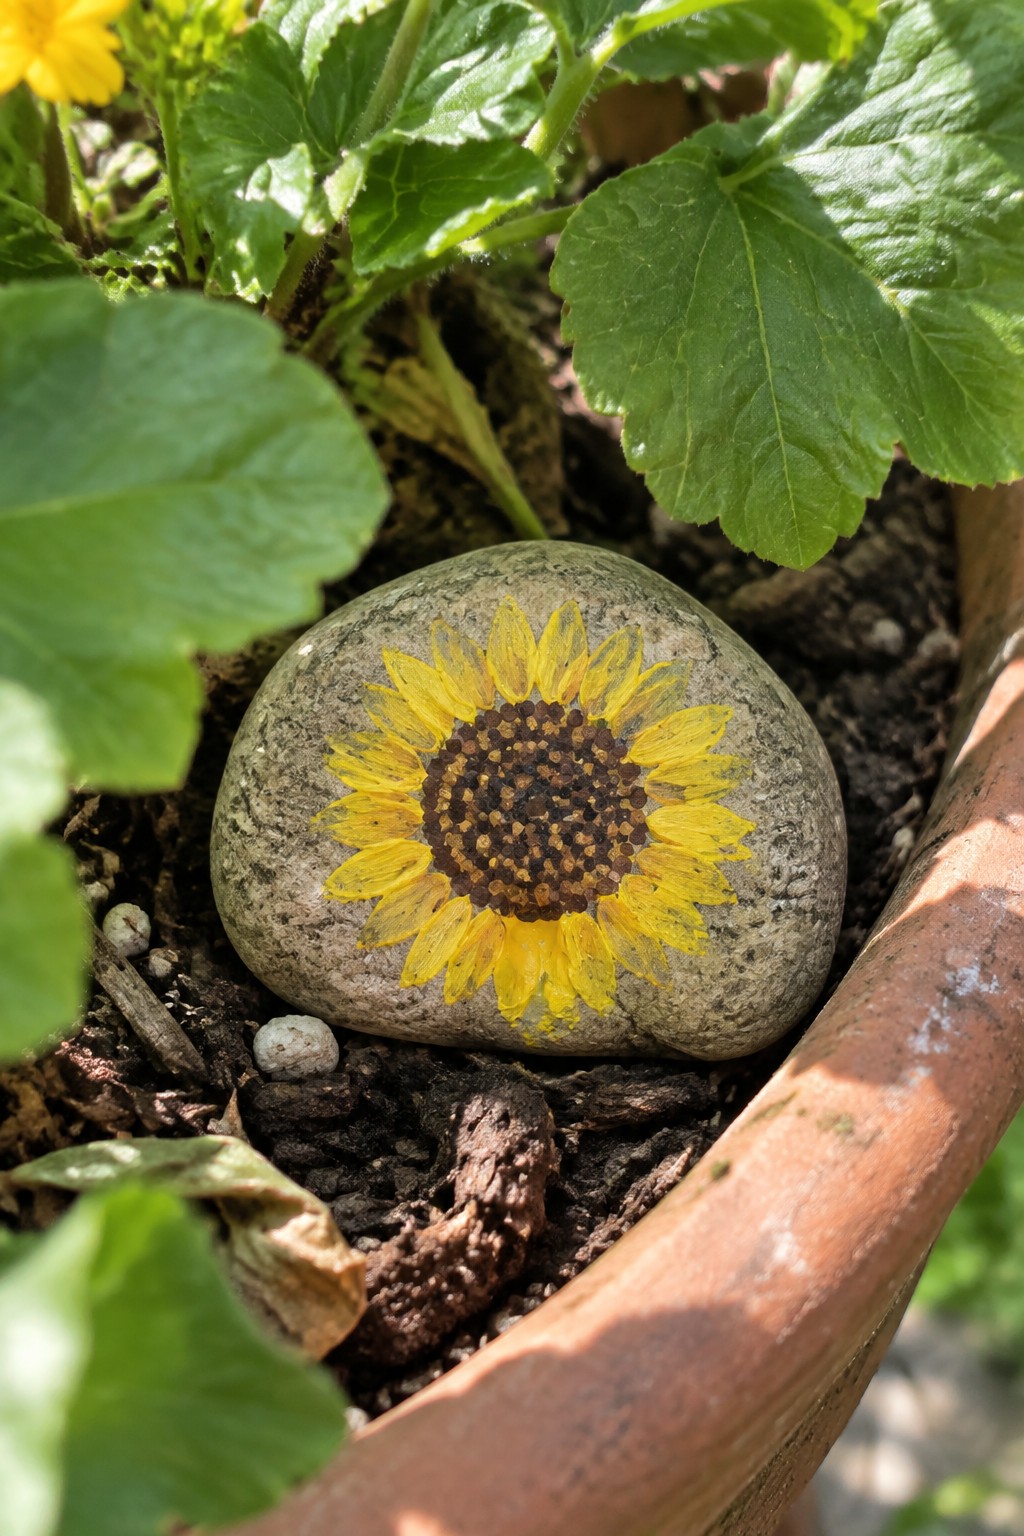
A rounded stone painted with a sunflower uses short yellow strokes radiating outward to form the petals and a tight cluster of brown dots for the center. The natural curve of the rock lets the petals follow the surface with minimal brushwork, and the design stays readable even when the stone sits among soil or mulch. This approach falls into the flower rock category and works as a small garden accent.
What makes this idea useful is how the same stroke-and-dot layout transfers to other rounded stones or pebbles without needing extra details. In a planter or flower bed the yellow stands out against dark soil, and the compact size keeps it from competing with live plants. You could shift the center color or shorten the strokes further to fit smaller stones for a matching set.
Watermelon Painted Stone
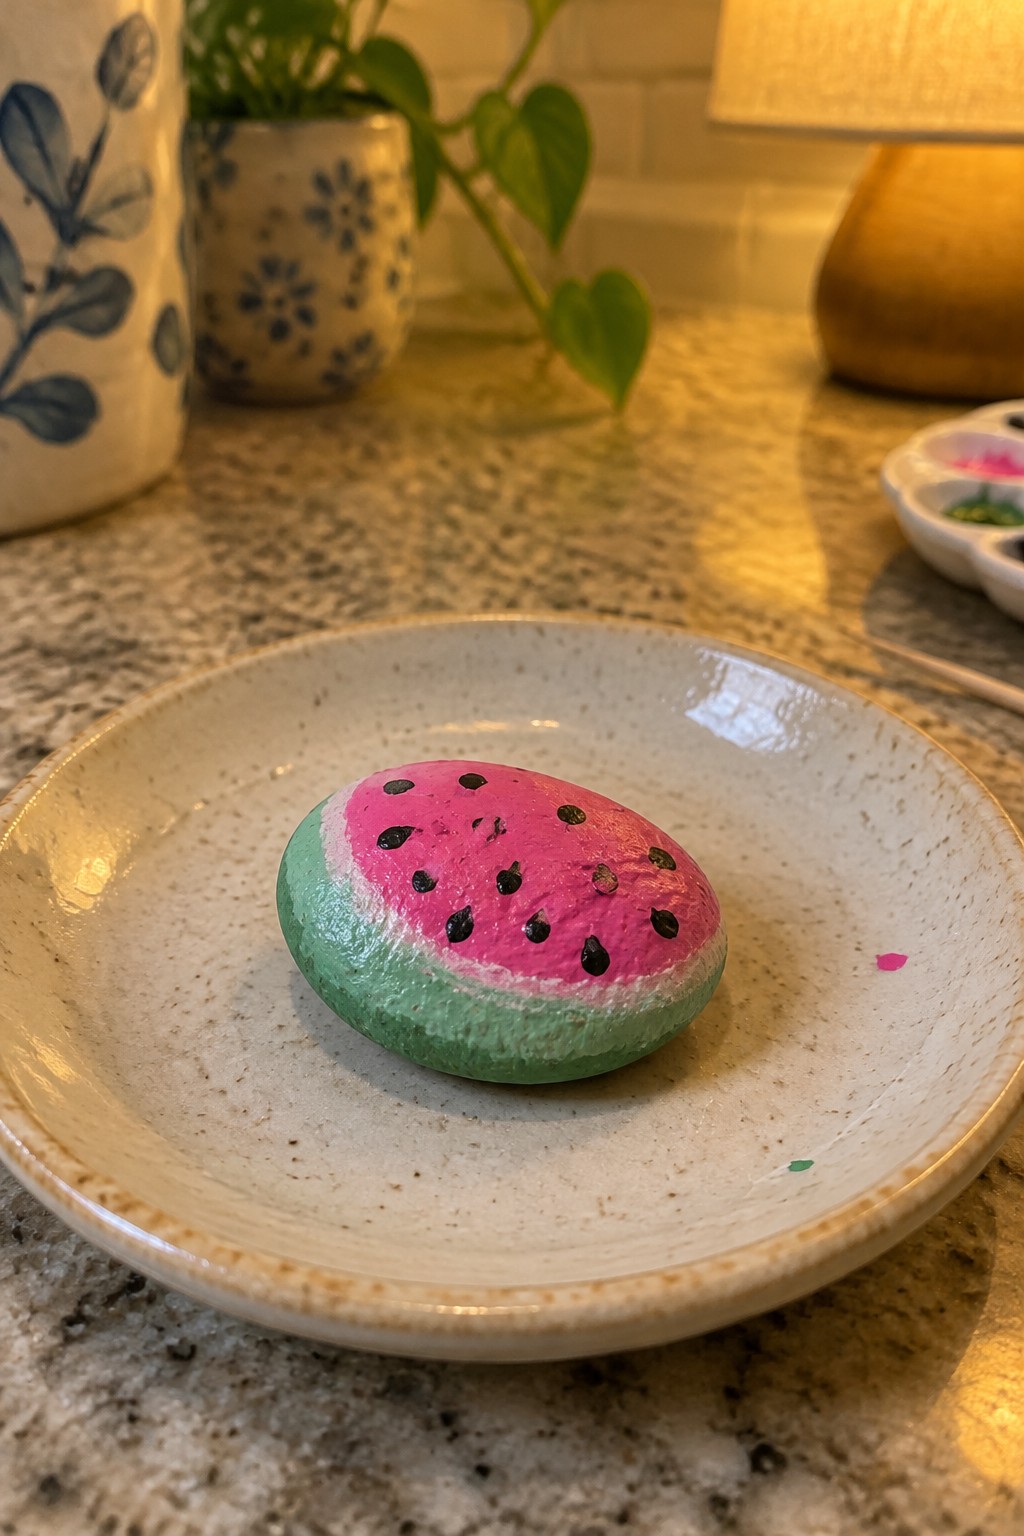
A smooth oval rock painted as a watermelon slice uses broad color blocks to divide the surface into pink center, white rind stripe, and green outer edge. Black dots applied across the pink area stand in for seeds with no extra linework needed. The rounded shape of the stone itself helps the curved fruit form read clearly without extra shaping. This food-inspired rock relies on simple color placement rather than detailed brush strokes.
The rock shape does a lot of the work here since the natural curve already suggests a cut fruit piece. A painted rock like this works especially well as a bright accent inside a planter or on a kitchen counter. The same color blocking approach could be reworked on a longer stone to make a different fruit or scaled down for a set of smaller pebbles. For garden decor this type of design stands out in photos because the bold pink and green contrast reads well even from a distance.
Sushi Nigiri Painted Pebbles
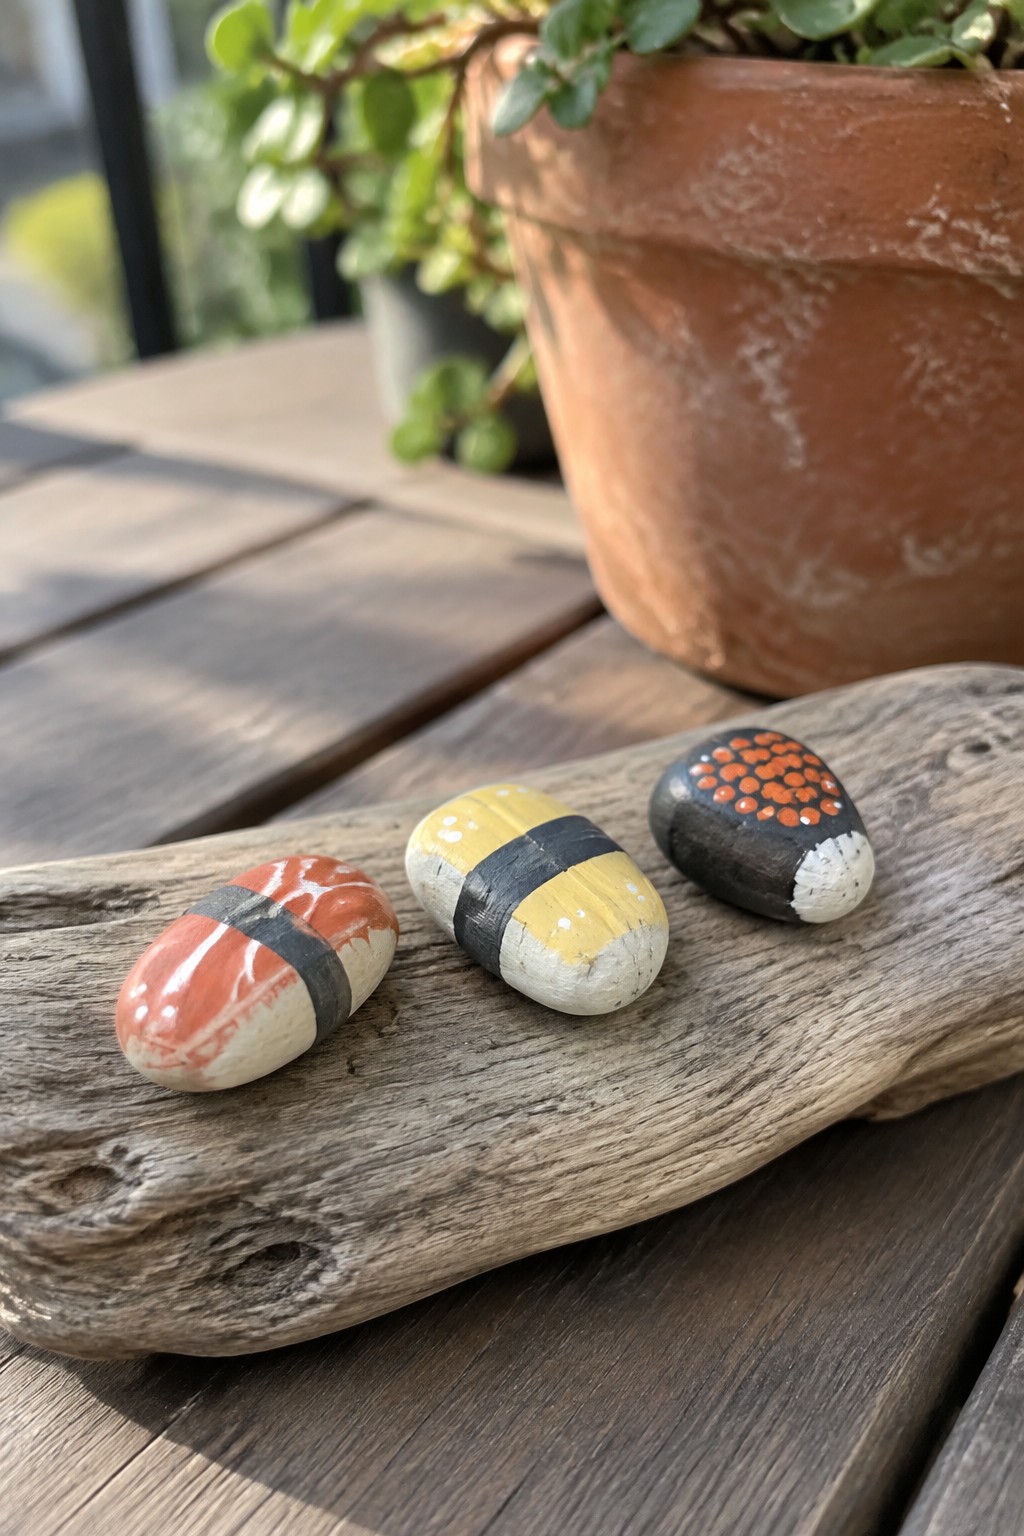
Small oval stones work well for this food-inspired project because their natural curves already suggest the compact shape of nigiri and gunkan maki. A few blocks of color plus a single dark band across the middle give the impression of fish or egg over rice without needing fine lines. The third stone uses only dots on a dark base to stand in for salmon roe. The approach stays simple since the rock shape itself carries most of the visual weight.
The rock shape does a lot of the work here so you can recreate the same look on any similarly proportioned pebble you already have. Swap the top color for tuna red or shrimp pink and the set still reads as sushi. These would sit nicely on a kitchen shelf, near a planter, or inside a small dish on a table. The same color-blocking method scales down easily to even smaller stones if you want a larger collection.
Pastel Hearts with Minimal Brushwork
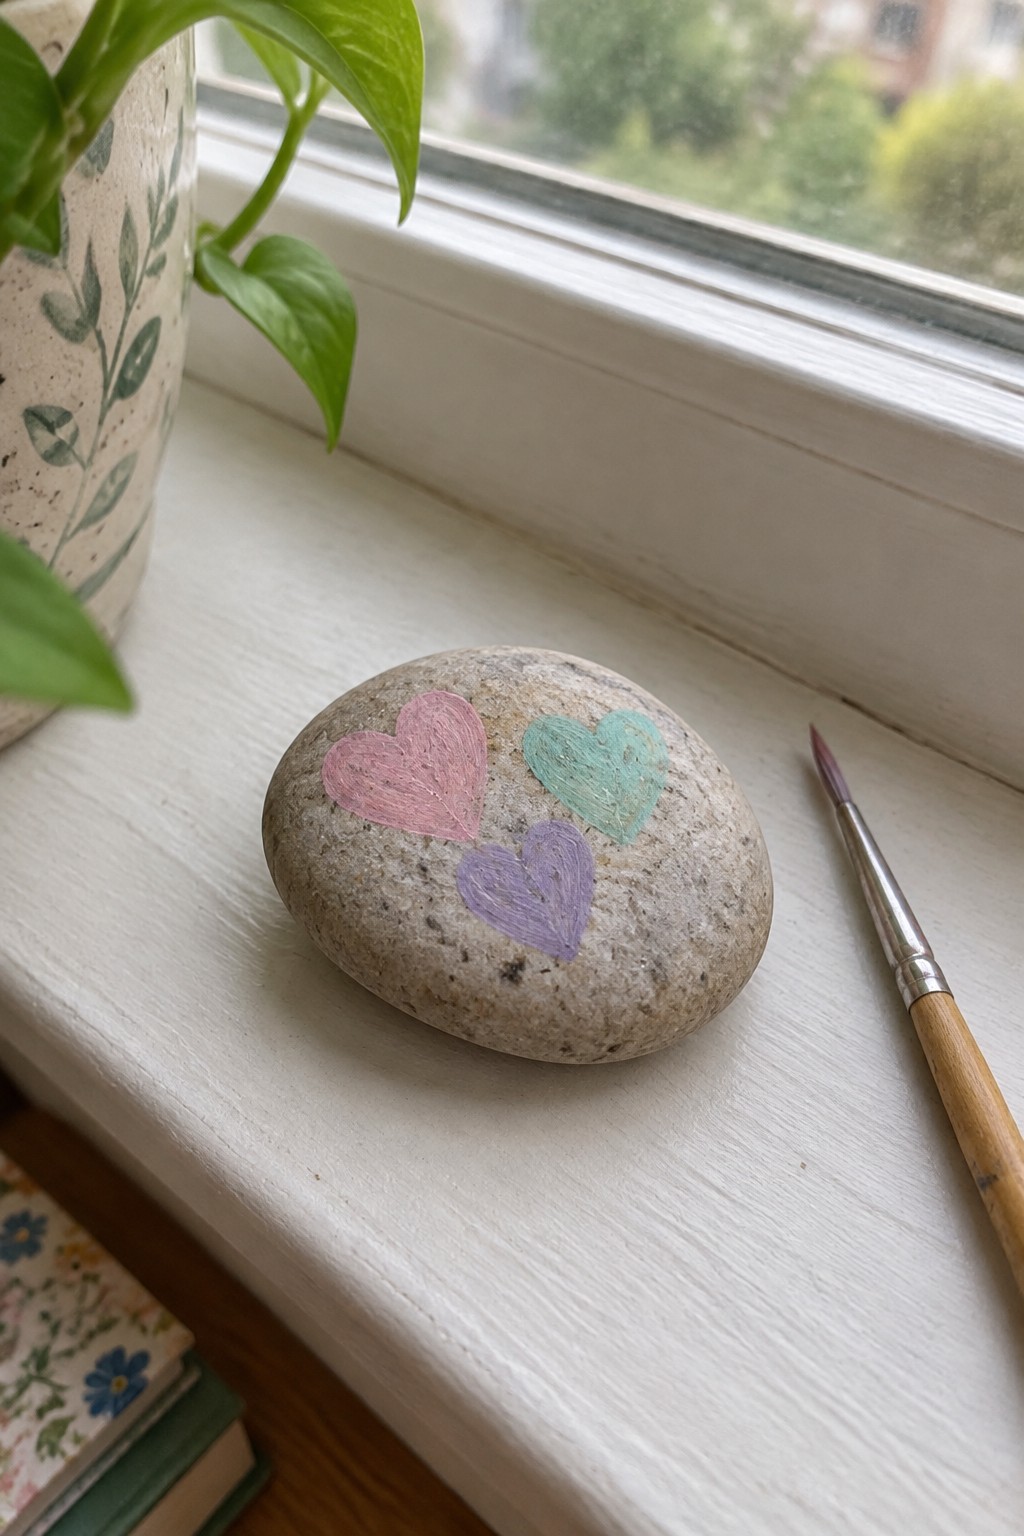
A smooth, rounded stone makes a good base for this design of three small hearts painted in pink, teal, and purple. Each heart is built from a few simple brush strokes that follow the curve of the surface, leaving the natural stone texture visible between the colors. This approach fits the positive symbol rock category and works as a small decorative accent rather than a detailed scene.
What makes this idea useful is how the rounded shape lets the hearts sit naturally without extra outlining or background color. The same motif can be scaled down to a single heart on a smaller pebble or expanded to more colors on a flatter stone for a different look. For shelf styling or planter accents, the design stays subtle enough to group with other rocks while still reading clearly from a short distance. You could swap in seasonal colors or skip one heart entirely if you want an even faster version.
Bumblebee Bug Rock
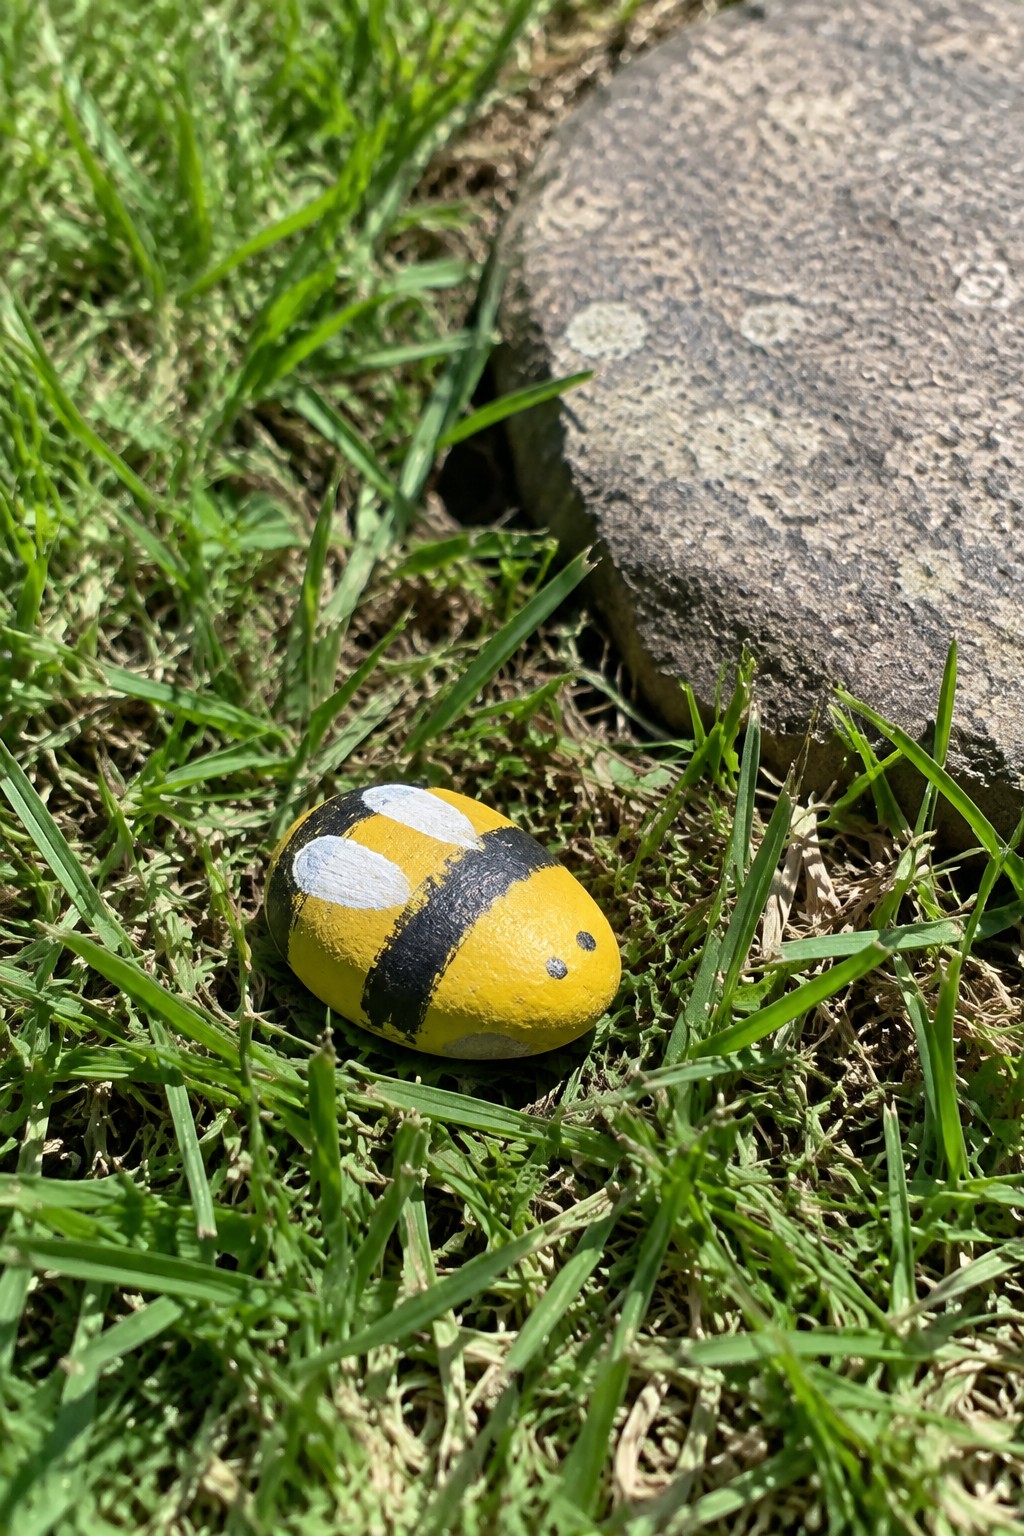
A smooth oval stone painted yellow serves as the base for a simple bumblebee design. Broad black stripes wrap around the body, two white ovals suggest wings on top, and a pair of small dots mark the eyes. The approach uses only a few color blocks and basic shapes to create the insect without extra detail work.
This kind of painted rock fits nicely into garden beds or along the edge of a planter. The oval shape already suggests a bee body, so the stripes and wing spots can be adjusted to suit longer or rounder stones. The same color blocking method works for other small bugs by changing the stripe pattern or wing color.
Minimal Brushwork Penguin on an Oval Rock
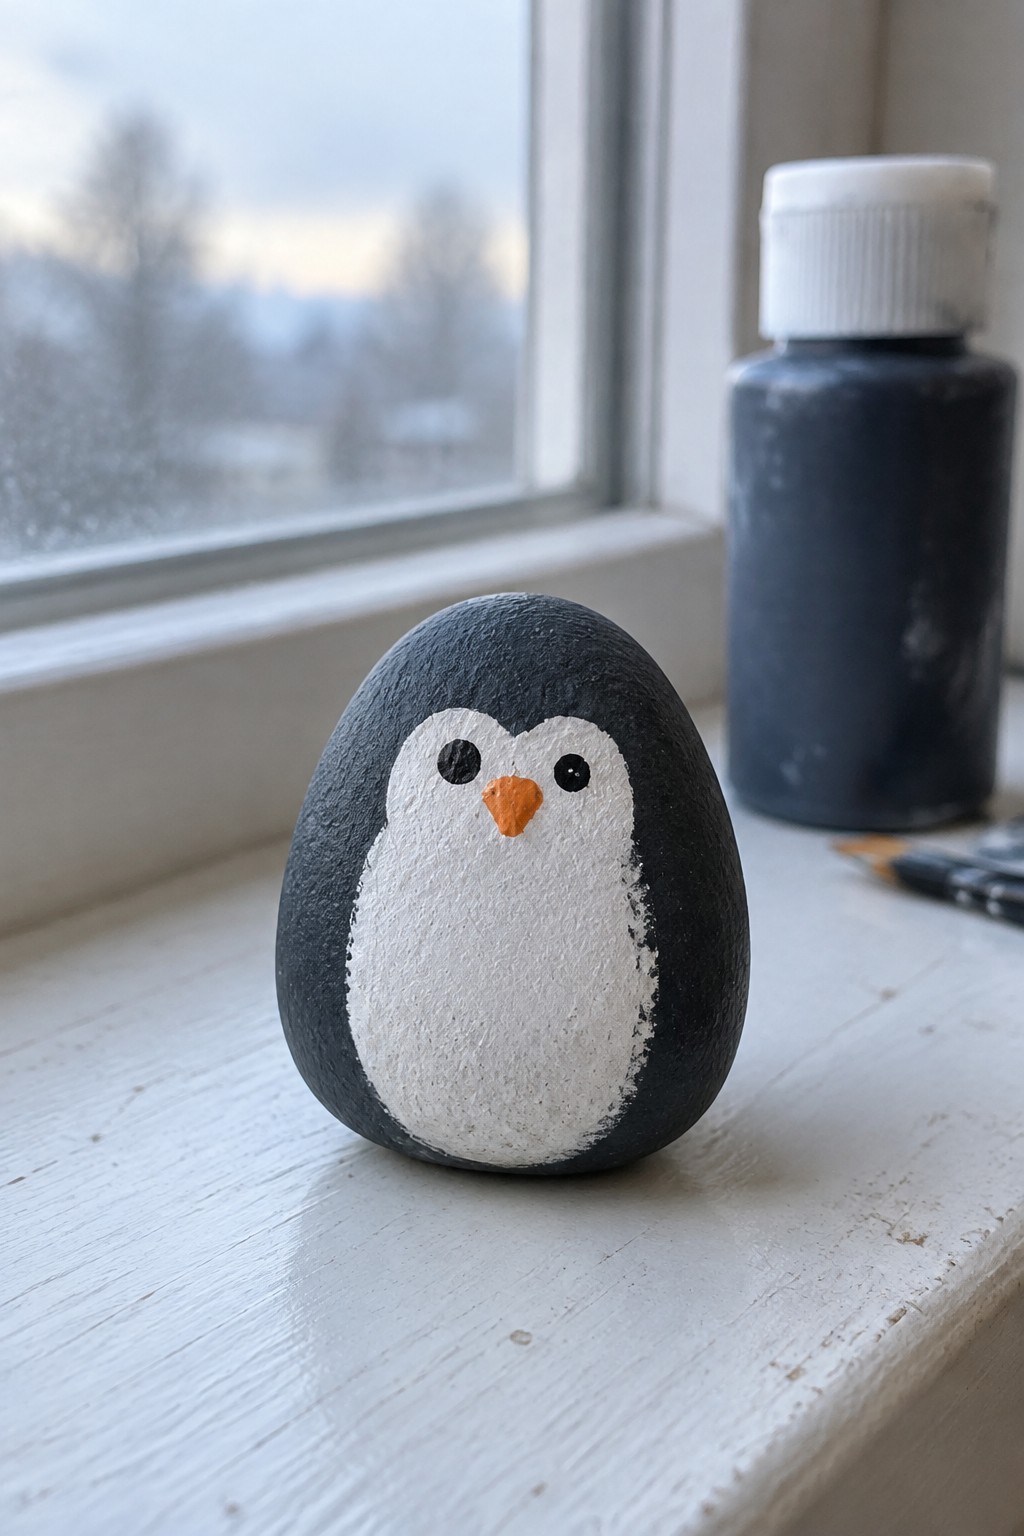
A smooth oval rock works well for a penguin because its rounded shape already suggests the body without needing outlines. The design uses simple color blocking with black covering the top and sides while white fills the front section in one uneven patch. Two small black dots and a tiny orange triangle handle the face with almost no extra strokes.
The oval form does most of the work here so the idea stays quick to paint even on rocks that are not perfectly symmetrical. This type of painted rock fits on a shelf, inside a planter, or grouped with other animal designs for a small collection. You could change the beak color or adjust the white patch size to fit flatter stones or rounder pebbles while keeping the same minimal approach.
Fox Face Rock With Dot Details
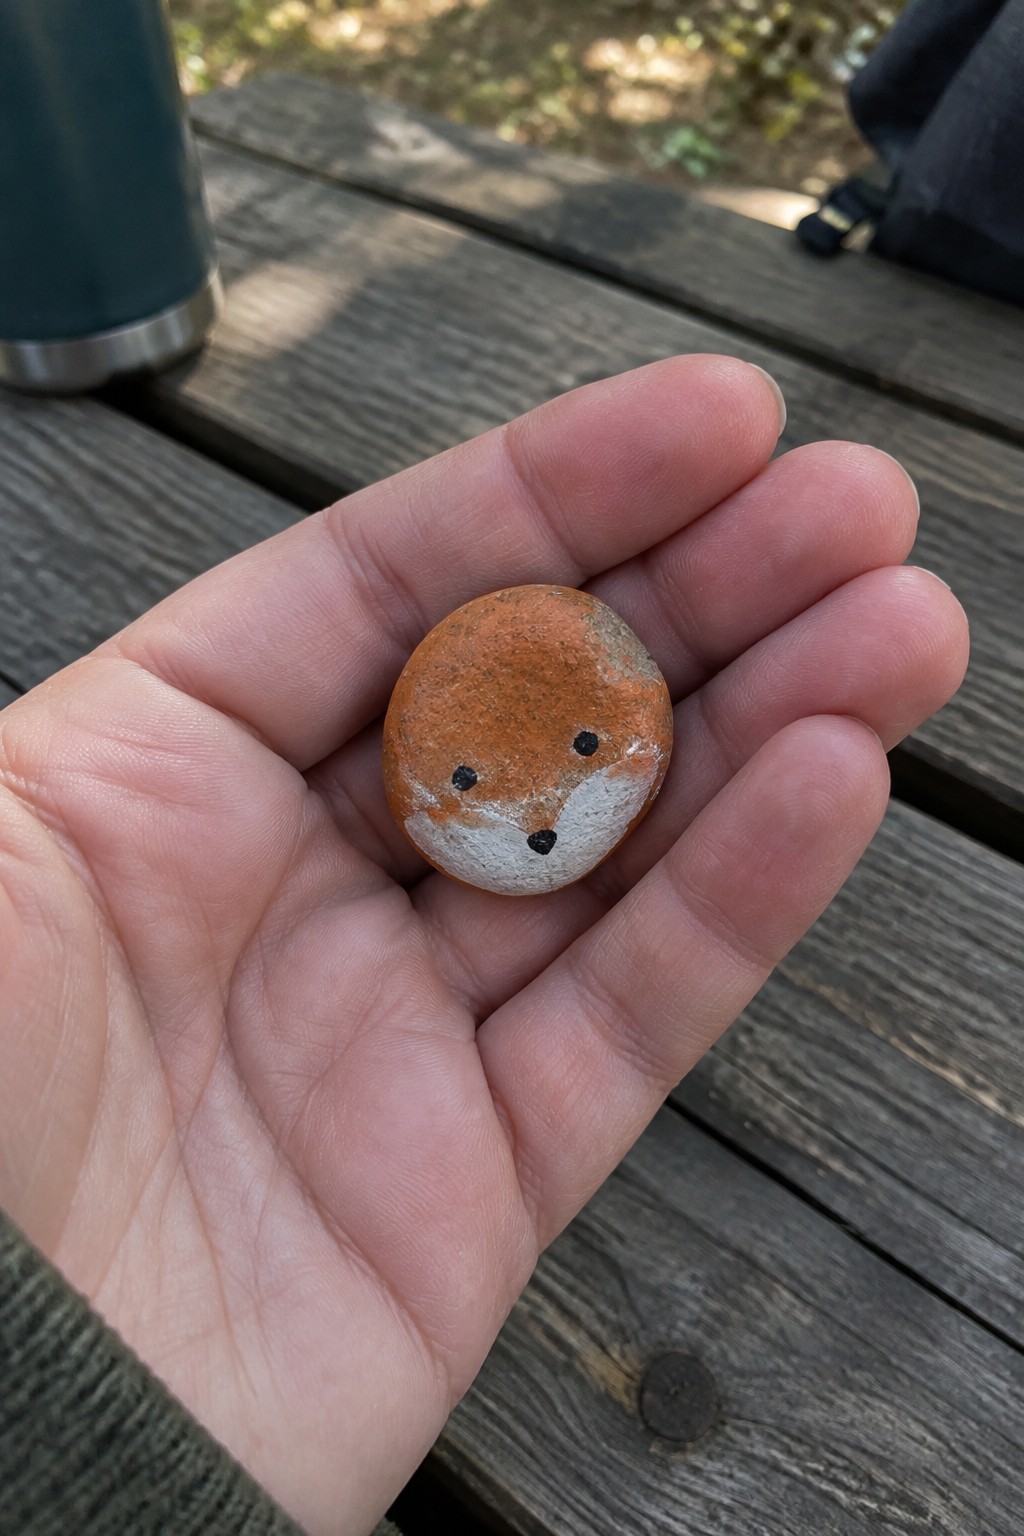
A small rounded pebble makes an effective base for a fox face rock because its natural warm tone supplies the main color without extra layers. White paint covers just the lower portion to suggest the muzzle and chest, while three simple black dots form the eyes and nose. This animal rock idea relies on basic color blocking and minimal dot work rather than fine lines or shading.
The compact size lets the painted rock sit neatly in a planter, along a garden path, or on a windowsill without crowding the space. The same approach adapts quickly to other small stones by shifting the white area or swapping the base color for a different animal. Using only a few brush areas and dots keeps the project fast while still reading clearly as a fox from a short distance.
Simple House Silhouette on a Rounded Stone
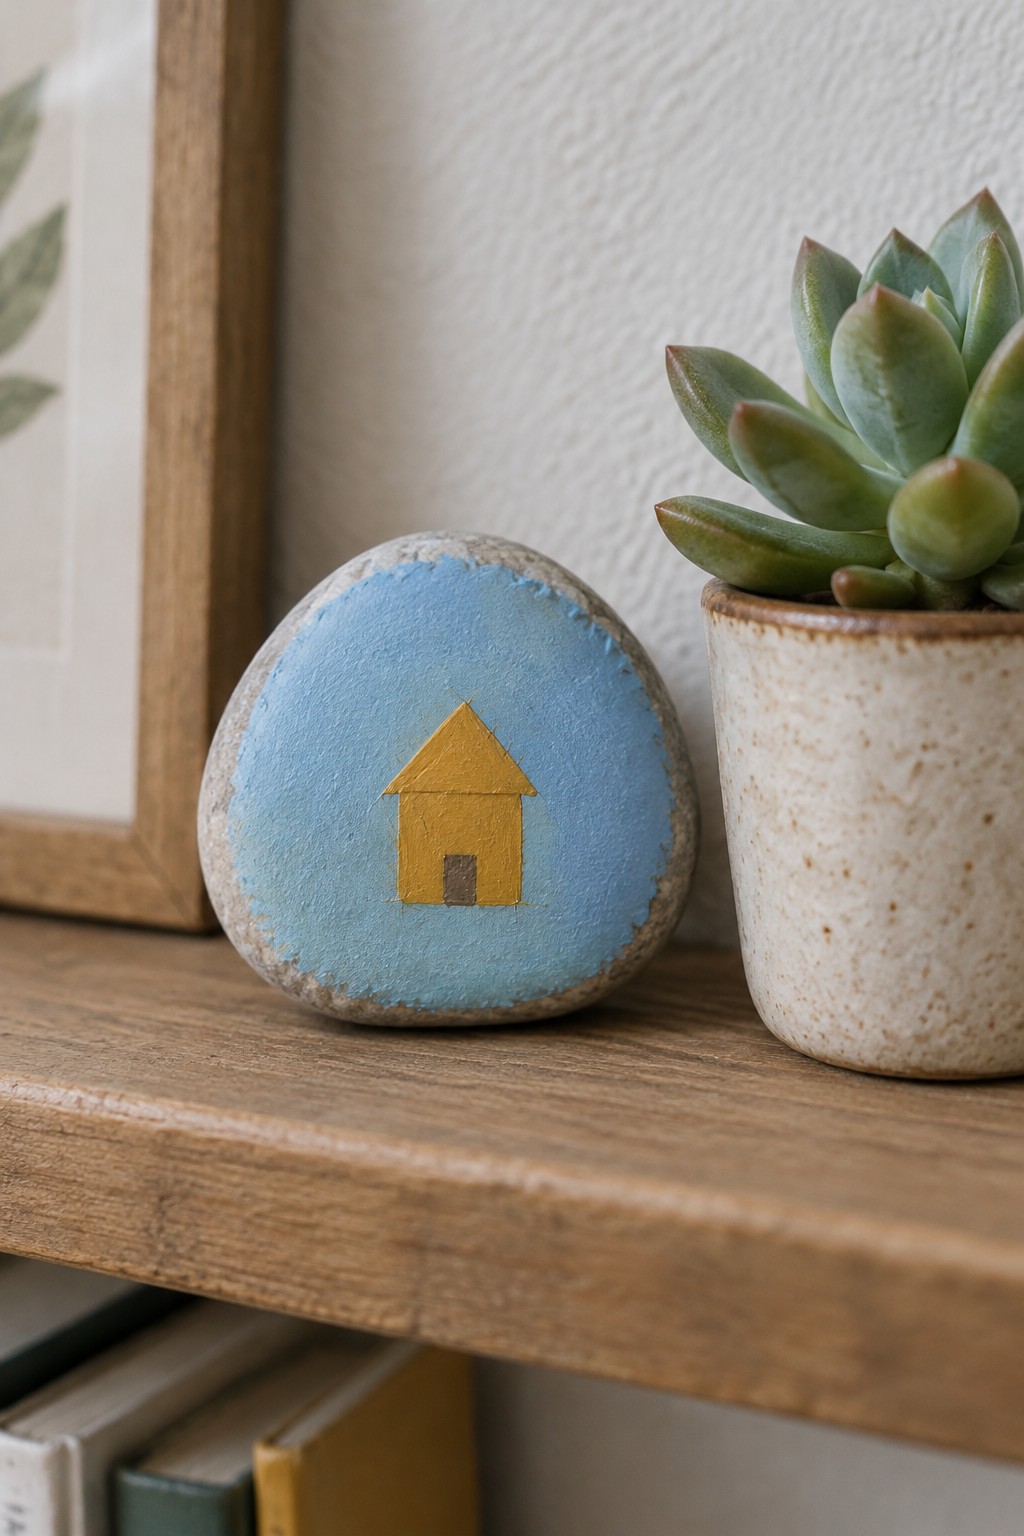
A smooth, rounded stone gets a light blue base coat that covers most of the surface while leaving the natural edges visible. A yellow house shape is added with minimal strokes for the roof, walls, and a small brown door, creating a clear motif without extra lines or shading. This approach works as a decorative stone craft that relies on basic color blocking rather than detailed painting.
The rock shape does a lot of the work here because the curved surface already suggests a compact form that fits the house motif well. You can repeat the same idea on other stones by swapping the blue for another background color or adjusting the house size to match the rock’s width. It places easily on a shelf, in a planter, or among books as a small accent that does not need much space or supplies.
Moon Phase Pebbles
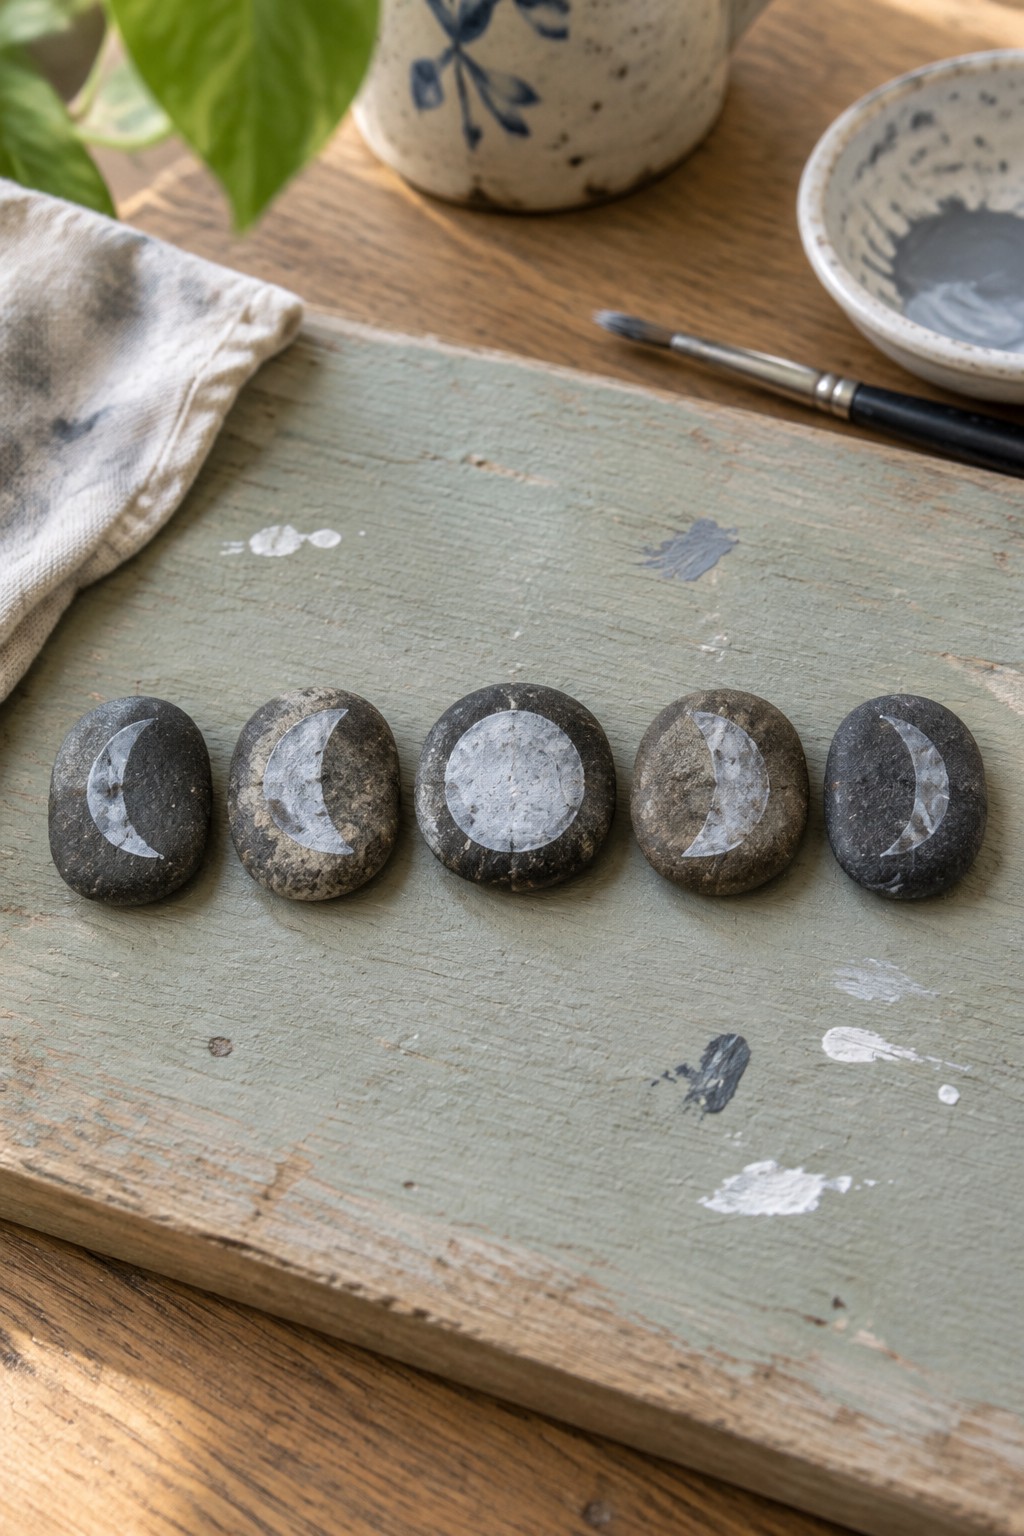
Painting the phases of the moon on small, rounded dark stones uses the natural stone color as the night sky background, so only the white moon shapes need paint. The design relies on simple crescent and circle forms that require very little brushwork to complete. Rounded river rocks or beach stones work best because their smooth surfaces let the white shapes sit cleanly without extra outlining or detail.
What makes this idea useful is how the same minimal shapes translate to any dark pebble you collect. You could paint just three or four phases for a shorter row or add the full cycle across more stones. These stand out on a windowsill, tucked into a plant shelf, or grouped on a desk because the dark background does most of the visual work. The approach also adapts quickly to other basic sky motifs like single stars or small constellations using the same light-on-dark method.
Frequently Asked Questions
What supplies do I need beyond paint and rocks for these projects? You will need acrylic paints in a few basic colors such as black white and primary shades along with fine tip brushes or alternatives like cotton swabs and toothpicks for applying minimal strokes. A sealant like clear acrylic spray helps protect the finished pieces and you can source smooth small rocks from craft stores or natural areas.
How do I prepare the rocks before painting? Clean each rock with mild soap and water to remove any dirt or oils then allow them to dry fully for several hours. Applying a thin base coat of white or light colored paint can make your designs stand out more vividly especially if the rocks are dark in tone.
How can I achieve the minimal brushwork style in the ideas? Focus on simple techniques like dabbing paint with a sponge tip or using the edge of a brush for single strokes that form shapes such as dots lines or basic silhouettes. Practice on scrap paper first to limit the number of passes and build designs with as few movements as possible.
How do I seal my painted rocks to protect them outdoors? Once the paint has dried completely apply two coats of an outdoor rated sealant allowing full drying time between each layer. This step prevents fading and water damage so your small creations can be placed in gardens or used as paperweights for extended periods.
What if I want to adapt these ideas for different themes or seasons? Start with the core minimal brushwork patterns from the list and swap in seasonal colors such as orange tones for fall or cool blues for winter. Keep strokes limited by using stencils made from paper or tape to guide quick applications without adding extra details.
